|
This post is going to be full of photos, because I think they do most of the work in making a case for a house full of greenery. But like, easy greenery. That isn’t stressful and that doesn’t remind you of that emoji of dollar signs with wings. Because when things die repeatedly, it can GET YOU DOWN. Ask me how I know. The point is that I TRULY AND DEEPLY BELIEVE that nearly every single room in a home can benefit from greenery – it adds a splash of life and a gorgeous and vibrant texture. So if you’ve got some low light spots that just don’t allow anything real to live, and you’re hunting for a good convincing fake that will never die, well, I’ve gotcha covered. And if you’re looking for real plants you literally would have to try hard to kill… trust me, I’m well versed at killing plants, so I’m only going to list the truly hardy stuff. 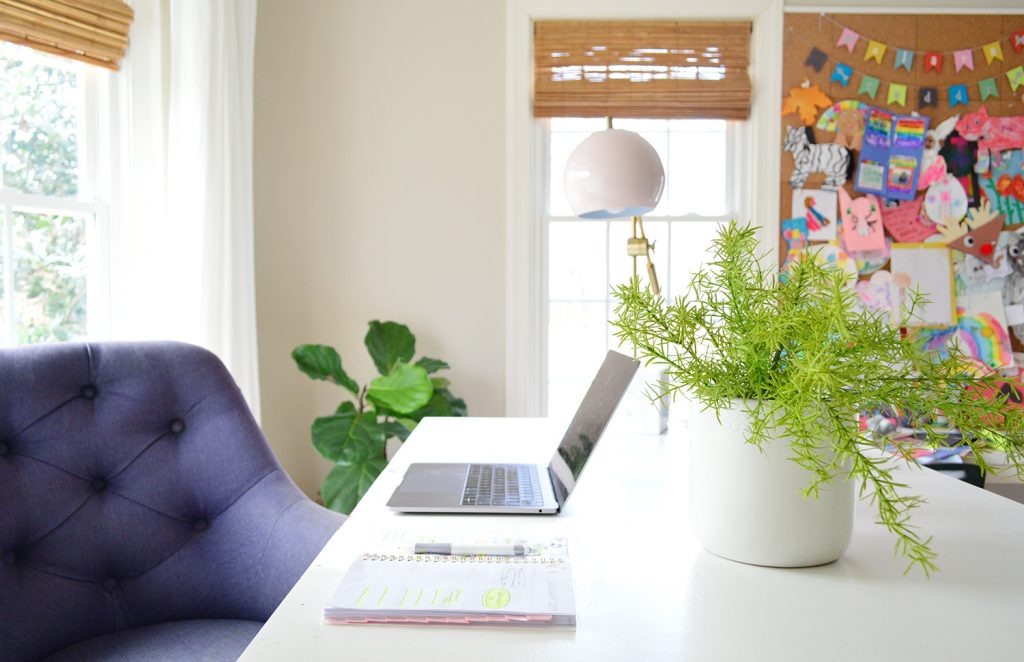
Exhibit A is this herb that will never die on my desk. That’s right, it’s fake. And I bought it at Michaels with a 50% off coupon (total spent: $7.50). I loved the soft texture and the tiny little feathery branches it has – and here’s one of my tips. I saw it in person. So I could poke it and prod it and judge if the color was too blue-green or too yellow or whatever. And it convinced me. It’s just as delicate as a real asparagus fern or an herb from the garden. But it’s from Michael’s and I paid for it once and it’ll last forevermore. Also, never buy a real asparagus fern. They die spectacular guilt-inducing deaths. At least for me. On the other hand, I have some other real plants that are SURVIVORS. Put them in matching outfits and call them Destiny’s Child. They are all over five years old. Some might even be a full decade old! And here’s the curveball: I completely neglect them. They’re called Pathos and they just need a little water and seem completely unpicky about sunlight amount, which tends to be key for me. 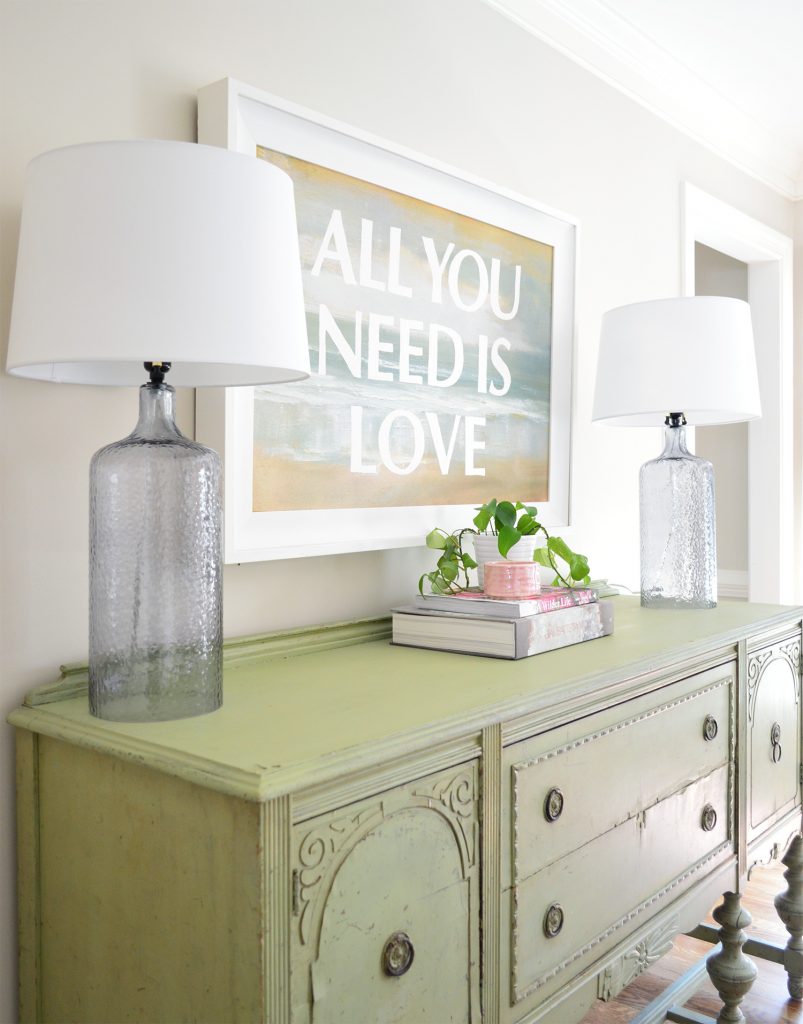
You can even clip off the long droopy legs (?!?!?!) – clearly I am not one of those green thumbs who knows all the plant terms – and then you can put them in water TO MAKE MORE FREE PLANTS (more on that here). So they’re high on the hardy and hard-to-kill list for me if you want some real greenery. And real house plants have all sorts of benefits like cleaning the air, and making humans feel happier (that’s legit backed by science, which is pretty amazing for something that you can buy for under $5). Jumping back over to the dark side (aka: fake plants), I fancy myself a faux plant diva, in that I DO NOT PLAY AROUND. If something looks fake, I keep it moving. I have sent back faux plants I’ve bought online for not being good enough. And if someone messages me and says “hey how is the Ikea faux fiddle leaf fig?” I will very honestly say “I’ve seen it in person, and I don’t love it – from far away it looks ok, but I’ve seen other fake figs up close that look more full and real for around the same price or even less.” 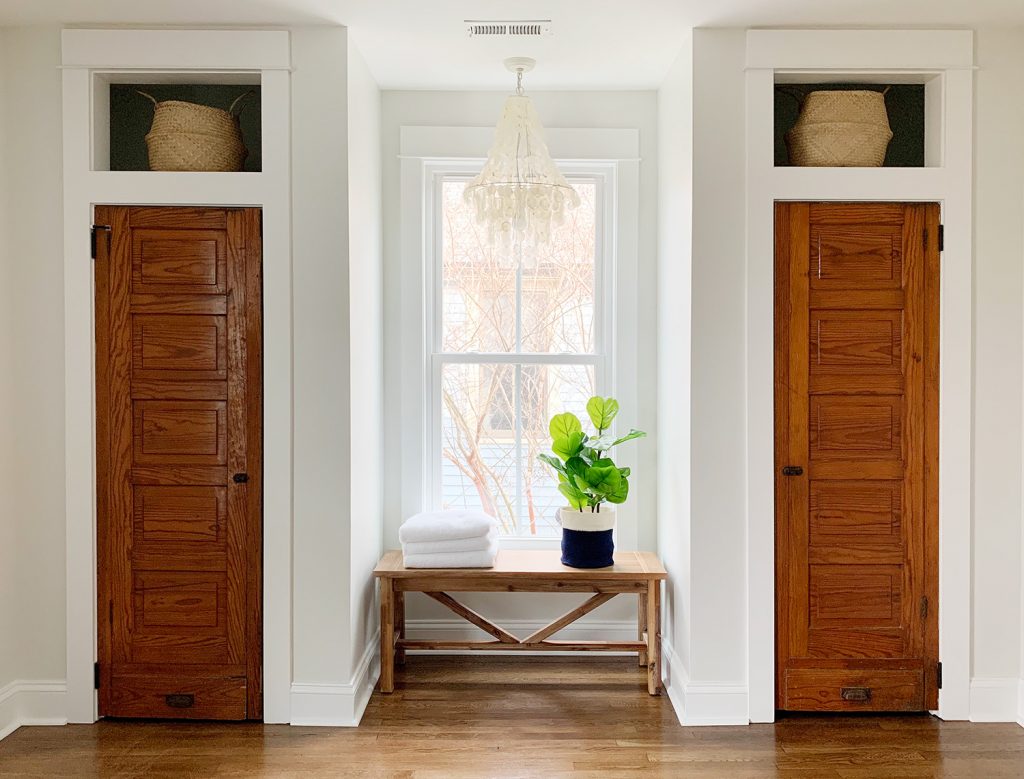
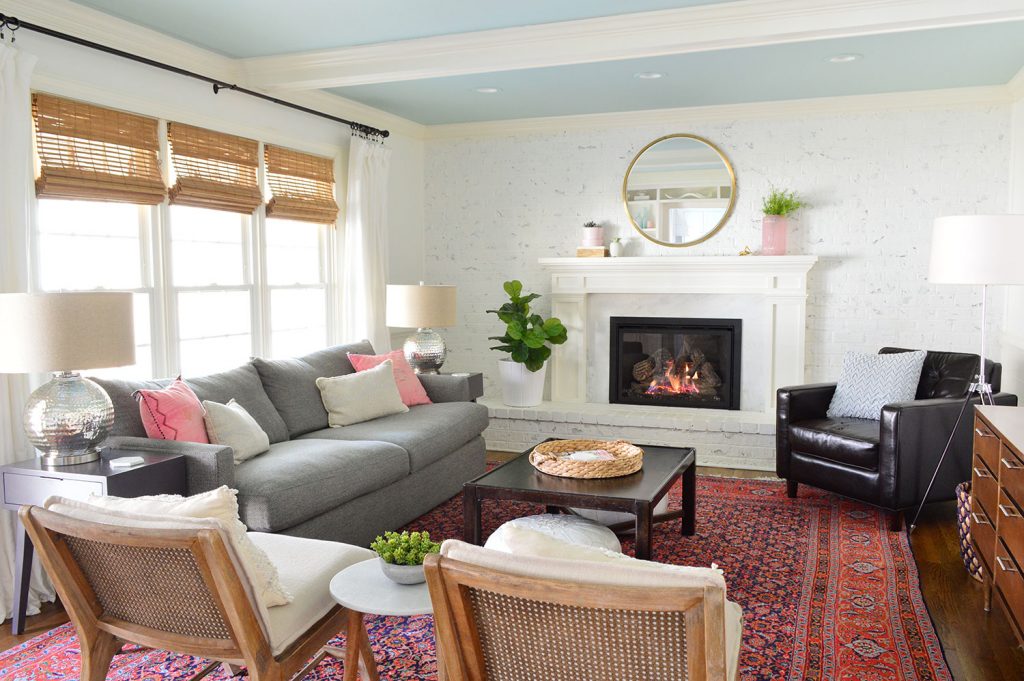
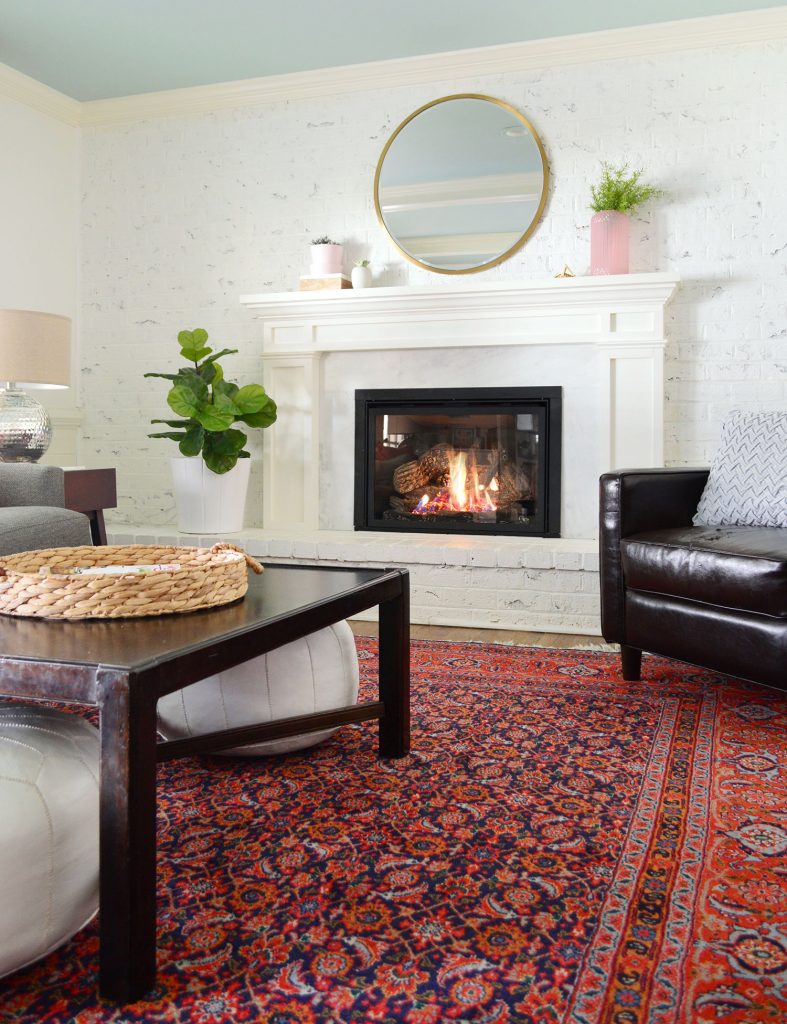
For example, I have loved these $39 faux fiddle leaf figs from Target (seen above and below), although I’m adamant that they need to be feathered out a bit. Just gently pull their branches apart so they’re less smushed vertically. Real fiddle leaf figs have leaves that are almost parallel to the ground, so doing that helps with the realism. And adding a bigger planter or basket for them to sit in makes them look a lot more convincing and proportionate. 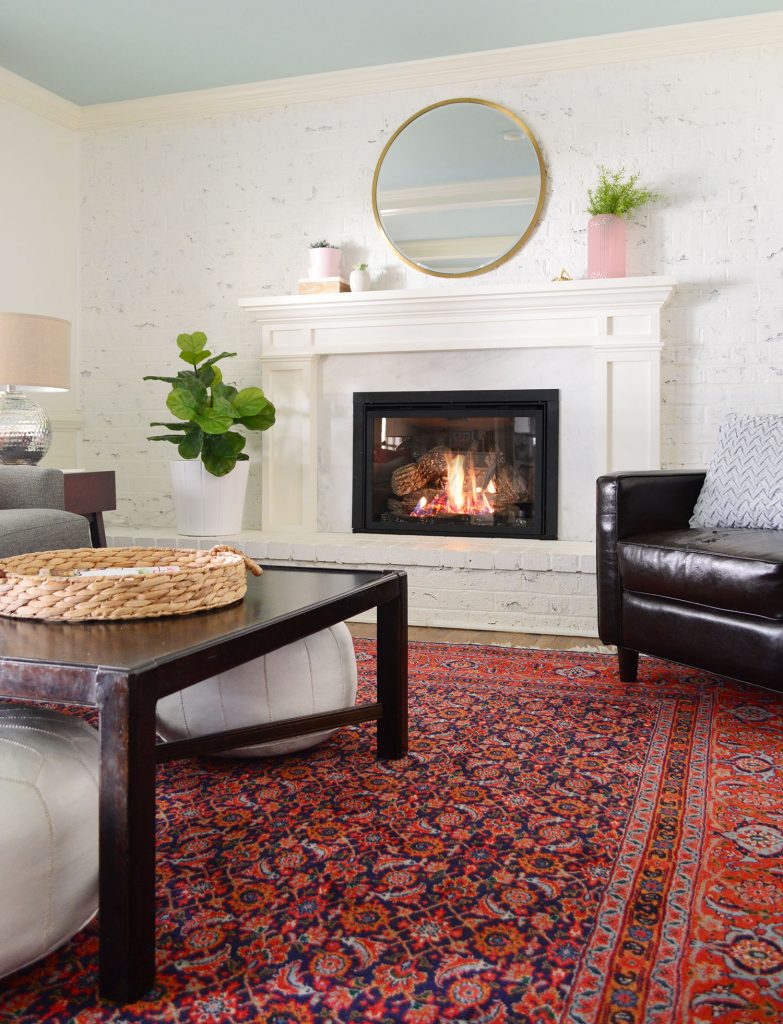
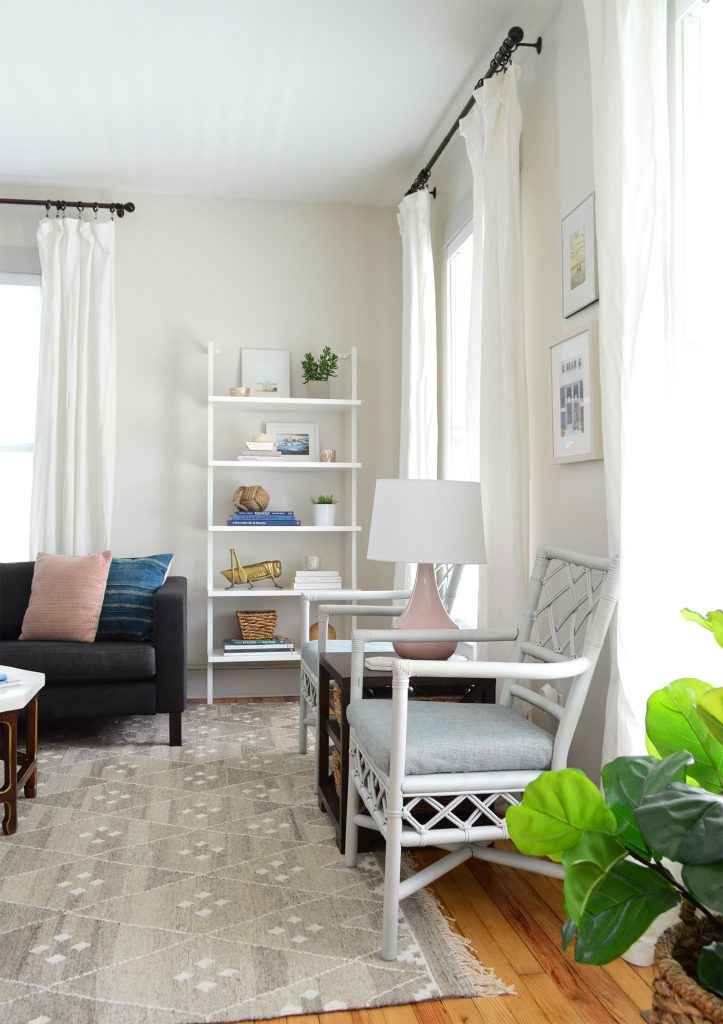
We have these faux figs at the beach house and the duplex, which are vacant for many weeks at a time (so real plants aren’t really an option except maybe for some succulents that I might add) and I also have one in our living room above. I kept trying to get real figs to live in that corner of our living room and it’s just too dark. I probably killed three before I faced the music that it was “faux or nothing” in that spot. It’s also really nice to have one up in the bedroom between the windows since the sun shines further into the room, but doesn’t really hit that spot on the floor much, so real plants kept getting stick-like after a while there. They were trying to grow towards the light so they’d end up looking really long and floppy as they basically dove in slow motion towards the window. 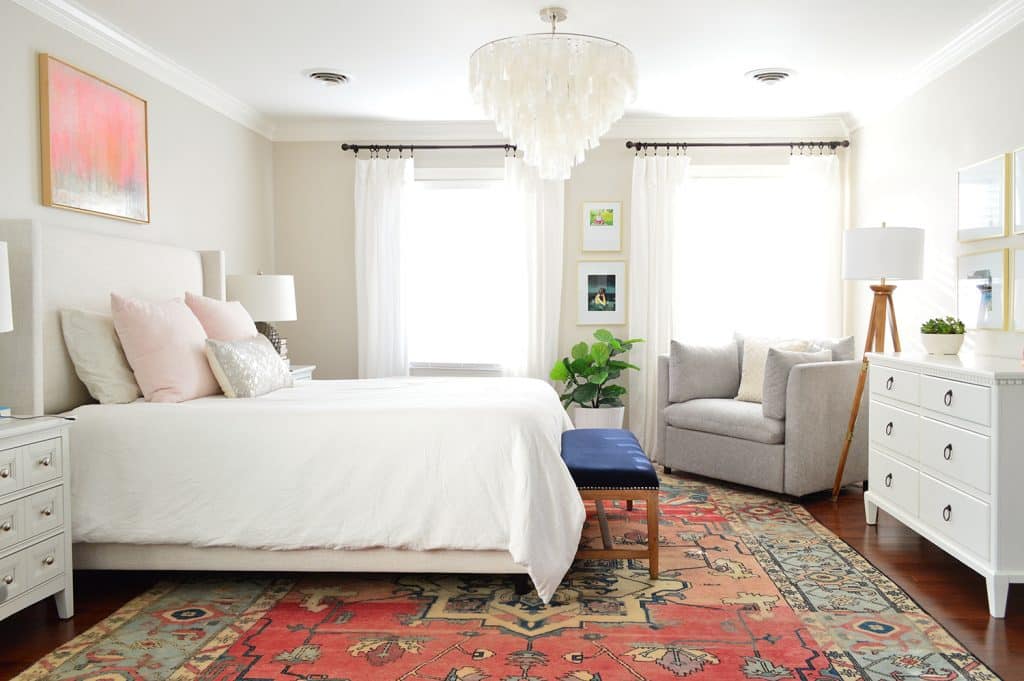
But let’s bounce back to real – and SUPER EASY – greenery for a second. These branches have been in two bouquets I have received in the last few years – and they are like mutant plants from Planet Neverdie. From a decent amount of googling I believe that they’re called Ruscus (specifically Isreili Ruscus I think) and THEY LAST FOR MONTHS! If I’m wrong, someone who is a plant expert DM me the name because we all need to know what these are. 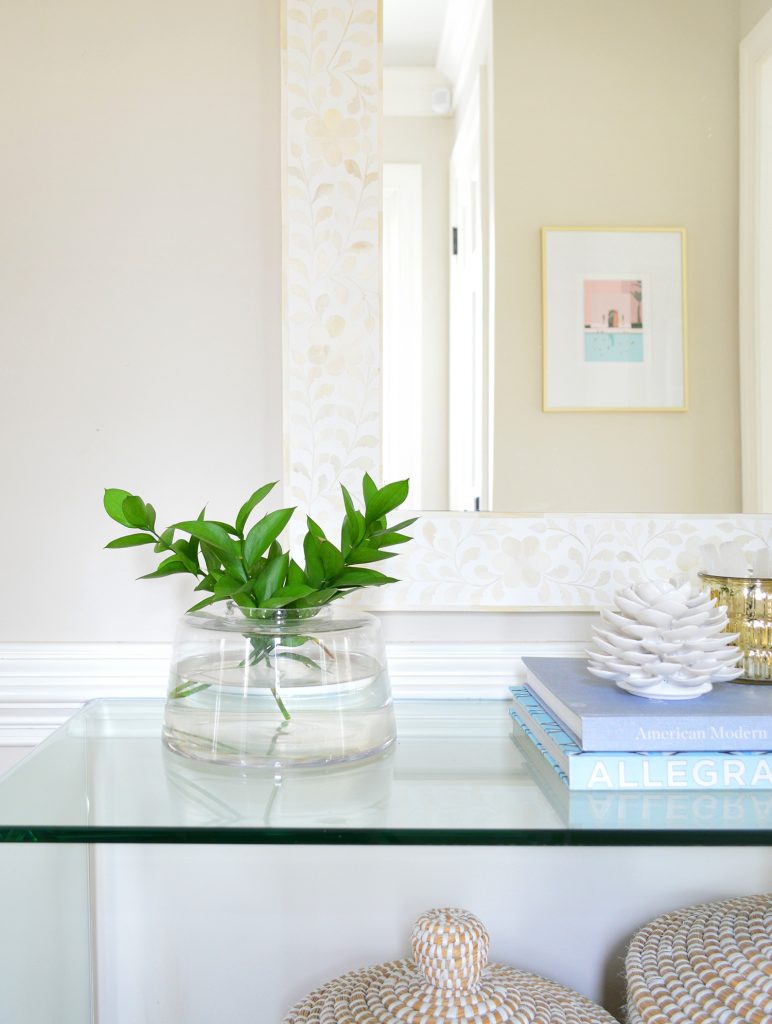
Saying they last for months sounds like I’m exaggerating and you might think, ok maybe one month… but I have had them last for OVER THREE MONTHS! I do not do a thing except put them in water and watch all the other flowers and cuttings around them die as they live on for literally a full season or more. I probably change the water once a month if I remember. 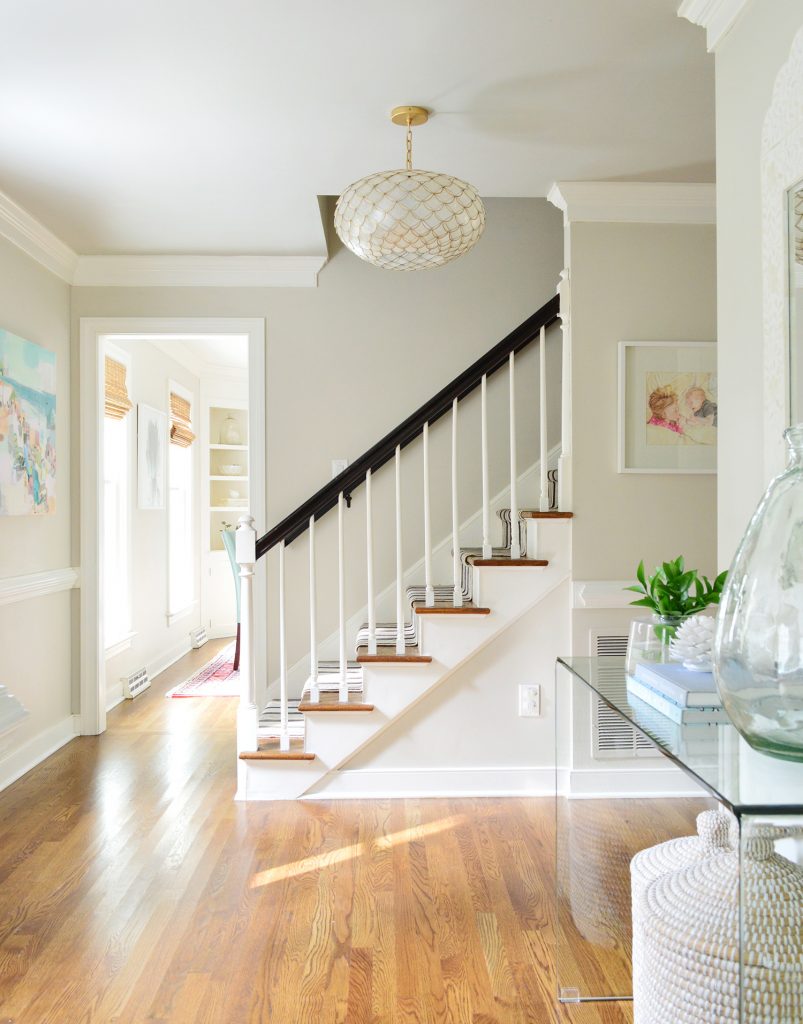
These are the same thing in the photo below. Just really great greenery that’s real long-lasting, but REALLY LOW MAINTENANCE. 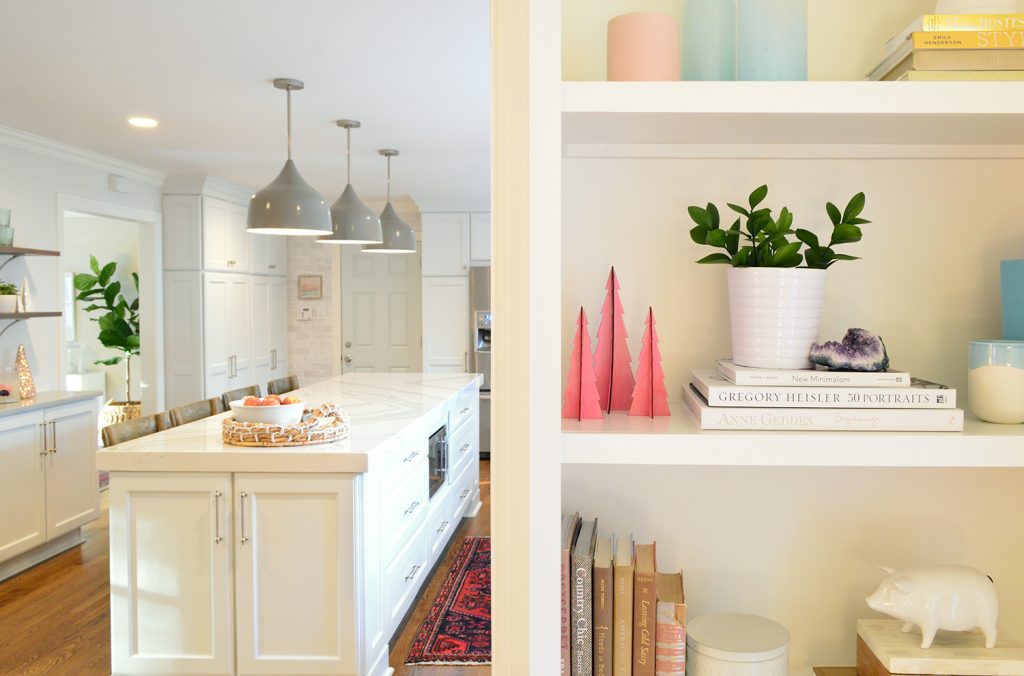
Oh and see that big faux fiddle leaf fig in the background of the photo above? That’s from Target a while back when they made these tall ones as part of the Opalhouse collection. I hope they bring them back because they’re GOOD. Like my-mom-has-watered-them good. If you’re looking for a big fiddle leaf fig like that one, I’ve seen this one in person too, and it’s great. 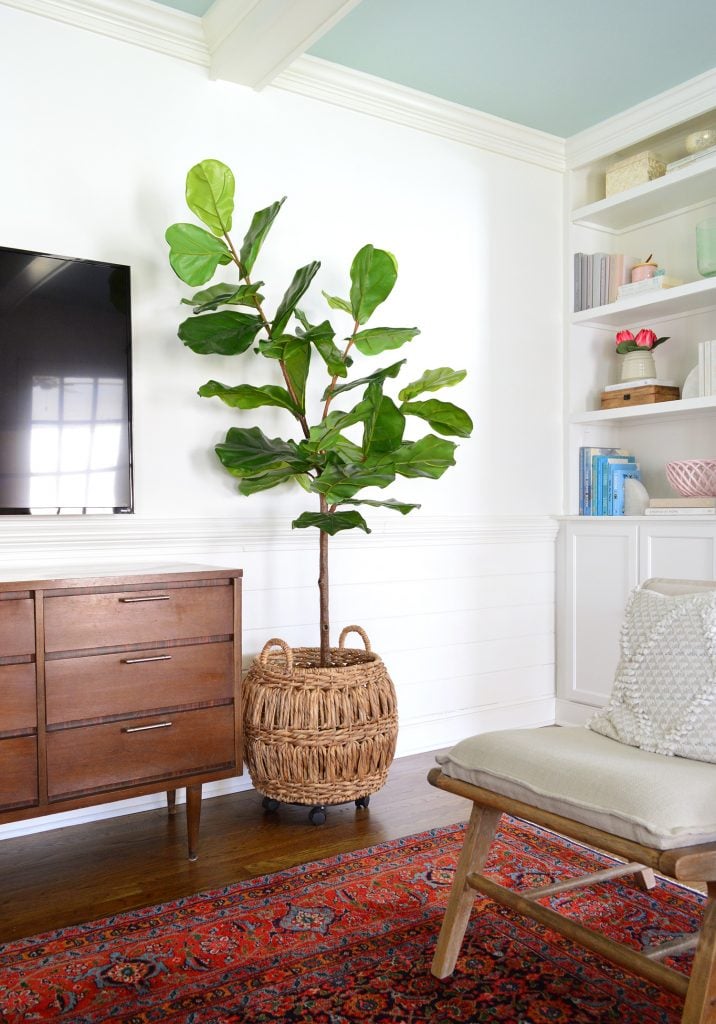
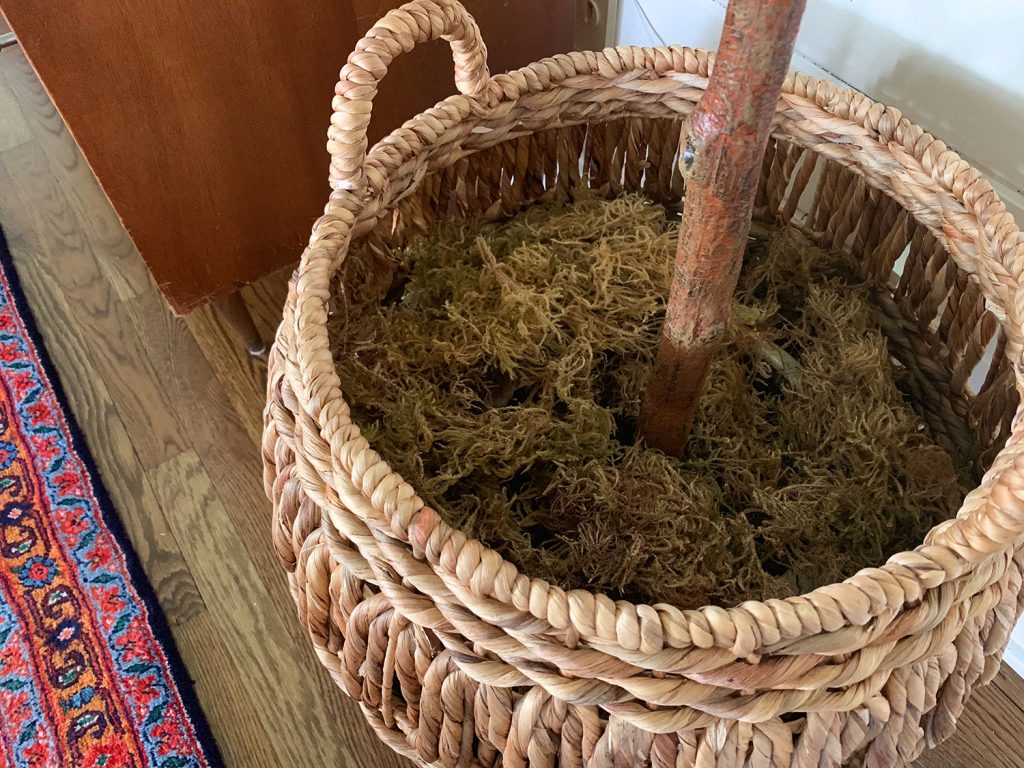
Sidenote: I get asked all the time if you put something into a larger pot, how should you deal with the extra space between the small original pot and the larger planter or basket you use. I have three ways I deal with it:
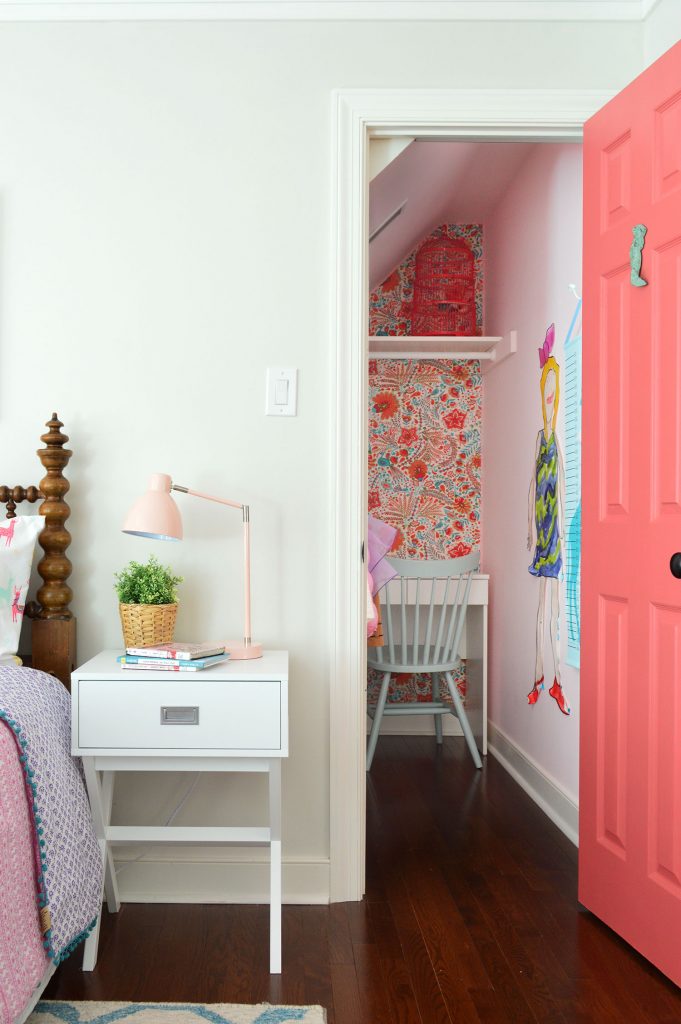
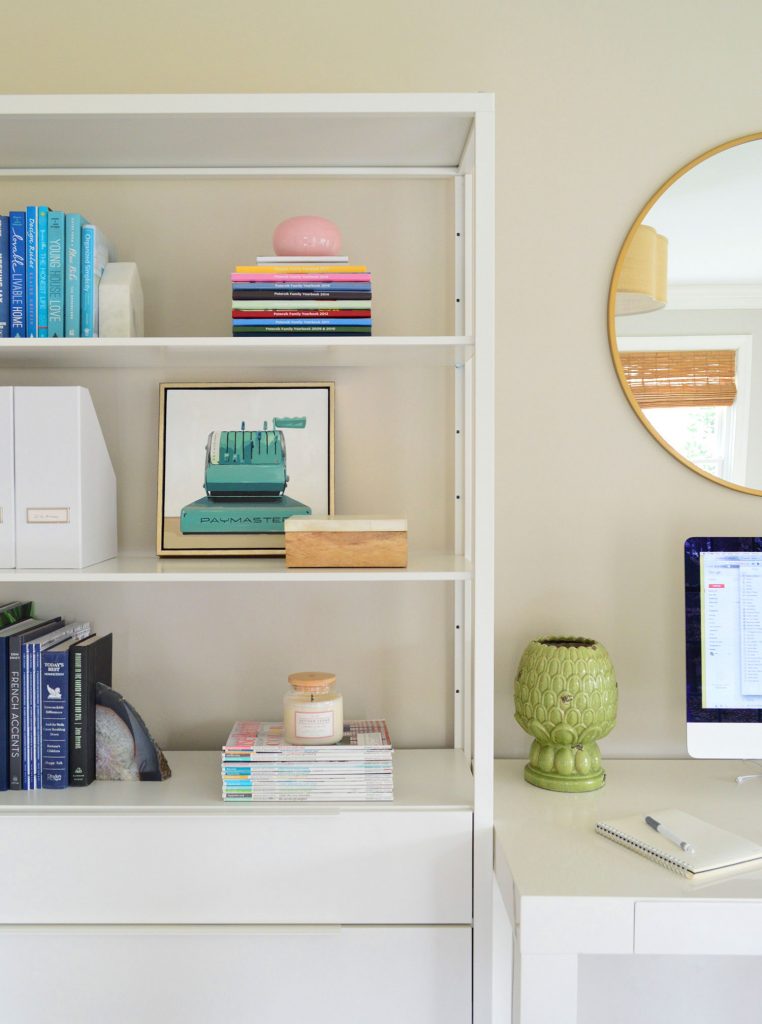
You might be wondering, but where can she keep a real fiddle leaf fig alive? And the answer, after living in our house nearly six years, is: One. Freasking. Corner. Yup, just one spot, in the corner of the office, gets enough light to keep a real one happy. So you can see it here in the background of this picture. I find the fiddle leaf fig to be a SUPER EASY PLANT to keep alive. BUT YOU NEED ENOUGH LIGHT. So like, 99% of my house = not enough light. So it would die in literally every other corner. I have killed MANY.
This corner though, equals enough light, so this thing is older than my four year old. All I do is completely ignore it, except for dumping one big glass of water into its soil every 9-10 days or so. When the leaves look droopy I dump the water on it and it perks right up. That’s it. But again: super sunny is the key to the equation. Otherwise, don’t mess with real fiddle leaf figs. I also REALLY love real eucalyptus, and I grab it when I’m across town at Trader Joe’s (they have THE BEST GREENERY and it’s SO CHEAP!). It smells great and it lasts a nice long time – you can even dry it and have it forever, although I find that it can start to fall apart and it gets sort of a dusty-gray tone after a while. So fresh is my jam over dried (I also just discovered there are Etsy shops that will send it to you fresh). And in some spots where I want the look, but zero maintenance (aka: the beach house & the duplex) I’m a big fan of these $5 Ikea fakers. Yup, that’s a fake stem from Ikea in that “vase” below: 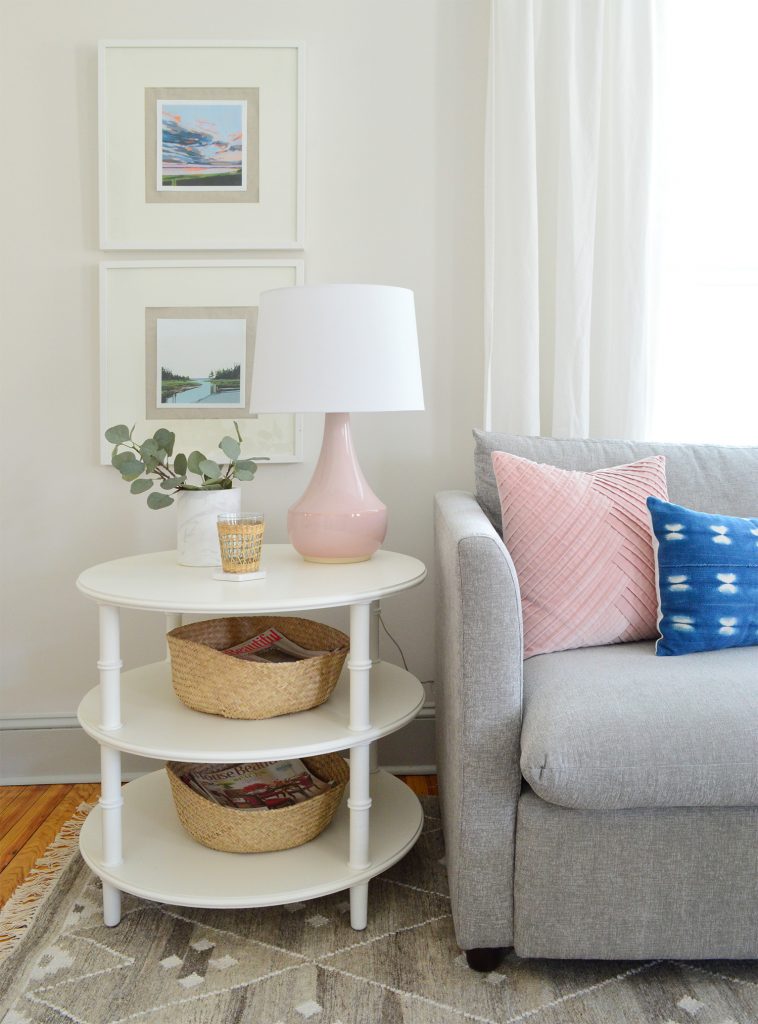
I put the word vase in quotes, because the container from the photo above and below is actually a marble utensil holder, and I love it so much for faux stems since it’s not great at holding actual water, but it looks amazing with a good fake stem or branch. I’ve bought like three of them to use as vases around the beach house and our own house – and I may or may not have picked up two more for the duplex. Hey, when it’s love, it’s love. 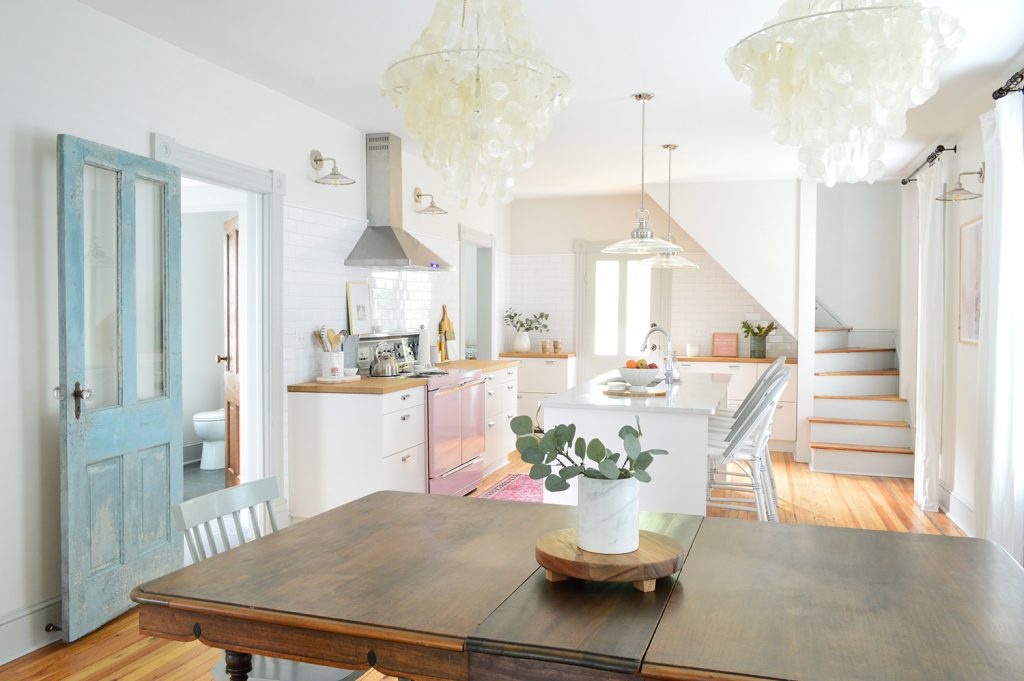
And yes, that stem in the photo above is another Ikea faker. The one key to those is not to bunch too many together. They actually look a lot more convincing and like real eucalyptus if they’re splayed out and not too crowded together if that makes sense. Bouncing back to the real plant realm, aloe (along with other succulents) can be extra easy. It literally needs nothing more than a tiny splash of water once every two weeks or so. I love the little pink pot this guy is in (from Ikea a while back – but here’s a similar one) because between the greenery and the cute pot, it definitely cheers things up. Plus aloe is known to be one of the better air purifying plants. Score. 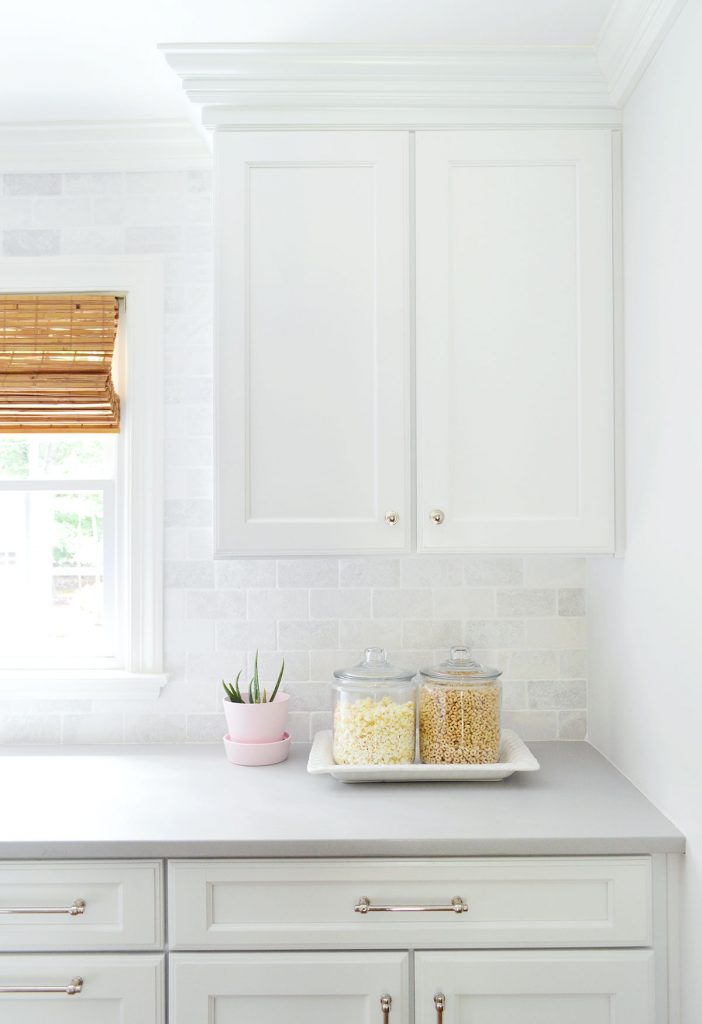
Meanwhile in our completely window-less and natural-light-less laundry room, we have a faux succulent. They’re usually some of the best fake options since they can look extremely real for some reason (maybe it’s the thick rubber-y leaves that real succulents have?). I’ve had this faux one for probably a decade (found it at HomeGoods forever ago) but these two look similar and have good ratings. 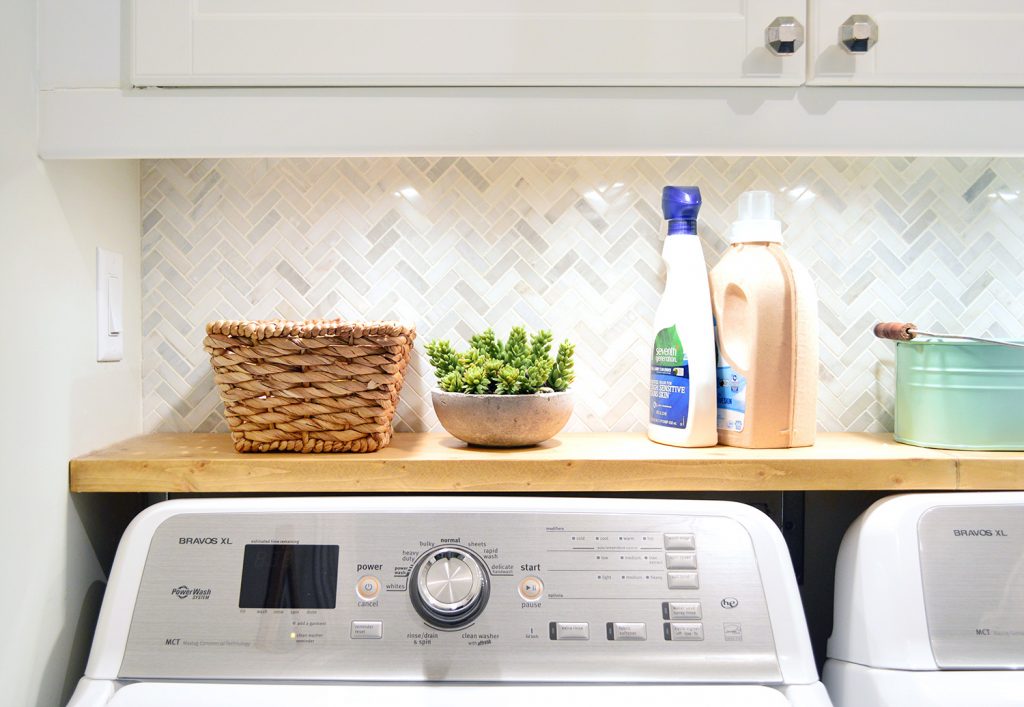
This one below is another HomeGoods find from eight or so years ago. Yup, it’s as old as my oldest child and still going strong. One tip I have for you is to hit a garden center and buy a pot you love (maybe an understated concrete one, or even a bright colorful one that makes you smile) and then hit a store like Michael’s and grab a few succulent stems that you can “plant” in the pot. You can even use real dirt. Literally nobody will be able to tell the difference – especially if you pick the succulents out in person and grab only the most real looking options. 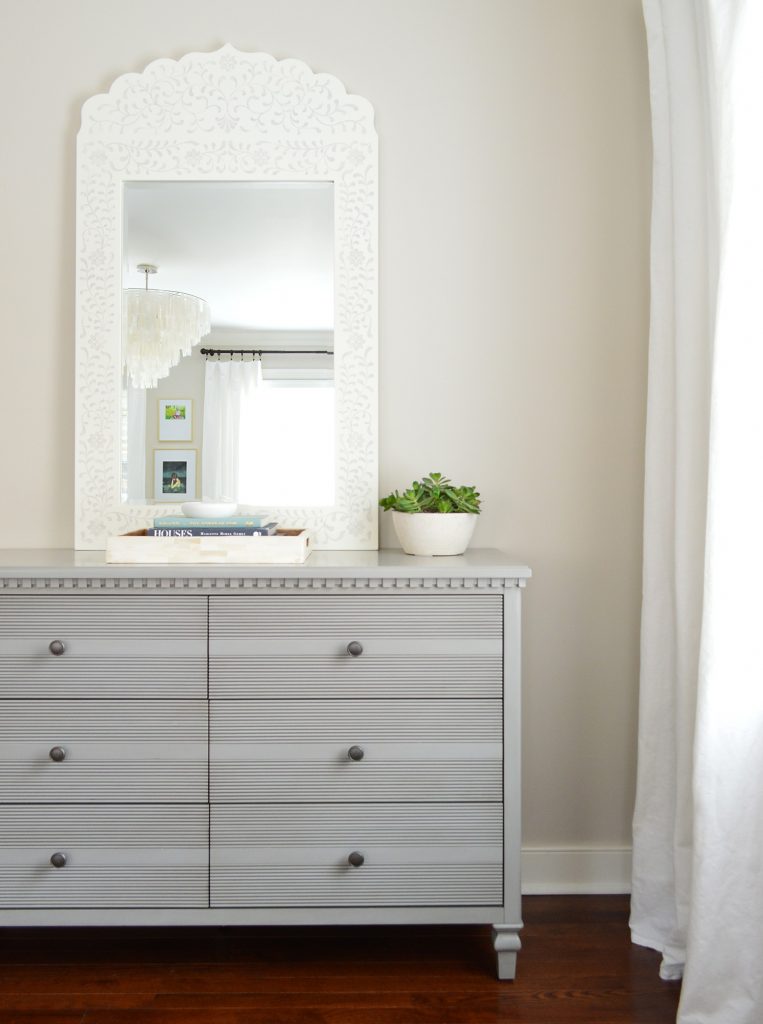
That’s actually what I did here, with another pink pot from Ikea – I took these little faux succulents from Michaels a few years back and just shoved them in there. It’s very convincing, and I love that they’re next to my ceramic succulent candle (from Anthro ages ago). Do I love plants or do I love plants? 
Also, I get the “how do you dust them” question a lot, so my favorite method is actually just a feather duster. I do it before I vacuum like twice a year when I remember, and it just tosses some dust on the floor and I vacuum it up. I figure every single item you put on any surface of your home needs dusting, so it’s not really a big deal to run a feather duster over a real plant, or a fake one. I haven’t really talked much about faux flowers and it’s because I think they’re harder to find when it comes to being truly eye-trickingly-realistic. Sometimes they’re gelled into that fake water but something about a few of the ones I’ve seen isn’t really quite convincing. Which is why I lean towards completely opaque pots for the ones I end up getting. It just feels more like these could be real cut flowers and leaves in this vase to my eye. I got these at Target maybe six months ago, and I love the bright color they add. Wish they still sold them for my fellow pink lovers out there. 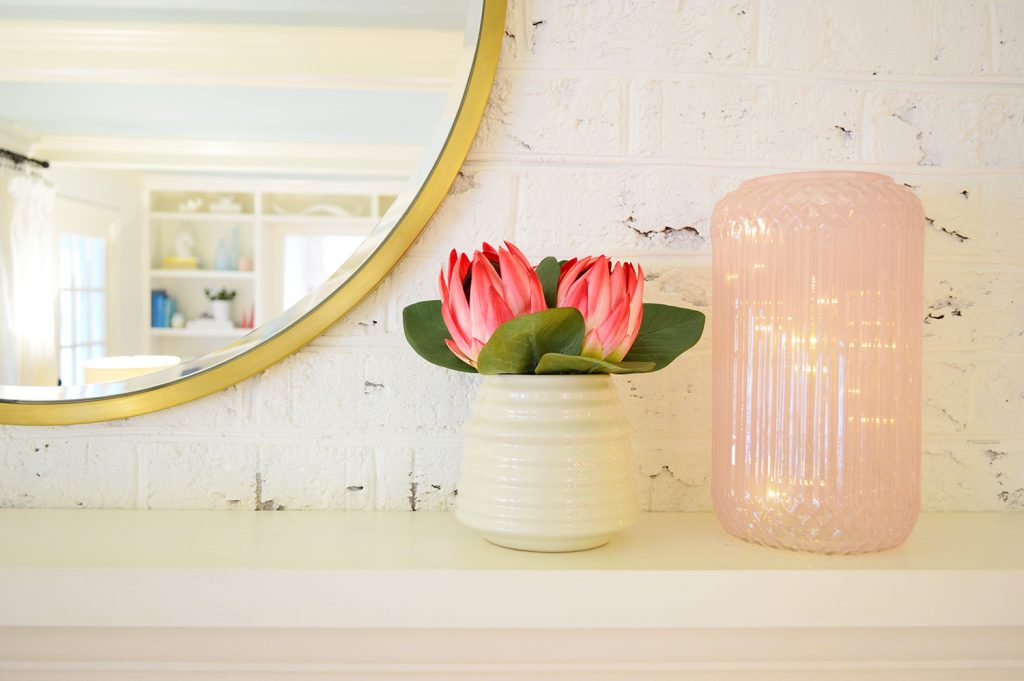
This is the laundry room at the beach house, and as I’ve mentioned, since we’re not there for weeks on end, we don’t have any real plants there, but that orchid on the top shelf is an Ikea find (so cheap! And I dropped it into a larger white Ikea pot just to balance it out a little). 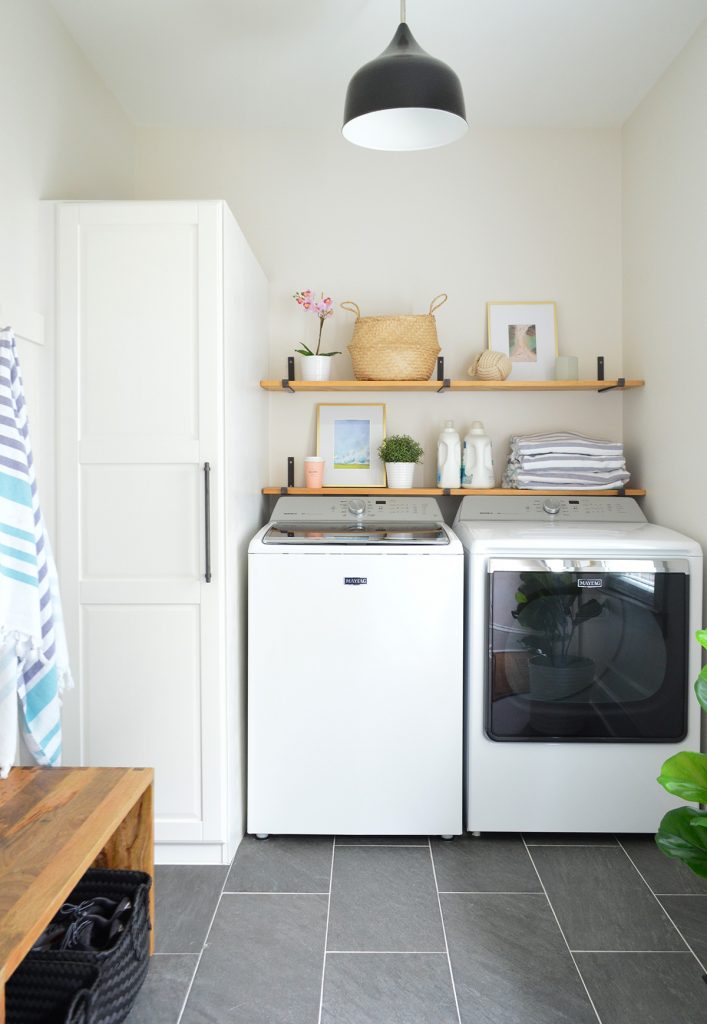
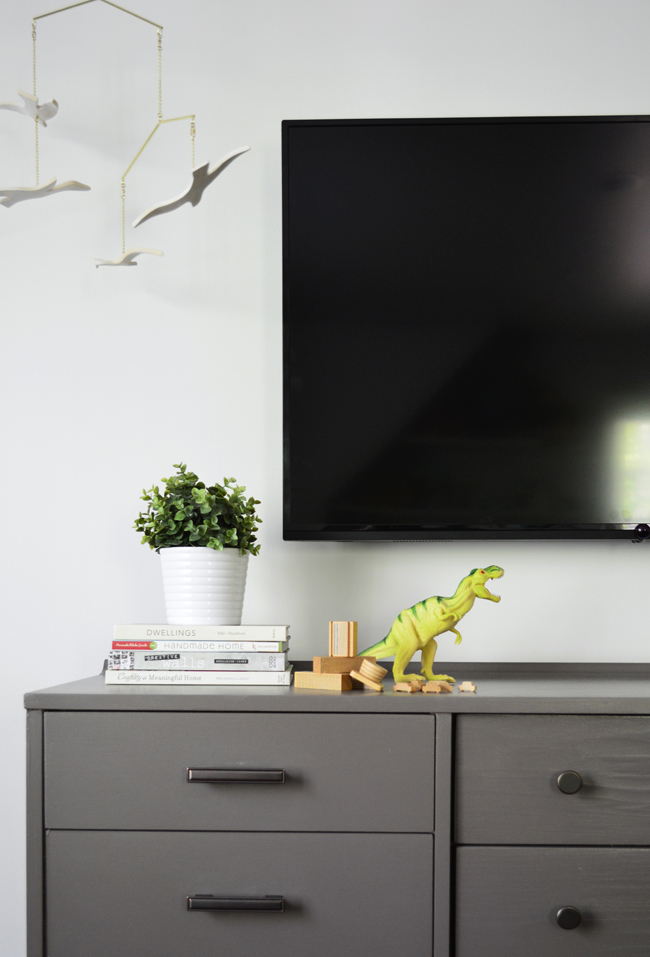
There’s also a faux Ikea plant on that first laundry shelf – it’s this one – and I have another one at home in the guest room (seen below). They’re convincing – especially in larger pots – and the price is pretty great. 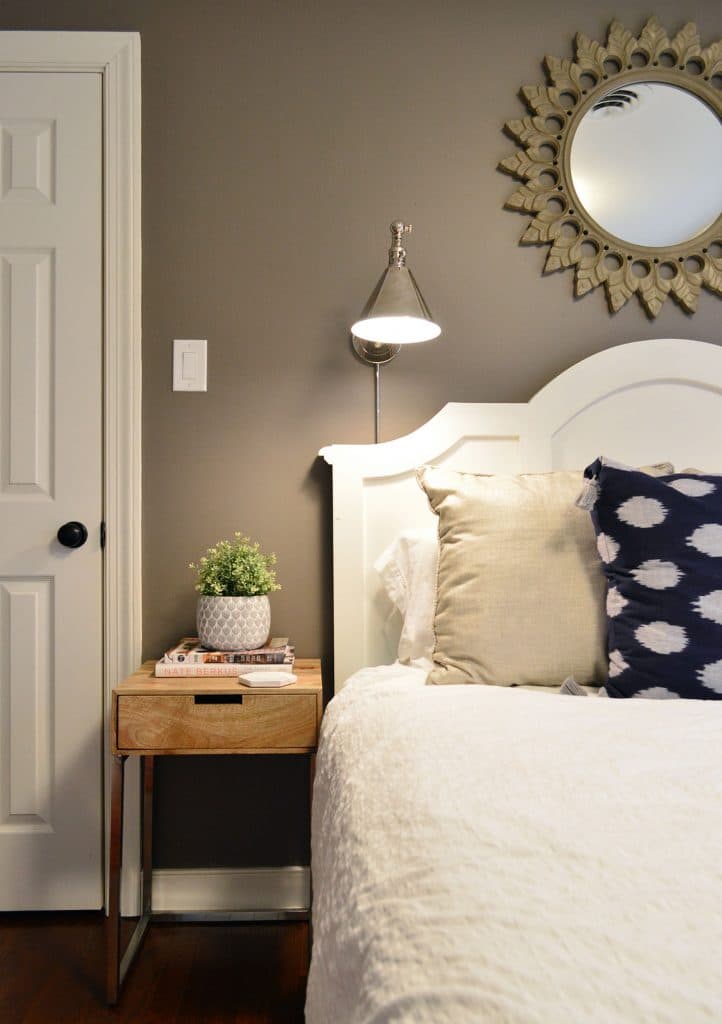
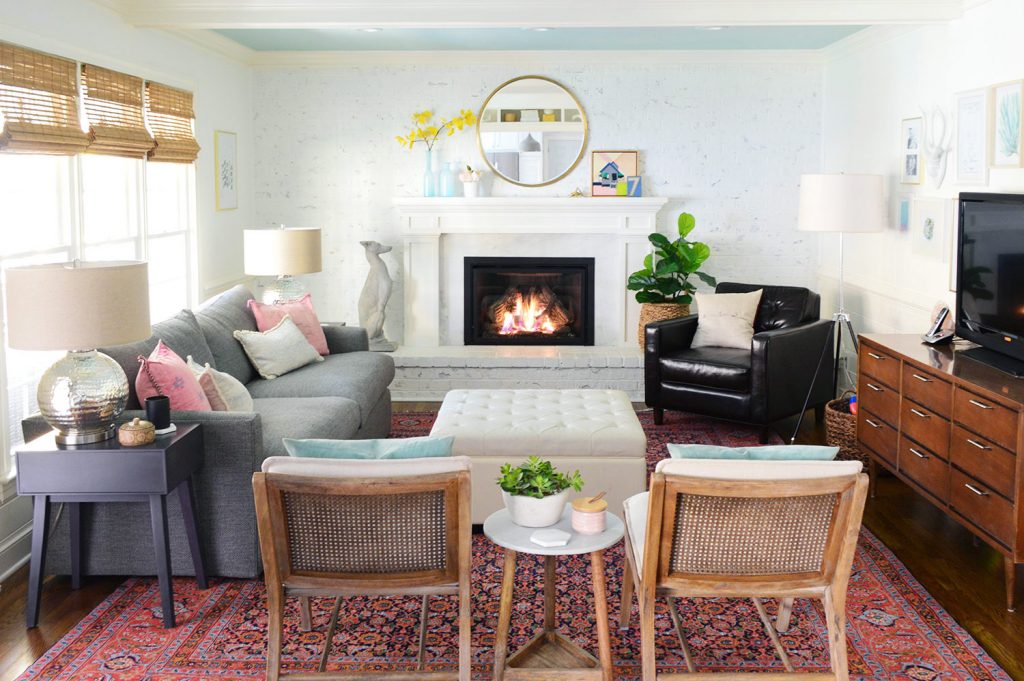
Actually, the one above is this one with the whiter little buds on the edges, and I loved plopping it into a pretty textured pot from HomeGoods. Half the fun of plants = pretty pots. To go back to the faux flowers thing, and how it’s hard to find something colorful that looks real (even the Ikea orchid from our beach house laundry room = white), I do LOVE these happy yellow ginkgo leaves. They’re from Crate & Barrel a while ago, but they brought them back once, so I’m hoping they come back again soon. 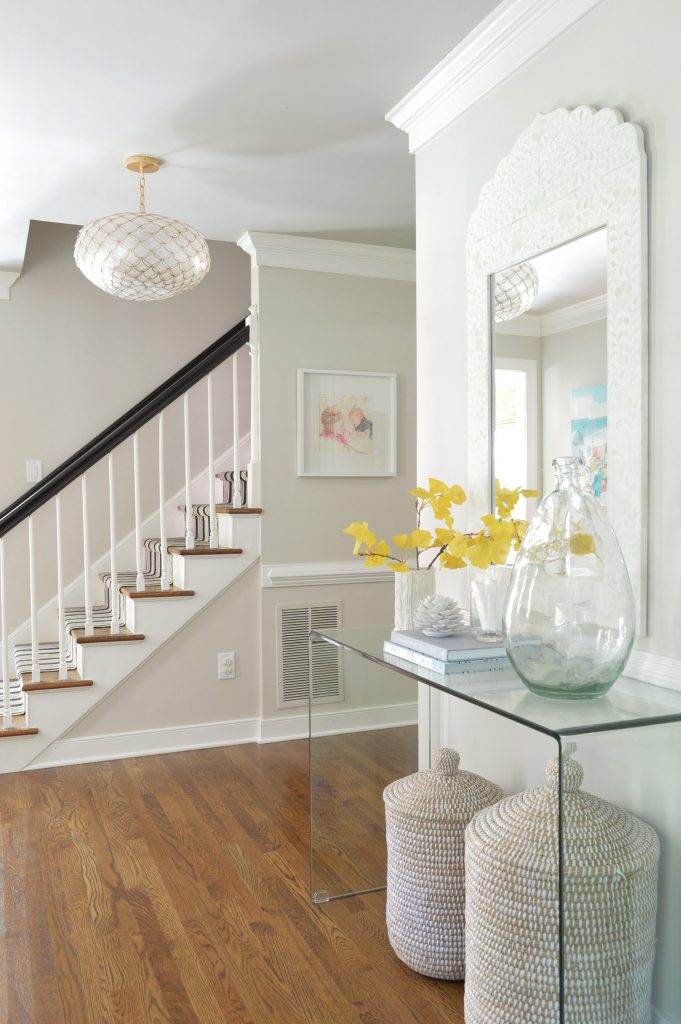
They’re just a nice way to add color and texture – they feel very spring/summer to me. 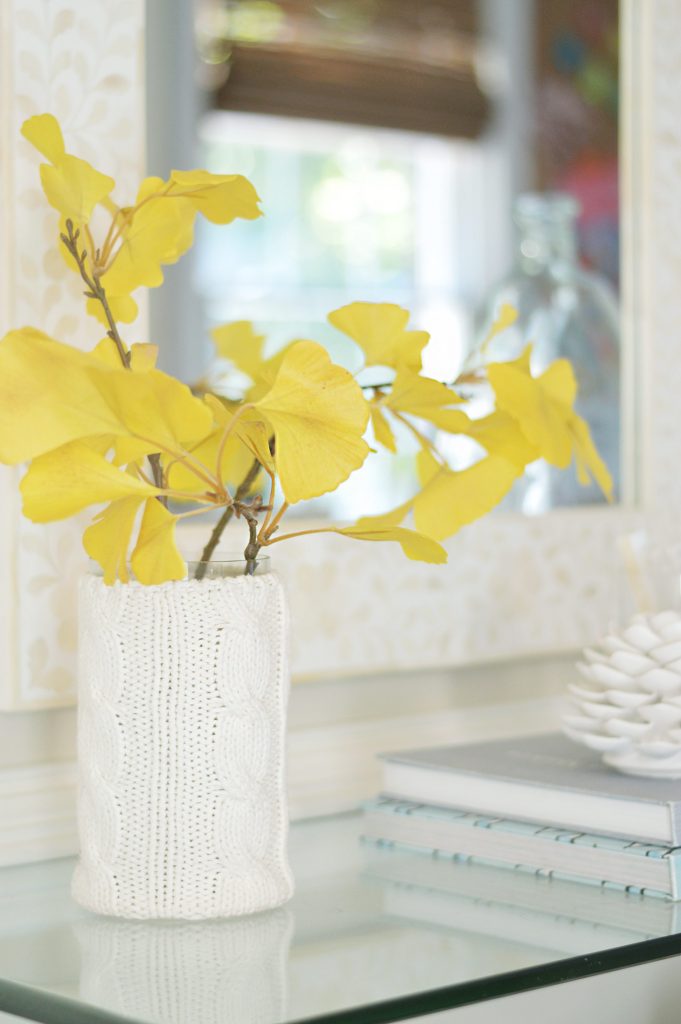
Here they are upstairs in the bonus room too. They’re versatile because a burst of happy color looks nice pretty much anywhere. 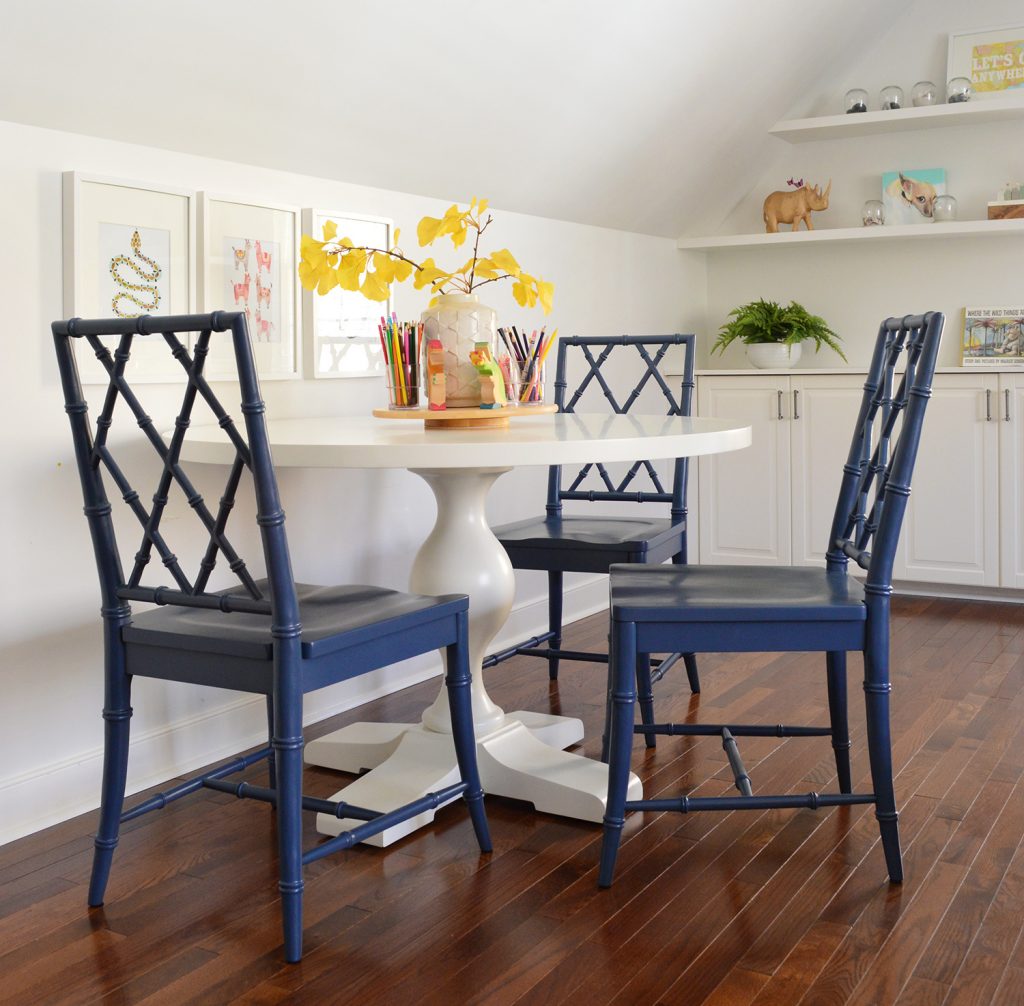
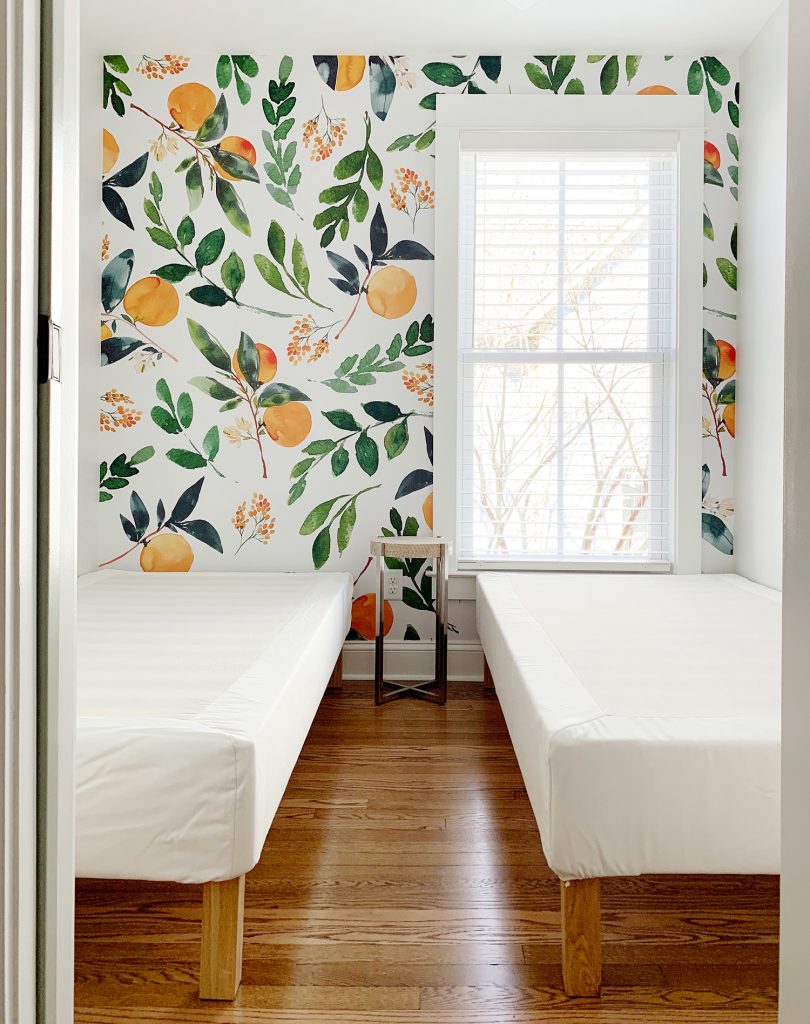
One other sort of abstract way to bring greenery into your house is with the use of some really cool art or even a wallpaper. This leafy mural we hung at the duplex definitely makes the room feel green and alive (you can see how we hung it here). 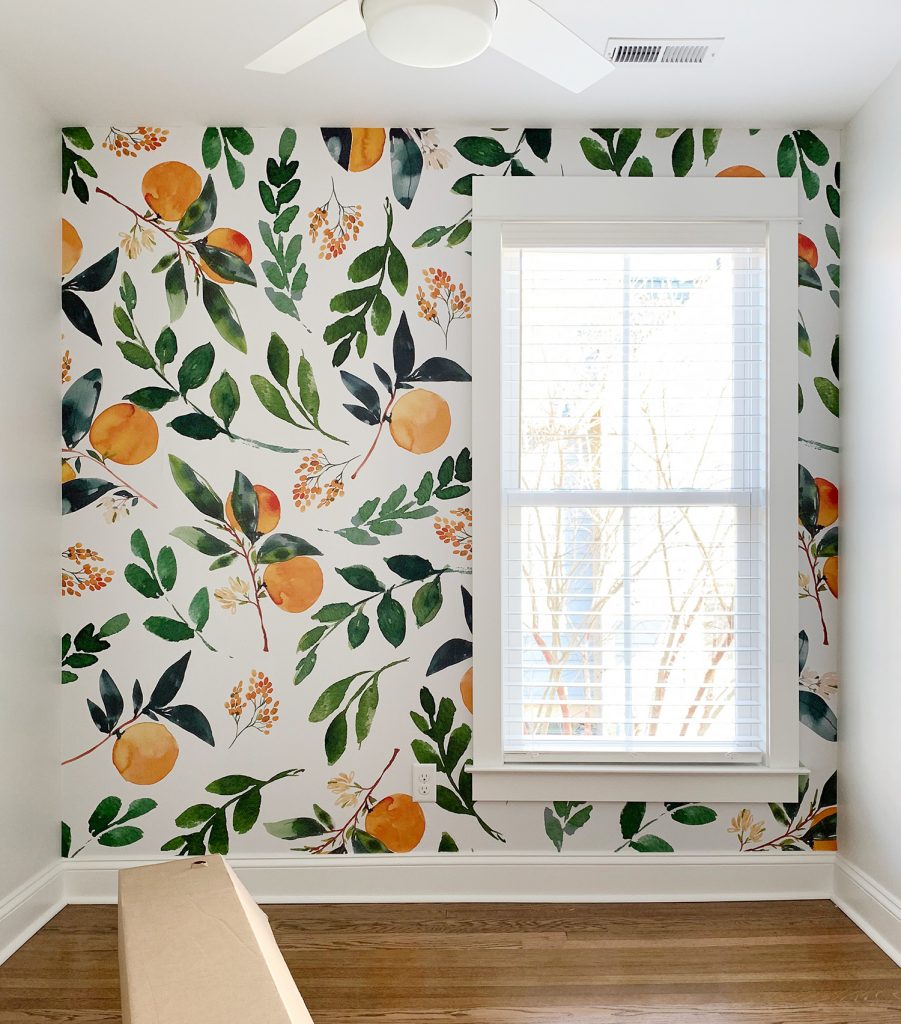
Simple art can also add that outside/green element to a room that might have less than stellar views – and you never have to water it. These large framed prints are from West Elm a while back, but I’ve seen similar stuff on Etsy (you know I love these and they also have them with a white background). 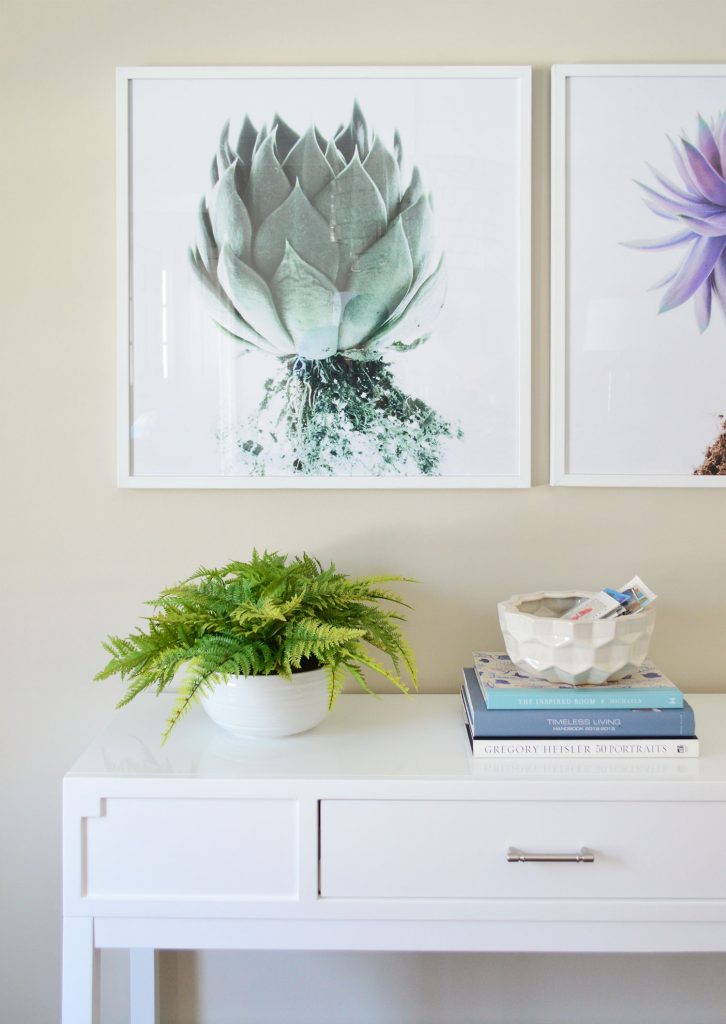
Oh yeah and that potted fern above? Fake from Target around a year ago. This one is the current version they make, and it’s well rated too. Let’s bounce back into the real greenery realm again, because I feel like I need to tip my hat to the old “free cuttings” category. Many months of the year, there’s free greenery at your disposal if you just walk outside with a clipper. These cuttings are from the bushes right in front of our house, and I steal from them pretty much every season except for winter when they go dormant. 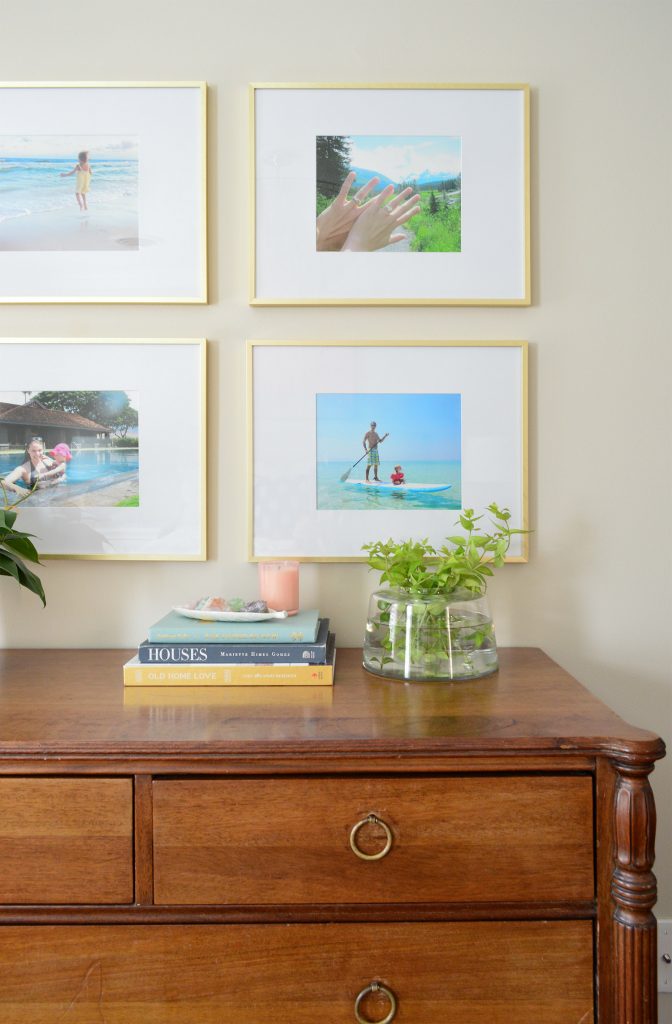
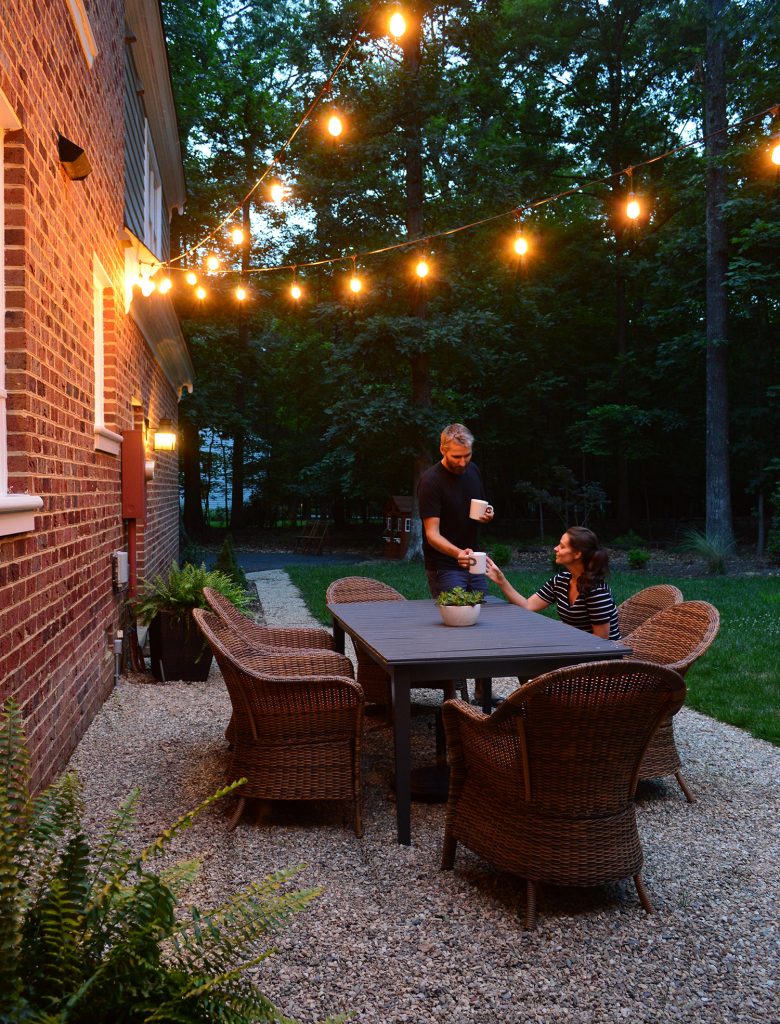
And whenever I stage houses, you know I love going outside and bringing some 100% free clippings into each room to make it feel alive and just plain welcoming (you can read alllll about house staging and my other tips here – I loved writing that post). Here’s a shot of some other “real greenery” we have embraced on a seasonal basis. We love grabbing fresh holiday garlands from Trader Joe’s (they’re super cheap and last around a month – at least that was our experience this past holiday season). We just tapped two small nails into the corner of the molding to hold this one up over the sink. And you know while I was at TJ’s I had to grab some fresh eucalyptus too. 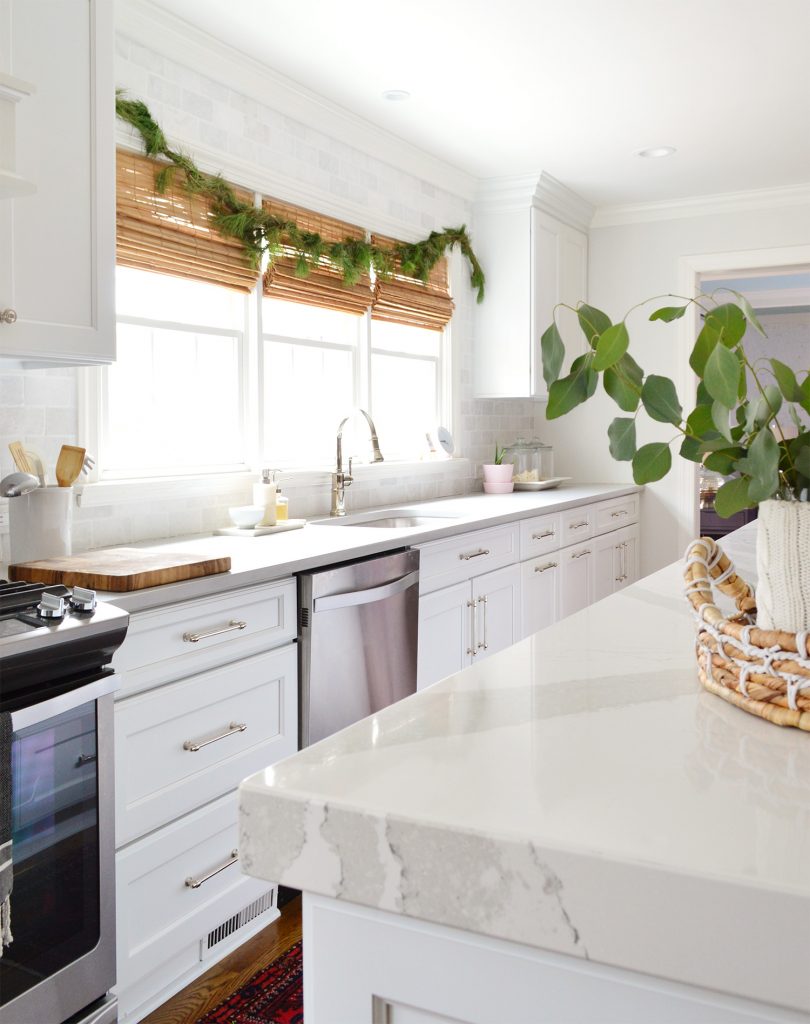
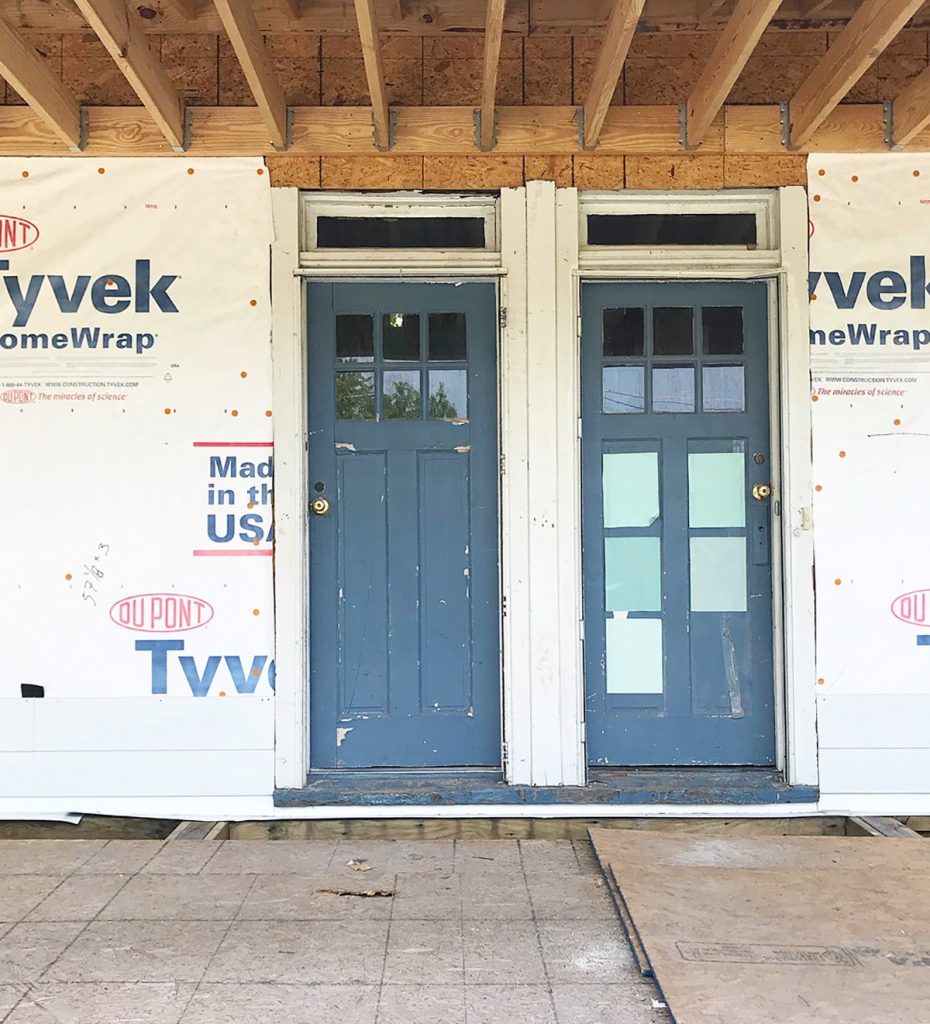
We also string up a fresh garland around the front door (actually it takes two to span that area, so I wire them together with green floral wire, and once again we just hung them over two small nails on the corner of the trim). But what’s worth mentioning is that in this photo, the wreath is also real – I make one out of fresh magnolia leaves every winter at a Wine & Wreath event that I go to with my favorite ladies – but the five foot bushes on either side of the door are faux. 
I feel like that’s worth noting, because they’re so convincing they can literally be right in front of a real garland and next to a huge magnolia wreath and they hold their own. We actually bought these three foot versions of those front porch bushes first – and loved them. After over a year of use there was no fading or damage to them through rain and snow. So when we painted the house white and wanted something taller next to the door after removing the portico, we upgraded to the 5′ versions and sent the three foot ones to the beach house. 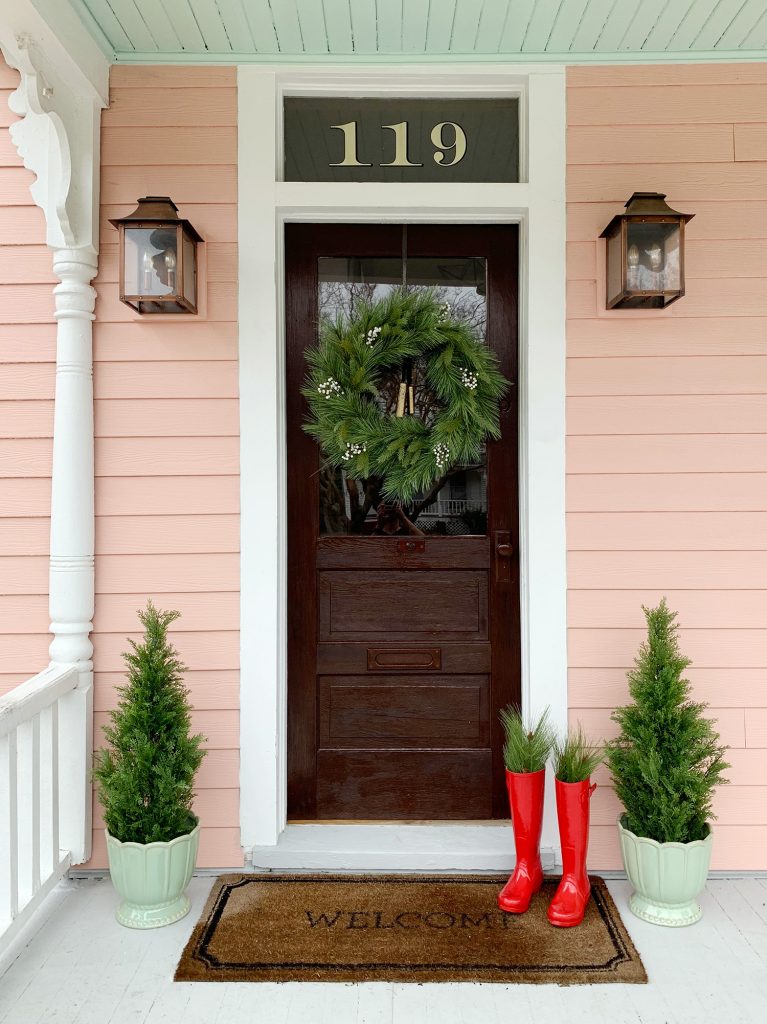
The pots above are from Home Depot (just in store – can’t find them online) and the copper porch pots from the photo before the one above are a DIY project – more on them here. I’ll leave you with one last real outdoor plant that has been deliciously low maintenance for us – at least here in our climate. Those big $12 ferns that Home Depot and Kroger sell in the parking lot…. we buy a few each year in the spring. And they last all the way until the very end of the year when it gets below freezing. There is literally nothing easier than plopping our annual fern friend into a few of the large pots we have out back – I don’t even have to touch dirt. And they just do their thing for nearly a year. 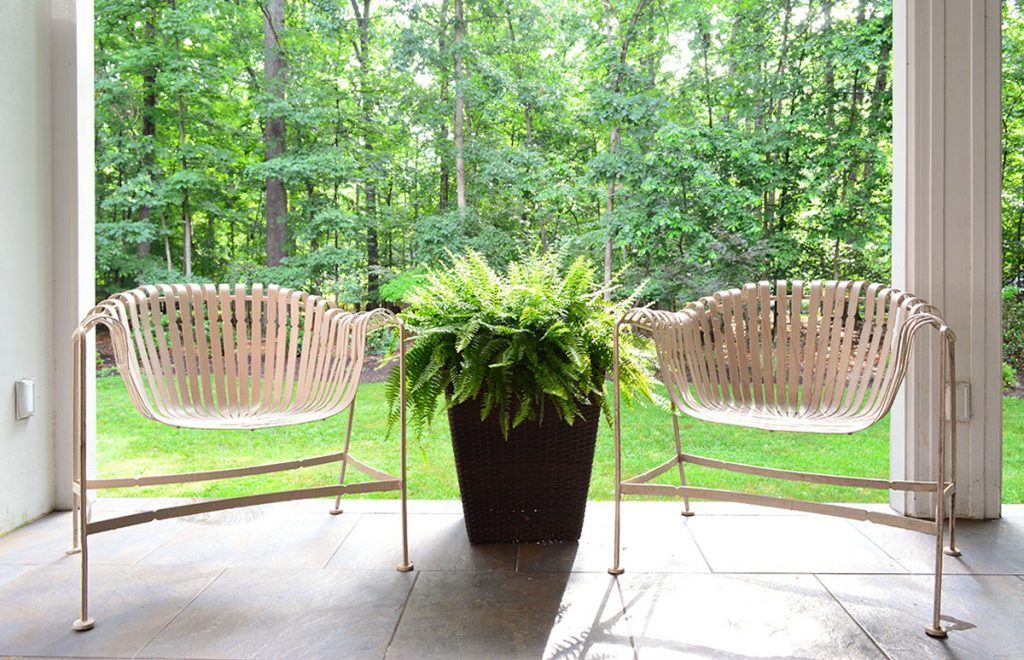
So there you have it, an exhaustive rundown of easy green stuff that hopefully won’t stress you out like… say… all of the other green stuff I have tried and then failed at and then decided not to list here because IT’S JUST TOO EMOTIONAL FOR ME, OK?! Also, it occurred to me that as much as John has special eyes for light bulbs, maybe I have special plant eyes. Because nobody ogles the green stuff like I do. Love ya, plants. Mean it. P.S. There were SO MANY pictures of our house, the beach house, and the duplex in this post, so if you have paint color or source questions, here’s where to find info about our house, here’s info about the beach house, and we’re just starting to get duplex info together here. *This post contains affiliate links* The post The Easiest House Plants & The Best Faux Plants I’ve Found appeared first on Young House Love. Via https://www.younghouselove.com/the-easiest-house-plants-the-best-faux-plants-ive-found/
0 Comments
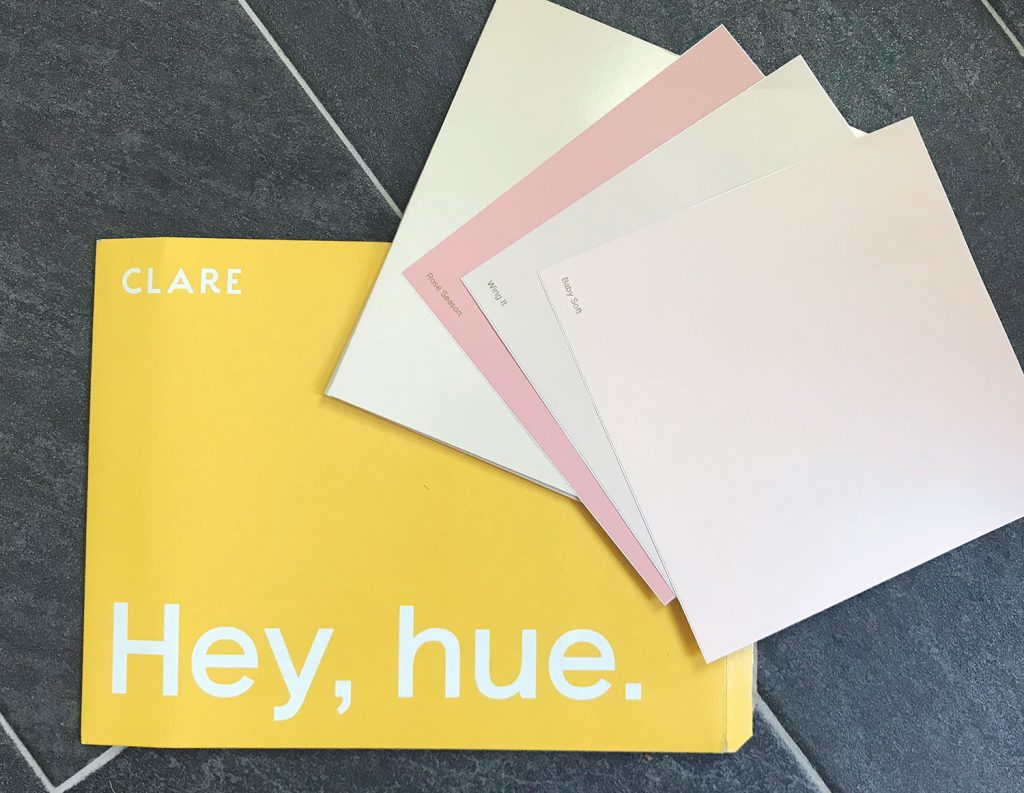
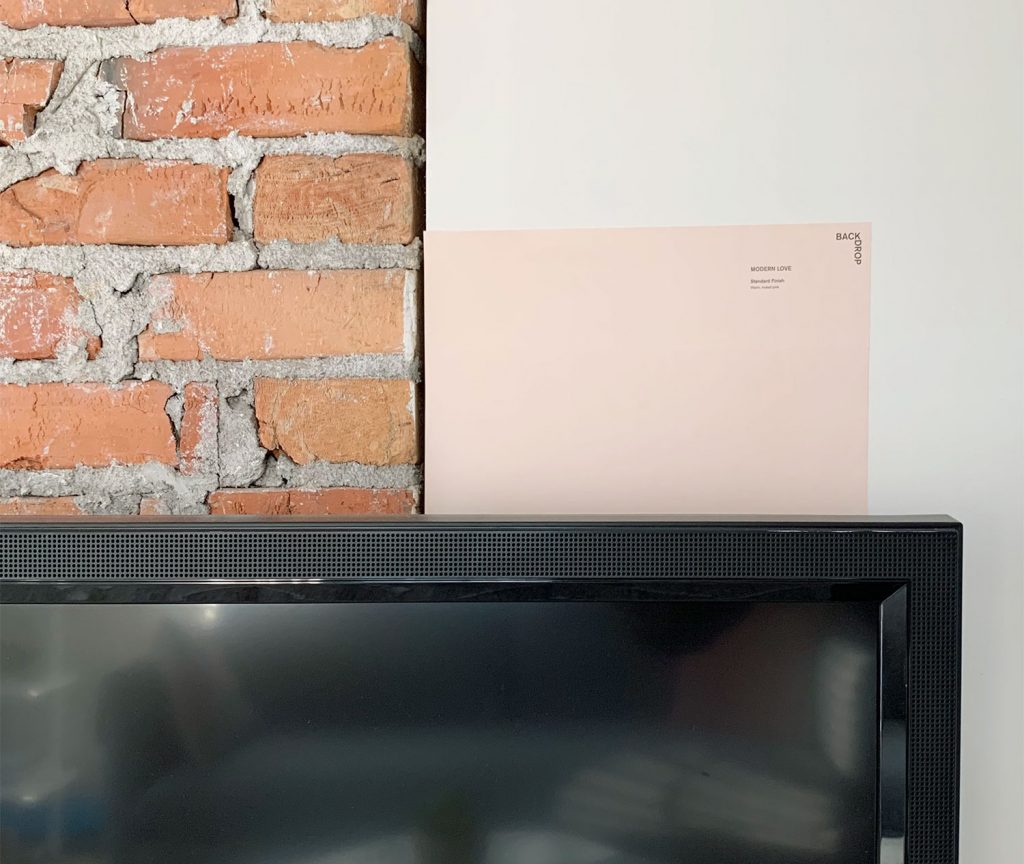
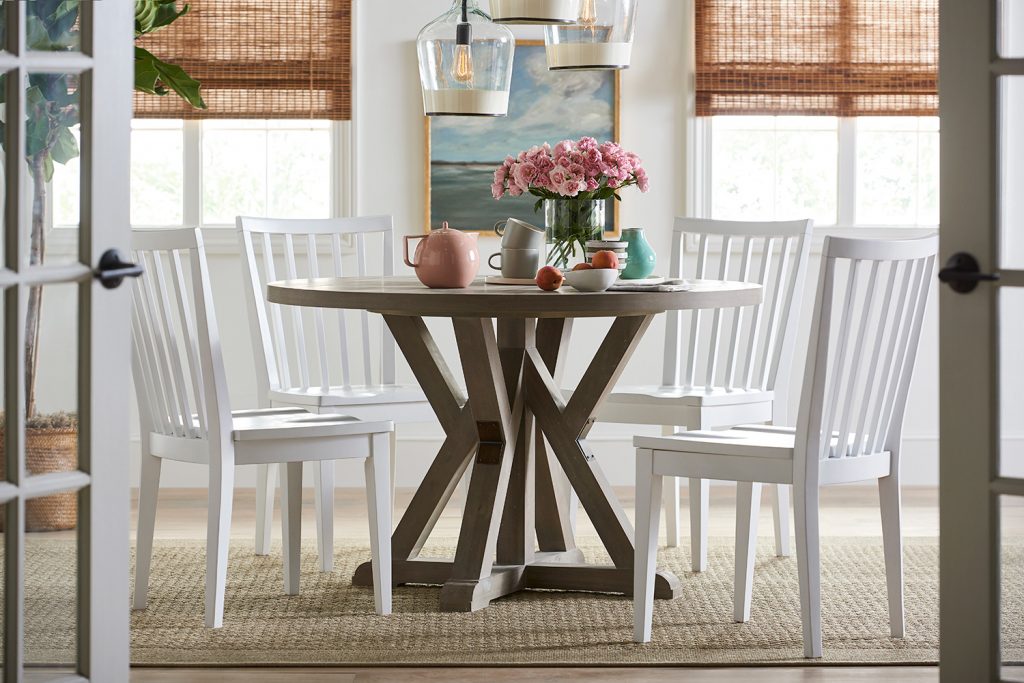
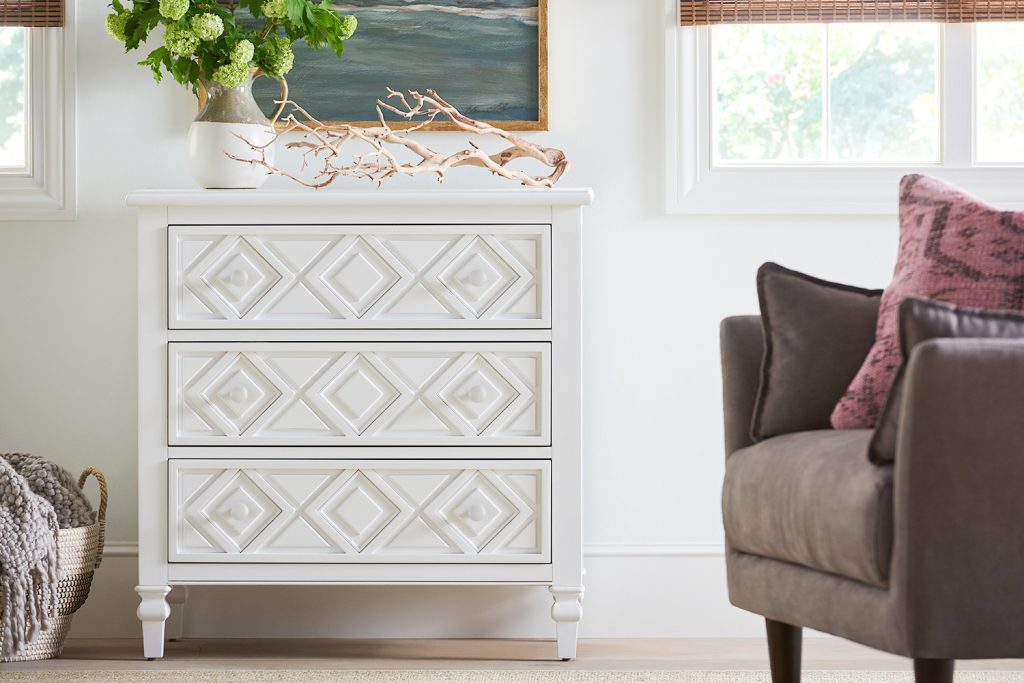
Just when you thought the duplex was getting all the action, we snuck in some beach house updates. The backyard is slowly starting to come together (shed! patio! fence! I CAN’T WAIT to show it to you once it gets a little further along!!) but today we’re diving into our lightener & brighter (and much beachier) living room. Now this place actually looks like it’s a few blocks from the beach! And the bonus is that everything is sand and popsicle friendly – which is a must for us (we pack this place with family and friends and all the kids). So our goal was never to make it too precious. In other words, we were going for a light and airy look… but it had to be durable, wipeable, and as close to worry-free as we could get it! 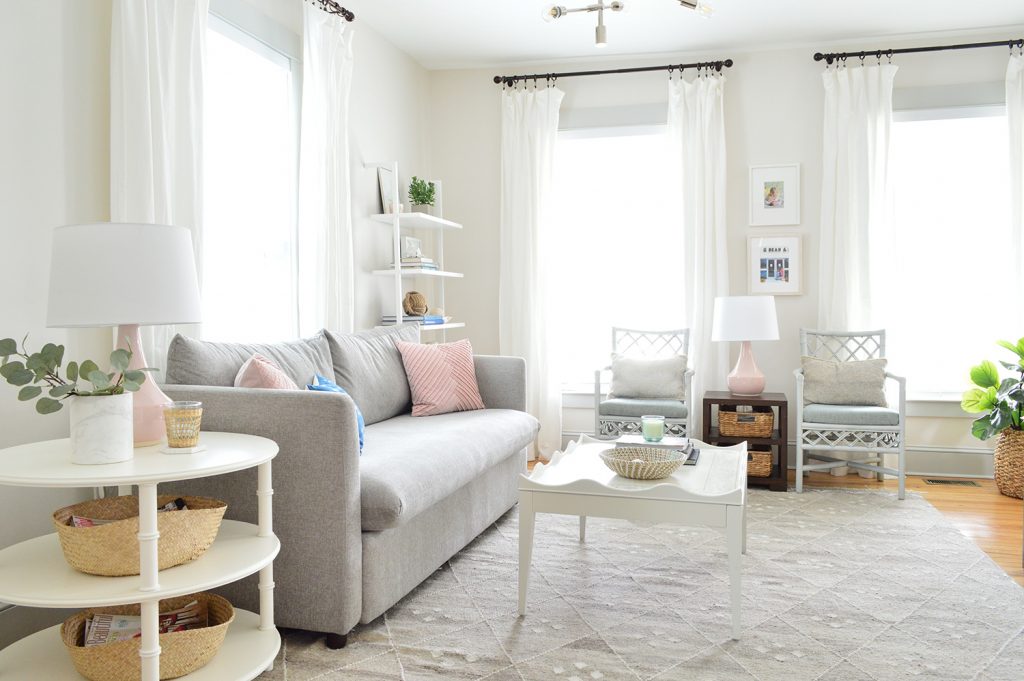 We wanted to use some ofthe furniture we designed, including one of our new sofas (performance fabric = all the yesses). So we started with our Mellow sofa. It’s sold out right now, but our other two sofas – the Pivot and the Spiffy – are discounted just for the next few days thanks to a Joss & Main’s flash sale (they’ve got different names on J&M for some reason). A lot of things are at the lowest prices they’ve ever been ($699 for the sofas!) so if you’ve had your eye on one of our designs, it’s a pretty great time to check it out. 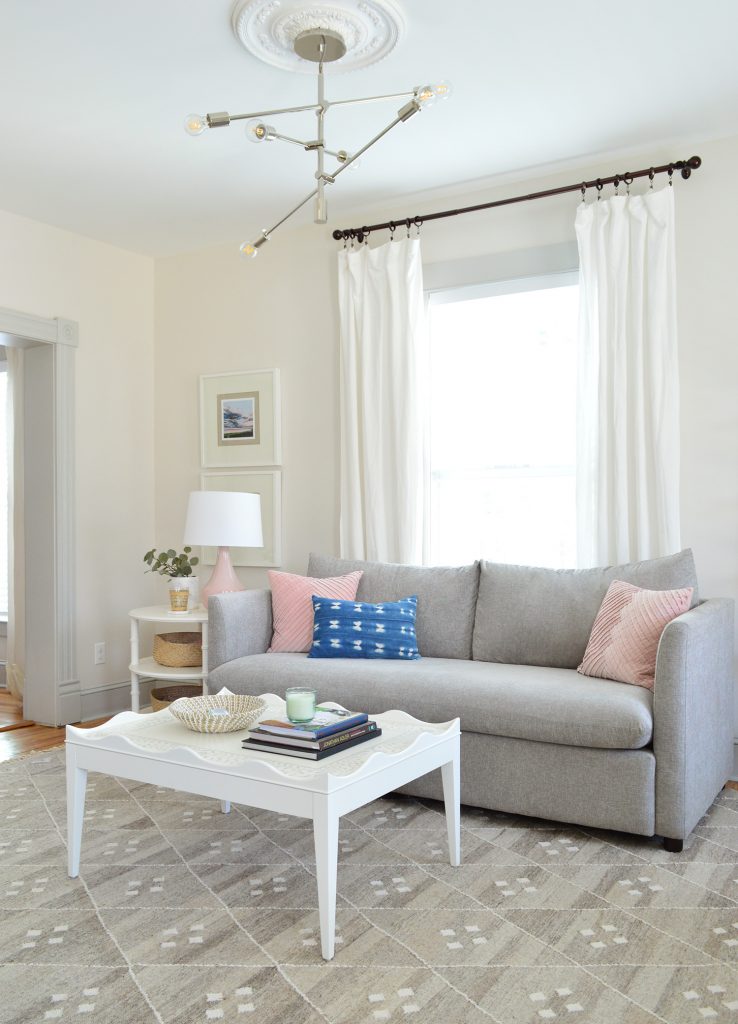 Sadly, our trusty old Ikea sectional (Karl the Karlstad, remember?) was ready for retirement (aka: donation). The problem with moving a sectional from house to house to house (we moved it from our second house, to our current house, and then to the beach house over the last eight years) is that sometimes the space would be better suited for a sofa… but you have a sectional… so you just sort of keep moving it around and trying to make the best of it.  We could kind of make sense of it it photos, but in real life there were awkward things like the chaise cutting into the doorway. We tried putting the chaise on the other end of the living room (it’s reversible), but it wasn’t any better because it meant we couldn’t have the extra seating over there, which really comes in handy and gets used a lot. 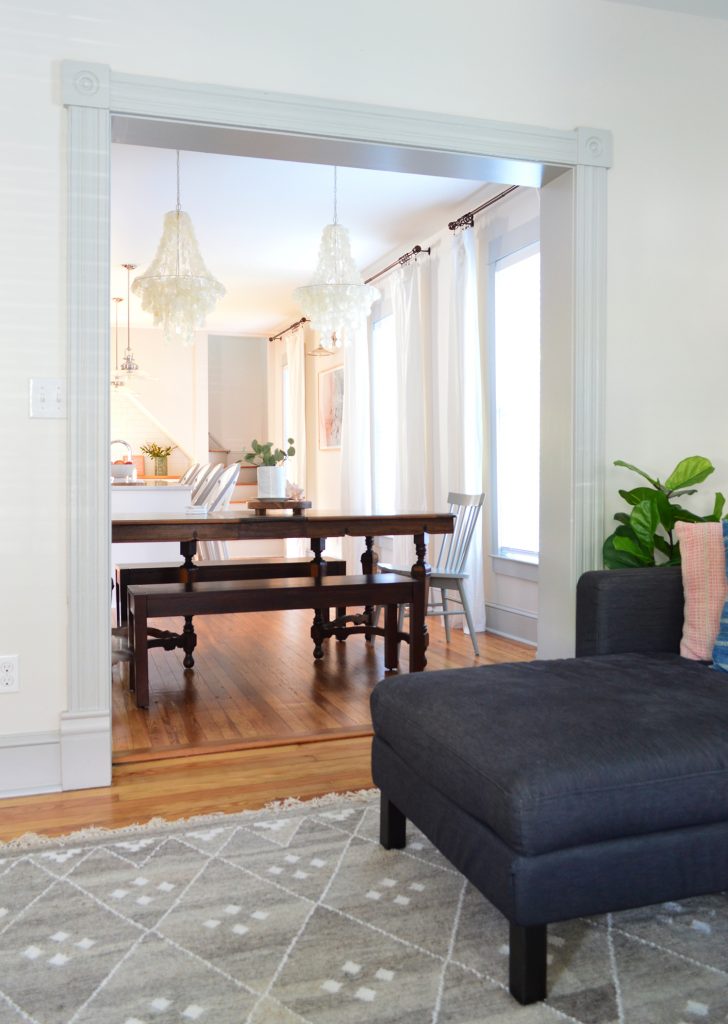 So as we mentioned a few weeks ago on the podcast, after eight awesome years with Karl, we donated him to a local charity that we love, and he’s living it up with a sweet new family. His legacy lives on. (*cue that Celine Dion song from Titanic*). Another way that we tried to make this room feel lighter and airier was thepatterned gray rug that we bought to replace the vintage one below (which happily lives in a bedroom at the duplex now). OMG that was meant to be in there, guys. 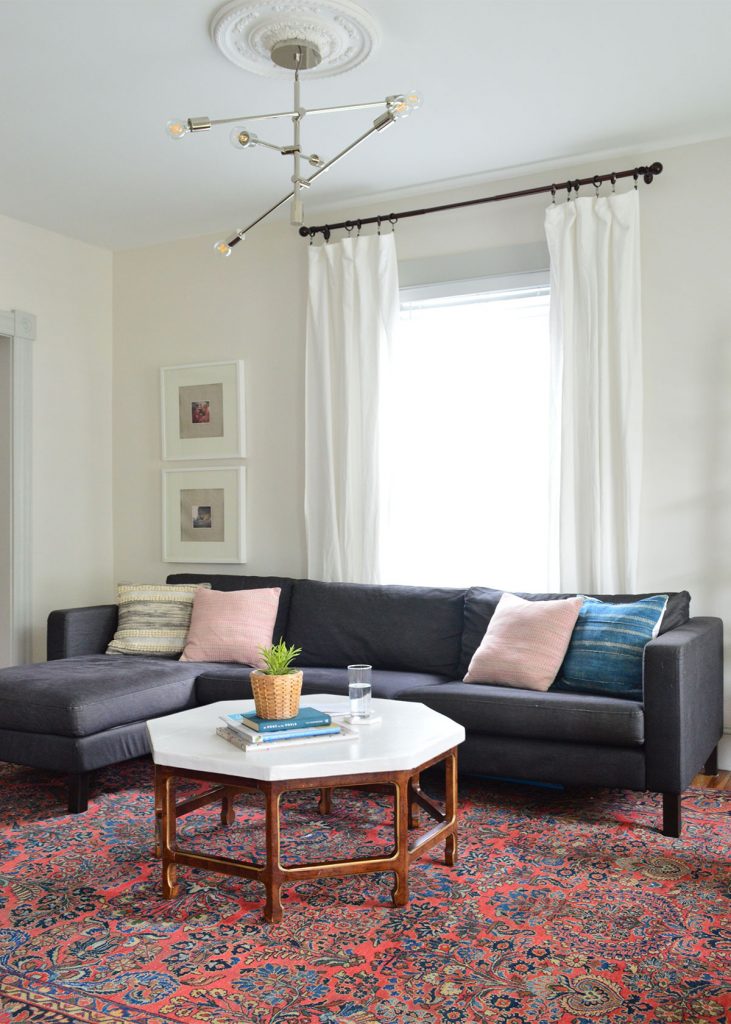 Along with our rug switch, the new sofa is a HUGE step forward in lightening things up. Plus its smaller footprint meant there was room for a few more functional furnishings. Like, momma finally gets a side table on her end of the couch. Hello reading lamp! Hello spot for my tea! 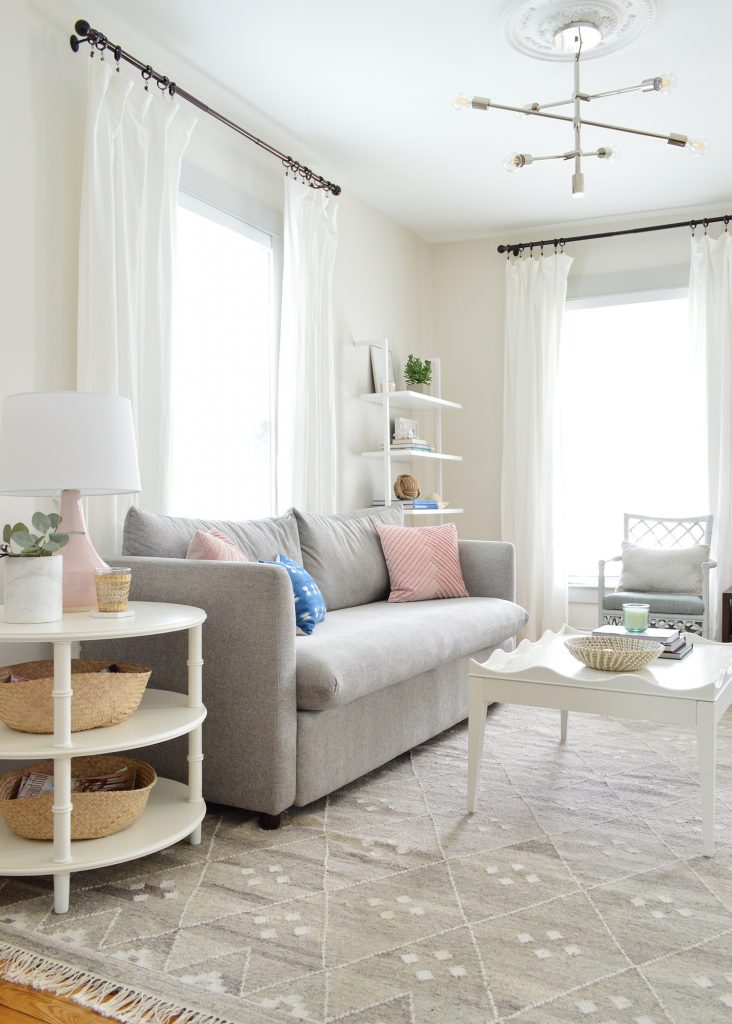 Also, a word about white wood furniture: it’s a GREAT WAY to achieve a lighter look that’s still livable (it’s all wipeable, but it looks so nice and bright). So if you’re staring at a space you’d love to lighten up, sometimes it’s as simple as a $15 quart of white paint with primer built in (we recently tried Behr Marquee and it had great coverage) and you can redo your coffee table and your end tables – or even a bookcase or a shelving unit in an afternoon. Light walls and white (gloriously washable) curtains help too! 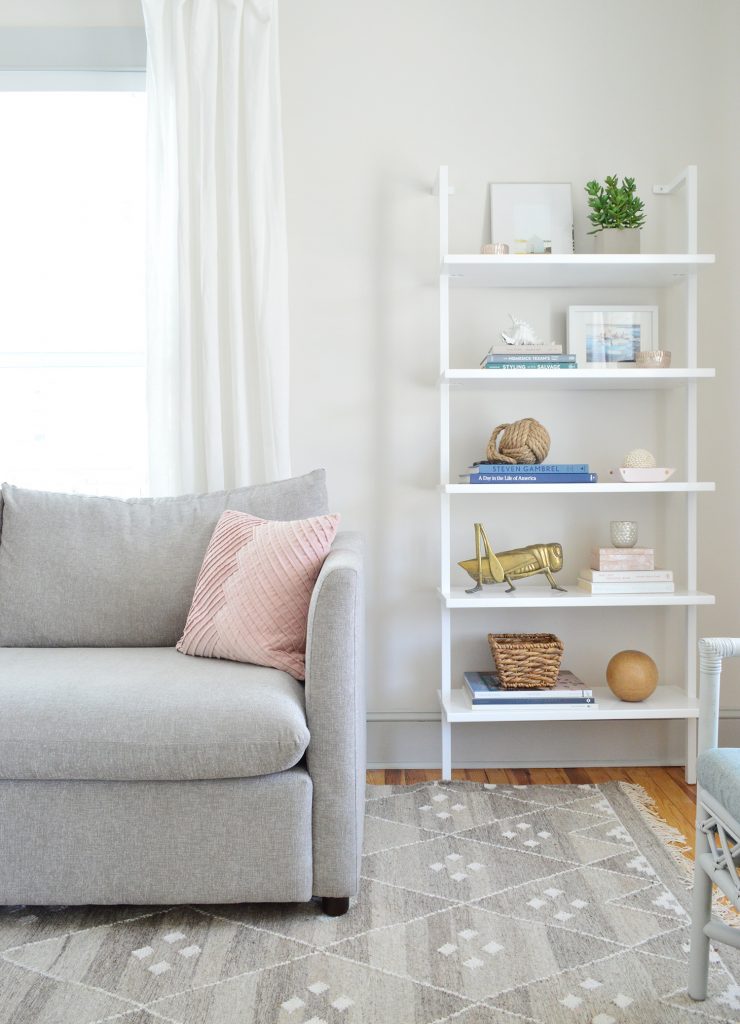 The three tiers on our side table = all the spots for magazines, a basket full of legos, or whatever else you like to keep at arm’s length. We actually ordered two more of the same side tables for the duplex because we love it so much. It also comes in a smaller version (which is super marked down right now) and you know I want to make a coffee table version, so stay tuned! I also hung some new art that I bought through an artist I found on Instagram. Her name is Sarah Madeira Day and her stuff is just beautiful and so well priced. These two 8 x 8″ canvas prints were $25 each! Printed on canvas with gorgeous vibrant colors! I just love them – and I framed them in simple Ribba frames from Ikea that I already had (with linen-like fabric behind them, which adds some really pretty texture and a double-mat effect). 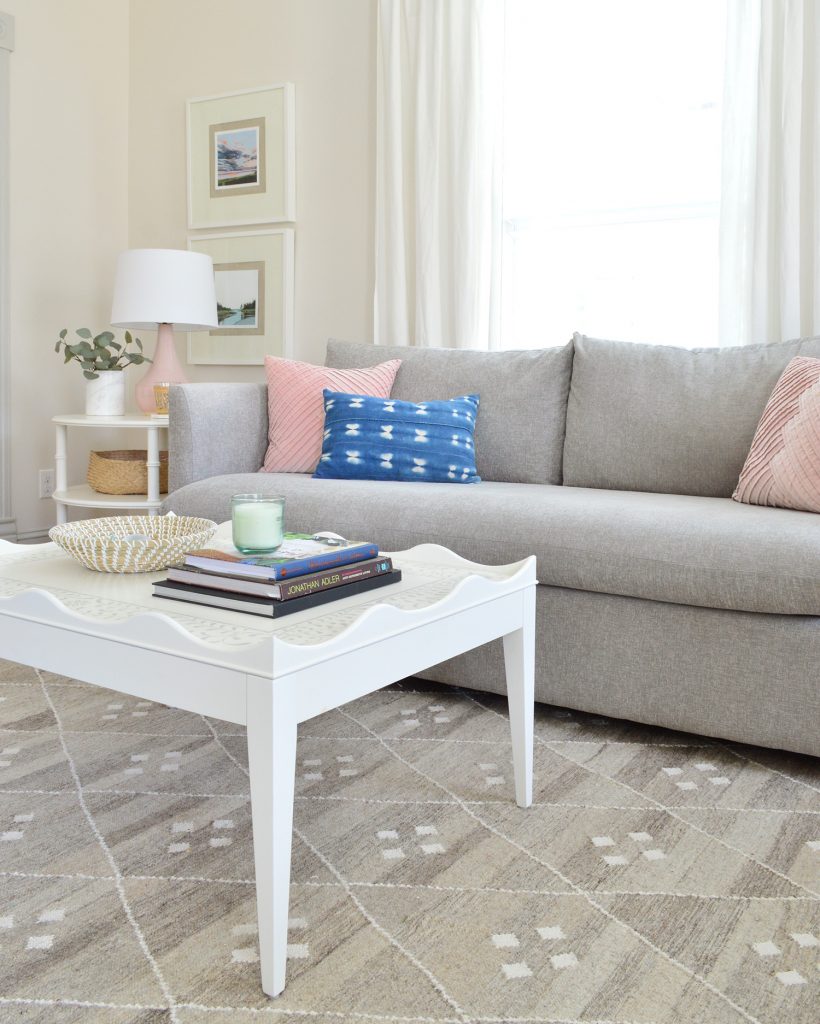 And as much as we liked the coffee table we DIYed last summer, the dark wood legs started to feel pretty busy – especially as the room got lighter. So we carried over one of these coffee tables that we ordered for the duplex. I’m liking how visually airy it is and the size is better for the space, so I may end up ordering another one to make up for the one I yoinked from the duplex. Also, John and I burst out laughing when we realized that we basically recreated this photoshoot set-up in our beach house. Even the rugs are similar! 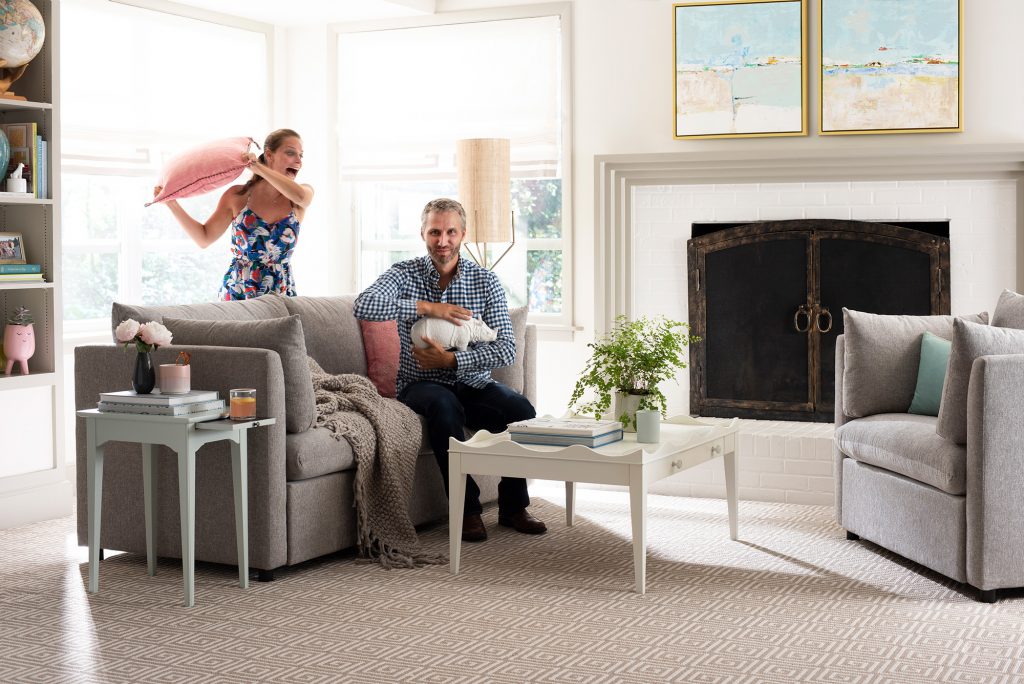 It kind of makes sense that it would happen that way, because we chose some of our favorite stuff for that photo… so I love seeing it living together at the beach house now. Especially mixed with other stuff that we love (that CB2 ladder shelf is so glossy and gorgeous in person, and I feel a deep and meaningful connection to our pretty pink lamp from Target). 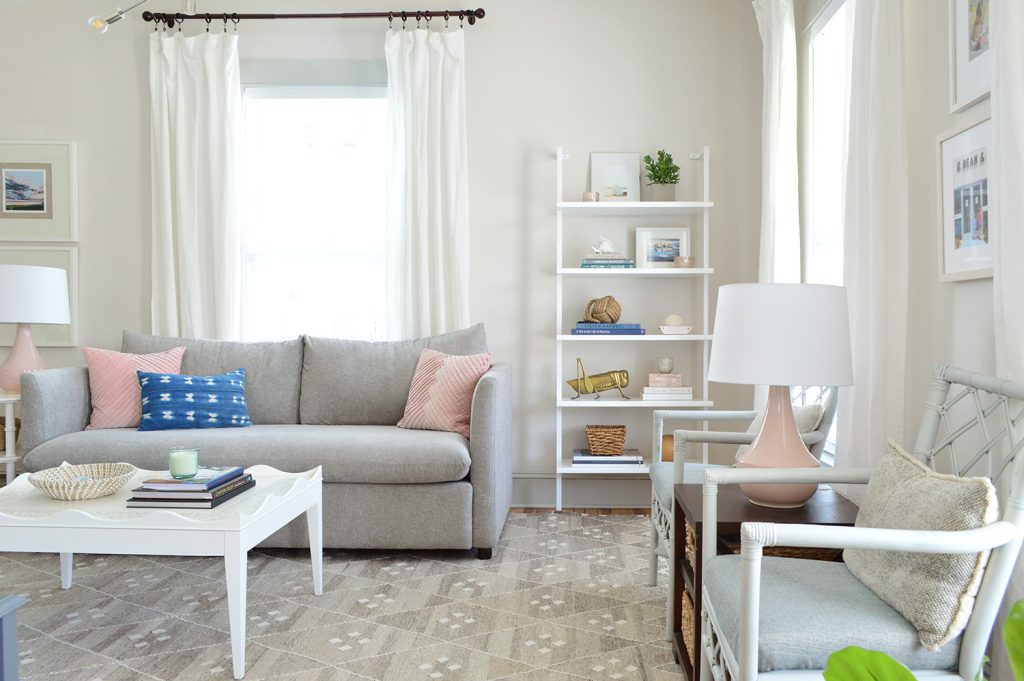 Funny story about this coffee table. A couple weeks after that photoshoot, John shot up in bed nervous that the scallops around the outside were a terrible idea. His concern was that it was going to prevent people from kicking their feet up on it (to which I said: “but not everyone puts their feet on the coffee table, right?â€). 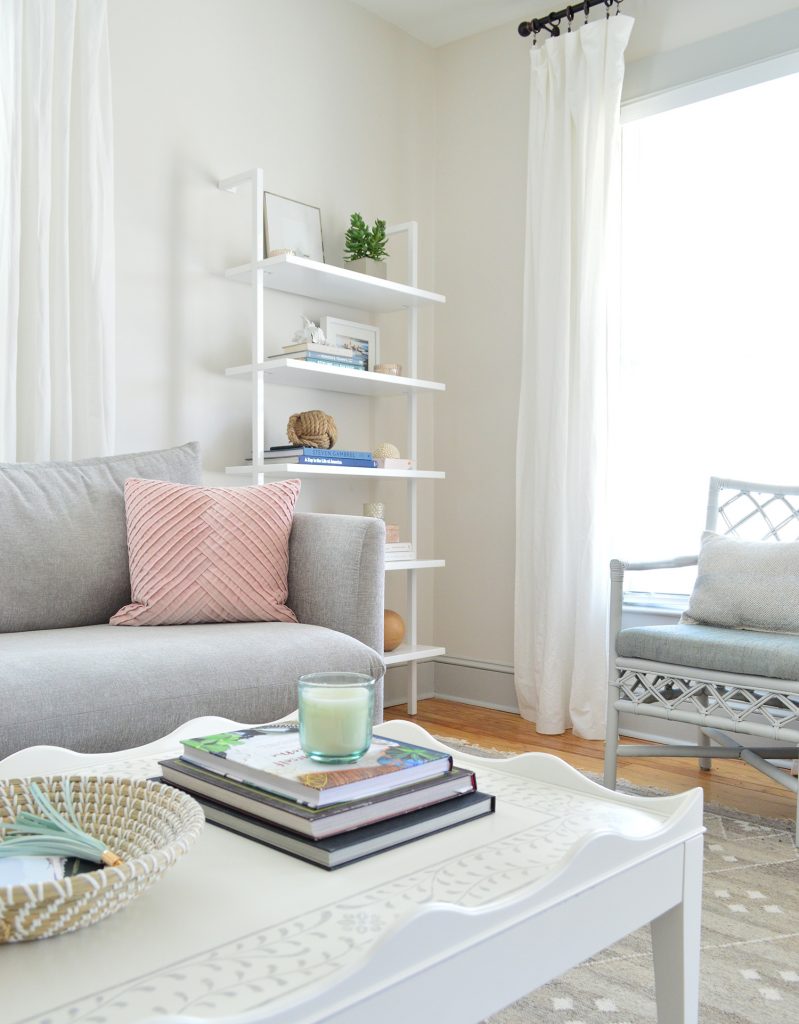 So imagine his palpable relief when he realized that his legs easily fit between the shallow rounded scallops, and he actually proclaimed it to be more comfortable than our coffee table at home (which also has a small lip on top, but it’s sharper and not rounded/smoothed out). 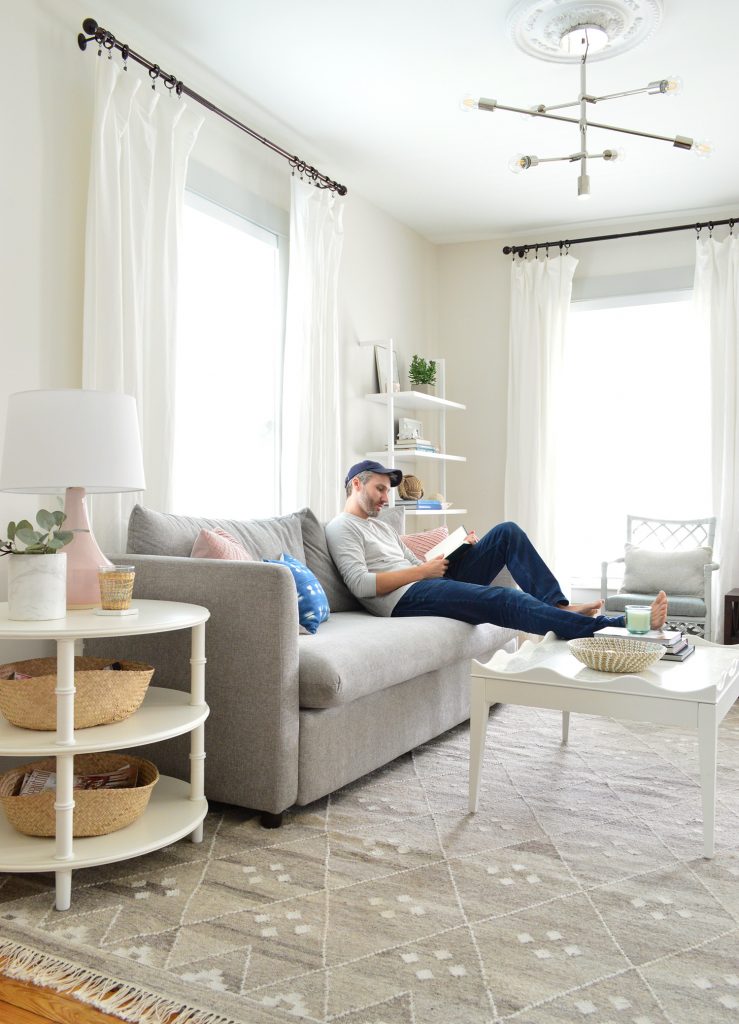 We’re also happy to report that the edge doesn’t get in the way of other tabletop activities like board games (you know we LOVE OUR BOARD GAMES). Actually the border does a nice job of corralling things. You know, if one of your crazy bear creations gets out of hand or you’re rolling dice and don’t want them flying all over the place. So if you DMed me about that, here’s your answer: works great for family board games – the scallops aren’t nearly tall enough to block your arms or anything like that. 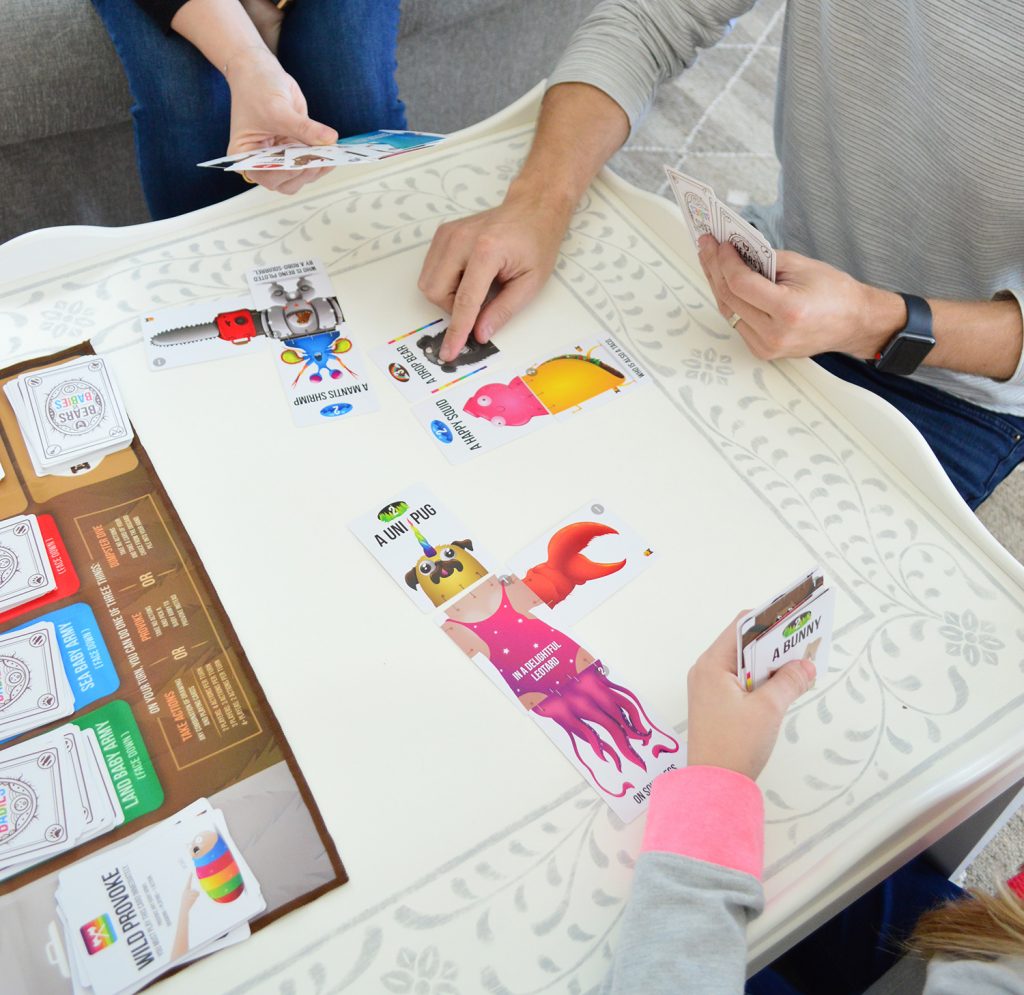 I also had someone message me to say “be sure to put a shallow little remote drawer in your next coffee table design!†and the good news is that this one already has one! I love a little hidden drawer to keep that stuff contained. 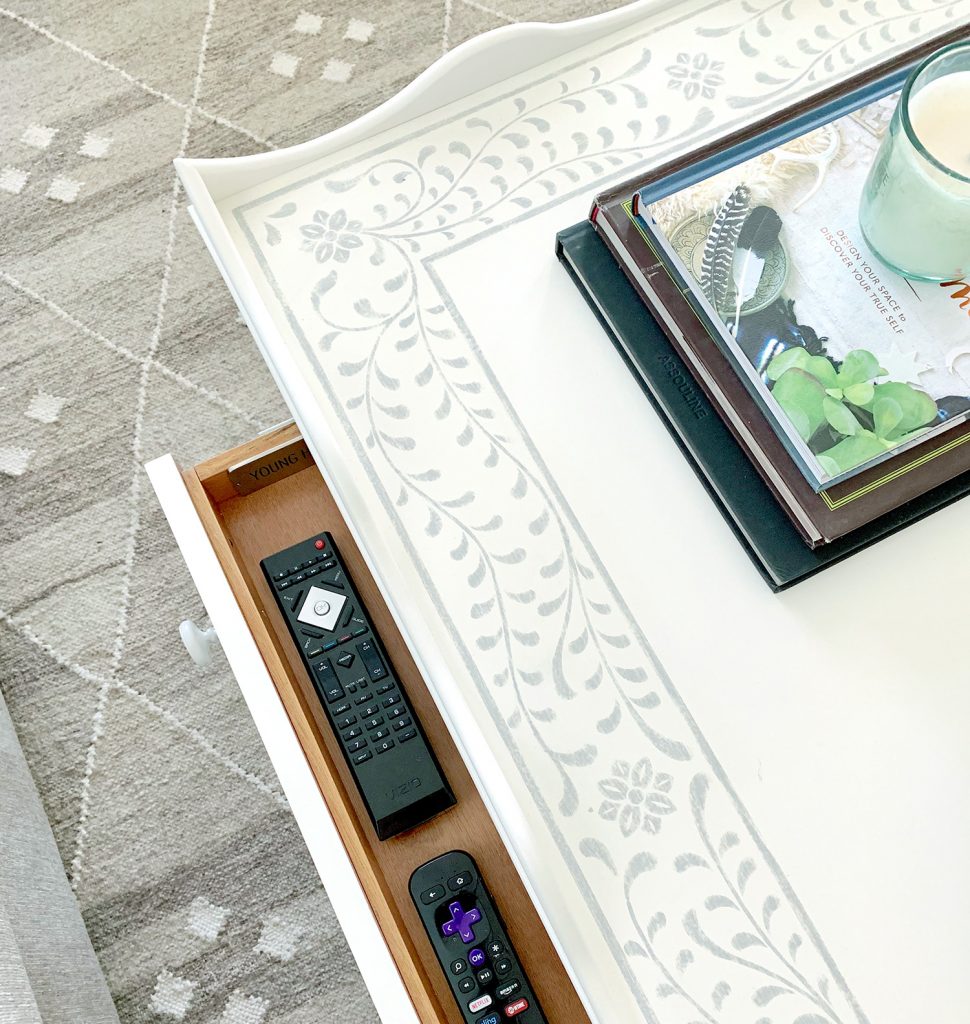 Also a note on living room layouts, because I FEEL YOU OUT THERE. THEY ARE HARD. This room has been evolving for over a year and a half now (I know, it feels like just yesterday that we furnished the beach house!), and we still have plans to mount the TV on the wall, possibly paint the walls, and change out those diamond backed chairs that are living by the windows, but more on that in a second. 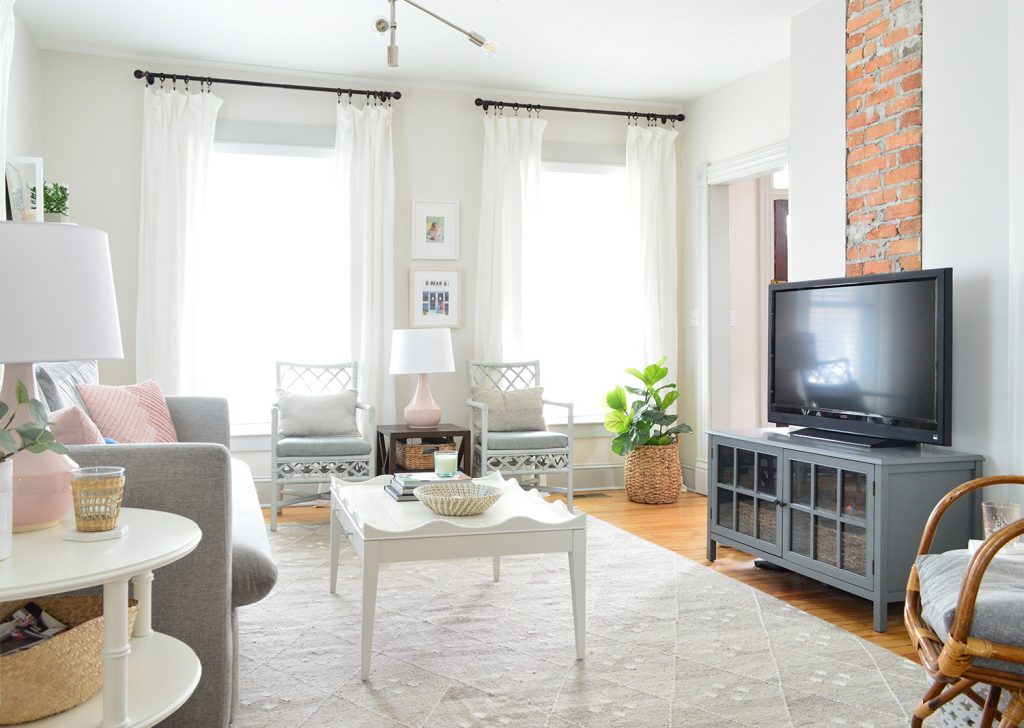 One of the reasons that living room layouts are tough is because we make assumptions about the way we live or the things we want and then we’re too nervous to try something else. So it’s hard to unlock a fresh solution if we’re stuck in the same thought patterns. Like for example, it sounds counterintuitive to say getting a smaller sofa can create more seating, but we learned last summer that trying to cram all of our guests onto a sectional wasn’t always the most comfortable or the most conducive to conversation. So we decided to try to “break up†the seating options a little more. With the chaise gone, we could also tuck a chair into the corner by the TV. So the sofa seats about three adults (the four of us fit on it just fine since the kids are smaller), and there are three other chairs in the room now, too. So even though your brain wants to believe that a sectional = the most seating, it’s not always true. 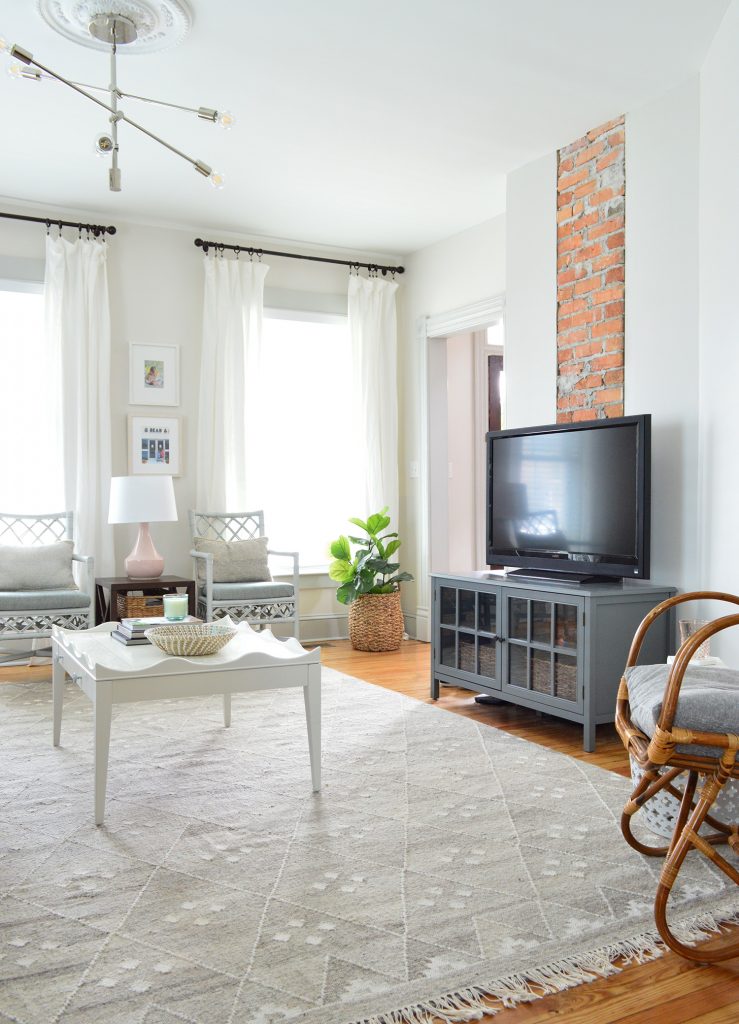 We’re still on the hunt to find some bigger / more relaxed feeling chairs for the window wall, but these thrifted ones (which you may remember from wayyyyy back in our old home office) are doing the trick for now. I spray painted them and recovered the seats to make them a little more neutral – and I always picture them ending up at the duplex because they have that diamond shape like the diamond windows over there. 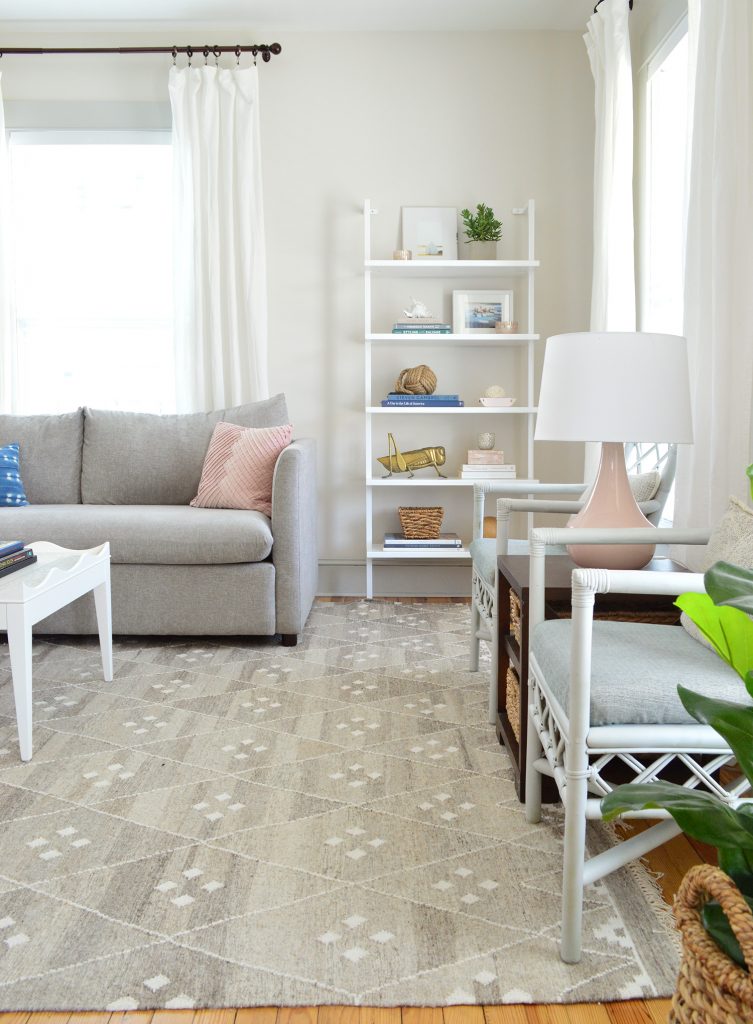 Oh and the rug. Let’s talk about that for a second. We recently had a slime incident. Not just a “slime got on the rug†issue, but a “slime sat on the rug for months under the chaise and I only discovered it when we switched the sofa out and it left a huge grease stain that everyone could see thanks to no longer having a chaise†issue. ARGH! But…. I got it out! After a lot of googling and some tips from people on InstaStories, the winning removal method was pouring white vinegar on the grease spot, letting it sit, scraping it with a spoon (to remove some leftover slime – it was actually “Thinking Puttyâ€) and after it dried I dabbed it with nail polish remover. That was key in lifting the grease stain and you can’t even see where it was! Plus it gives me a new appreciation that this rug has such a variety of gray tones! Those lighter and darker areas make it much more forgiving. Between that AND getting an immediate chocolate stain on the new sofa (which came right out dabbing it with water – thanks again, performance fabric!) – we feel like this room can take anything that these kids throw at it – both literally and figuratively. I mean… they might prove us wrong, but they’re gonna have to try harder than slime and chocolate… The last thing I’ll mention while we’re on the topic of updates at the beach house is our dining room chandeliers. A few months ago in our email newsletter, we showed how we swapped out the old capiz chandeliers for these from our lighting line, but I’m not sure we ever shared a picture on the blog. We love that they’re a little more substantial and the polished nickel details tie into the other light fixtures throughout the living room and the kitchen. 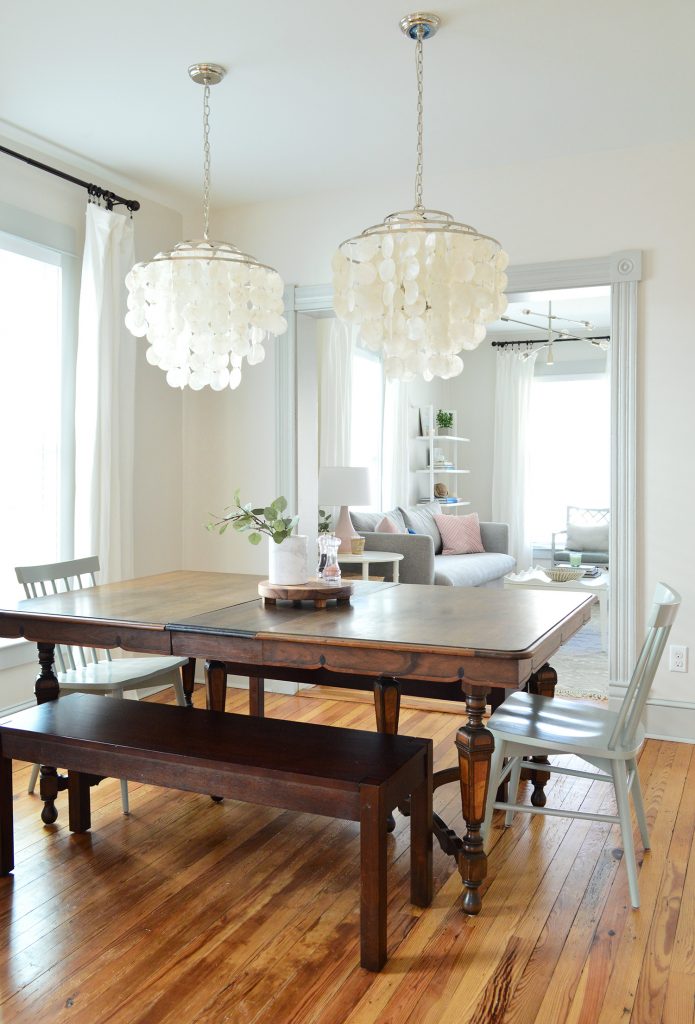 The previous chandeliers are now hanging in the master bedrooms at the duplex because it’s basically in the Sherry Petersik Decorating Handbook that every house we fix up must have a capiz fixture somewhere. And you know I love playing musical furniture & light fixtures! (p.s. this is a TV concept, I just don’t want to actually be on tv – but someone please make a series about switching things you already have around like that old show on HGTV called Freestyle and I’d be SO INTO IT! It goes back to my love of staging houses and being scrappy with things you already have on hand). 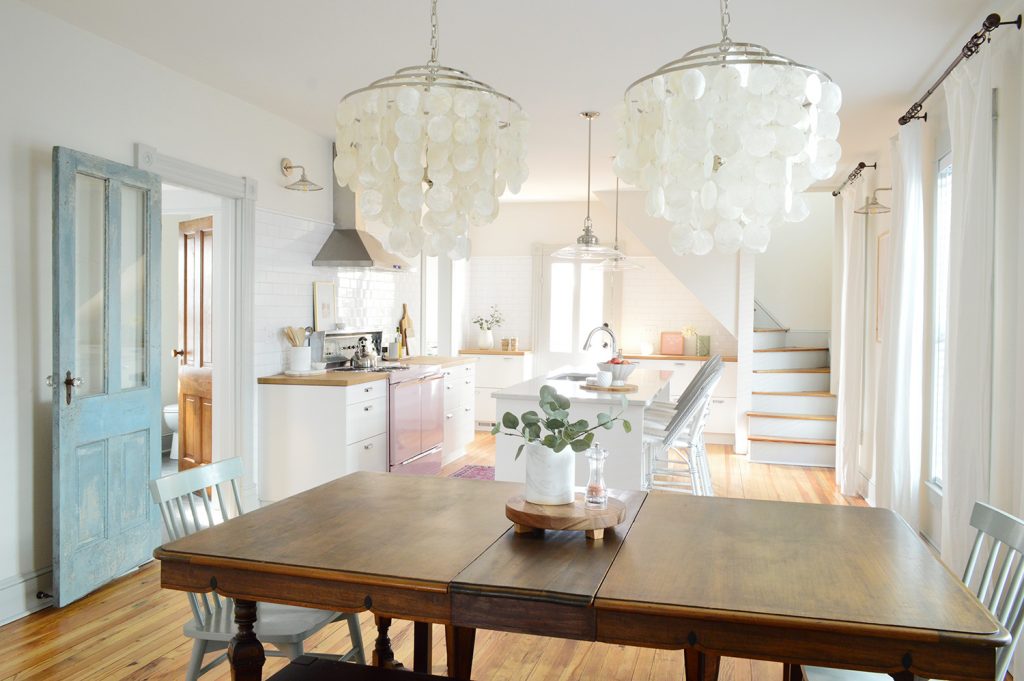 So there are our latest beach house updates – and I hope it’s comforting to hear that sometimes rooms take a little while to figure out, and it’s totally not a failure to move things around and keep experimenting and trying new things. Even in our very first home I used to rearrange stuff all the time! There truly is no better way to get a quick makeover. If you want to catch some of our furniture while it’s on flash sale, it’s only on Joss & Main this week (actually, like only 3 more days). And if you want to learn more about the whole furniture designing process, here’s a post we wrote all about that. And for more on our (well, mostly John’s) idea of painting the living room walls a new color, that’s on this week’s podcast. We tried out some trendy online paint companies to see if they really would make picking paint colors easier… *This post contains affiliate links* The post Making A Light & Airy Living Room (That’s Still Livable!) appeared first on Young House Love. Via https://www.younghouselove.com/lighter-beach-house-living-room/ We were both pretty shocked about the results of going completely without television for a while – especially Sherry. So today we’re sharing what we learned, what was hard, and the side effects that even we didn’t see coming. Not to mention the big question of how it will impact our viewing habits moving forward. We also tried a new paint picking method to see if it could solve a wall color conundrum at the beach house. Plus, Sherry updates you on her “tooth jail†sentence and I bask in the nerdy glory of pairing paint with geography. You can download this episode from Apple Podcasts, Google Podcasts, Stitcher, TuneIn Radio, and Spotify – or listen to it below! Note: If you’re reading in a feed reader, you may have to click through to the post to see the player. What’s New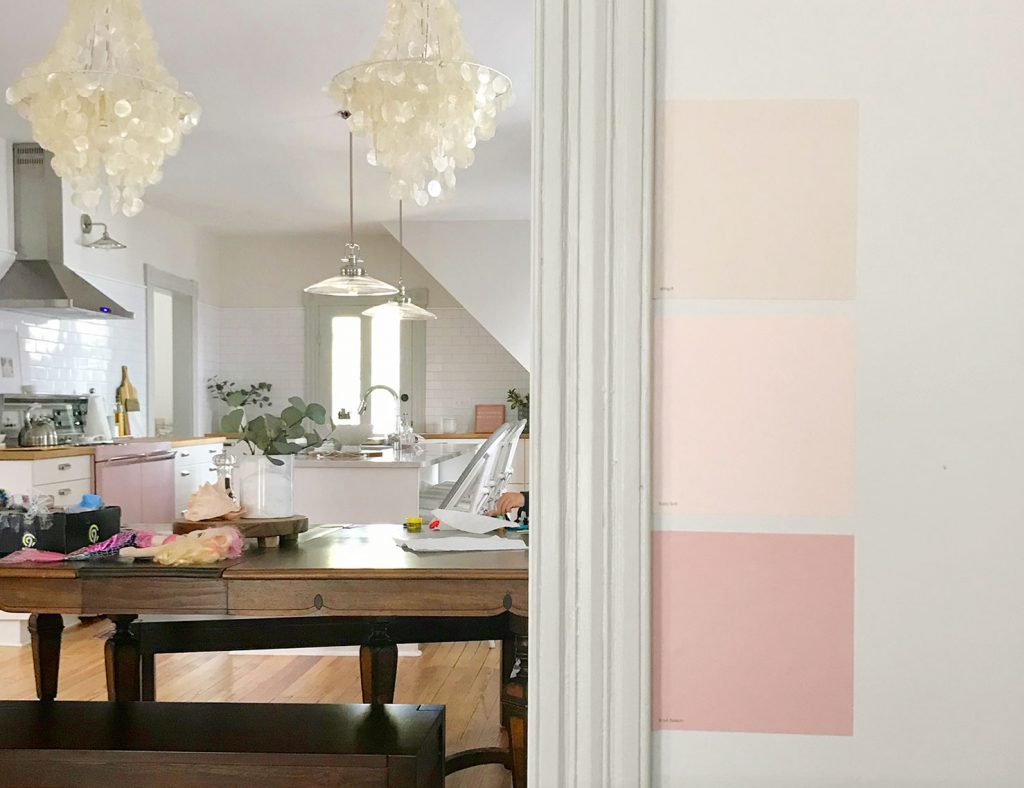

State Your Colors Quiz

TV Free Week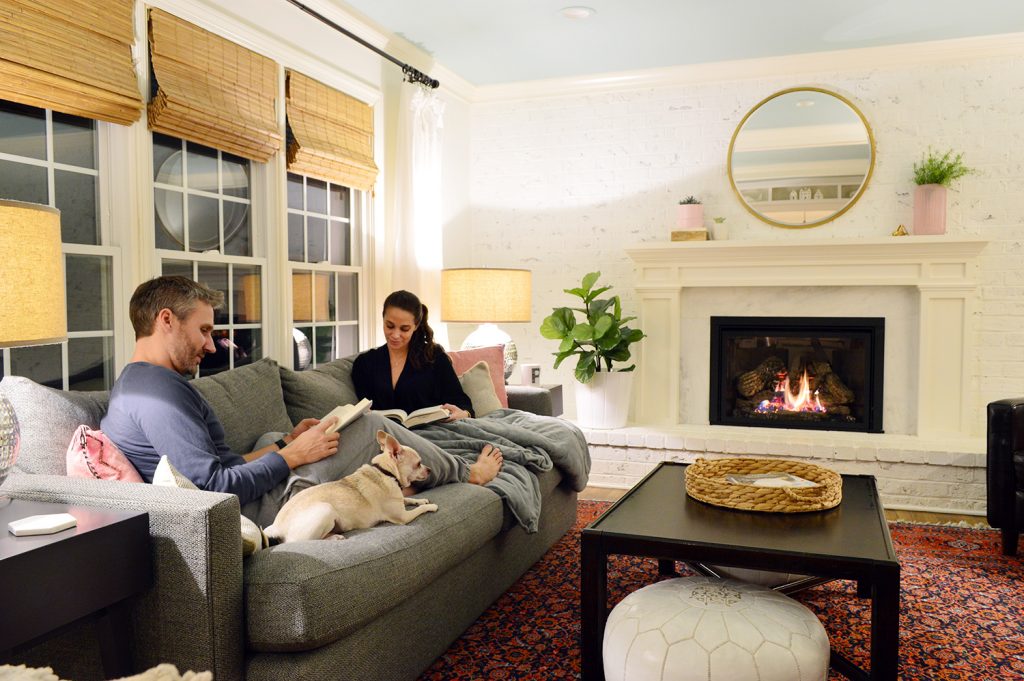
 We’re Digging
If you’re looking for something we’ve dug in a past episode, but don’t remember which show notes to click into, here’s a master list of everything we’ve been digging from all of our past episodes. You can also see all the books we’ve recommended on our Book Club page. And lastly, a big thank you to Agility Bed for sponsoring this episode. During their Presidents’ Day sale, enter the code PRESIDENT at AgilityBed.com to get $150 off any size mattress plus a free pair of Therapedic TruCool Memory Foam Pillows! 
Thanks for listening, guys! *This post contains affiliate links* The post #131: The Surprising Side Effects Of Going TV Free appeared first on Young House Love. Via https://www.younghouselove.com/podcast-131/ You know we painted our front door a new color back when we painted our brick house white in October, and I even mentioned back in that post that I used a new-ish specialty paint that’s made for front doors. It’s called Grand Entrance by Benjamin Moore and the paint color is Tranquility also by Benjamin Moore, and it can either be made in a satin base or a super hyper glossy mirror finish base. Based on all of those excited adjectives I used to describe the latter option, it should be of no surprise to you that I jumped at the chance to buy and try “high gloss” for the first time. 
Photos don’t do it justice. I mean the picture above is nice, but you don’t get the shiny and luxe effect at all (which is especially awesome in contrast to the super matte paint that we used on our bricks). This paint is so shiny, you can see your reflection in it. Basically Cardi B would scream MONEY if she saw it. It’s amazing and EVEN THE FED-EX GUY NOTICED AND SAID IT’S SUPER COOL AND RAN HIS HANDS ACROSS IT LIKE A DOOR PAINT AD! (Have I mentioned that I paid for this and it’s not sponsored or anything? I’m just really into this stuff). In the picture below you can kind of see how glossy and mirror-like the finish is. See how my fingers are reflected in the paint? They would’t do that with semi gloss paint, which is what’s typically used for interior and exterior doors. 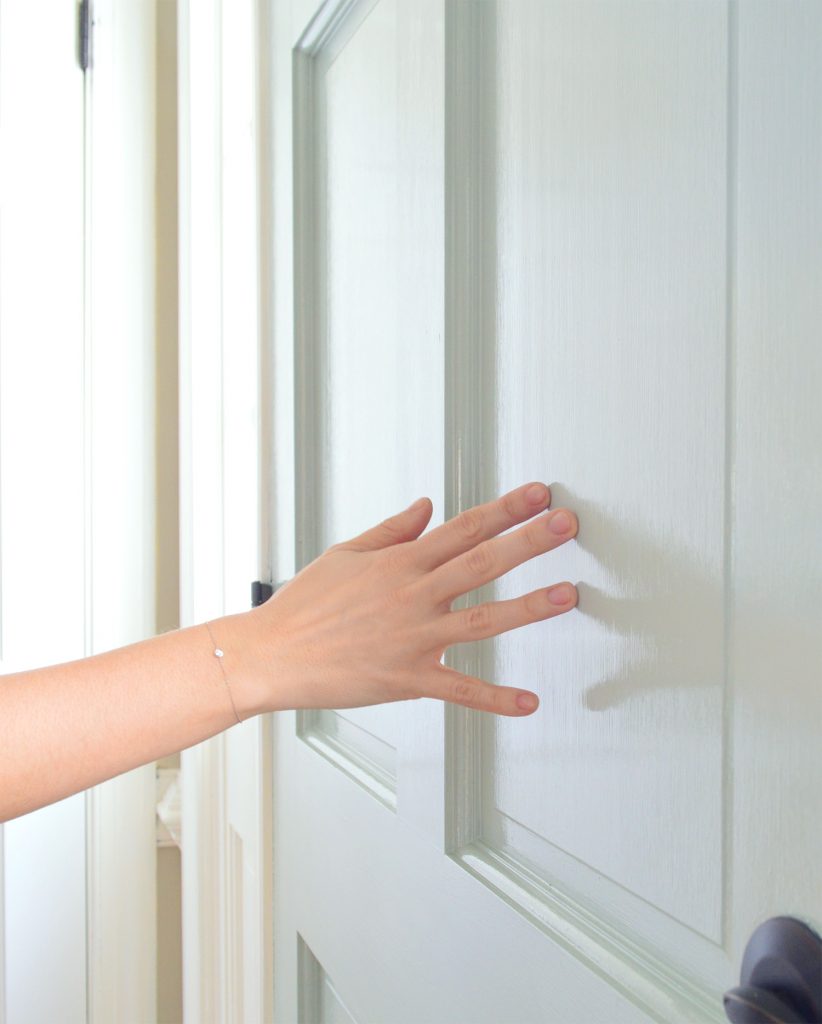
Not only did I take this paint for a test drive on both sides of our front door, I’ve slowly been working my way around the rest of the house, repainting all of the exterior doors. And after so much door painting (I’ve done four doors and counting in this same color with this same product) I have a bunch of tips & tricks to share, as well as a video of the process. Videos always seem to help me when I’m looking for a tutorial online – and best of all, it captures the shine on the door in a way that these photos don’t. 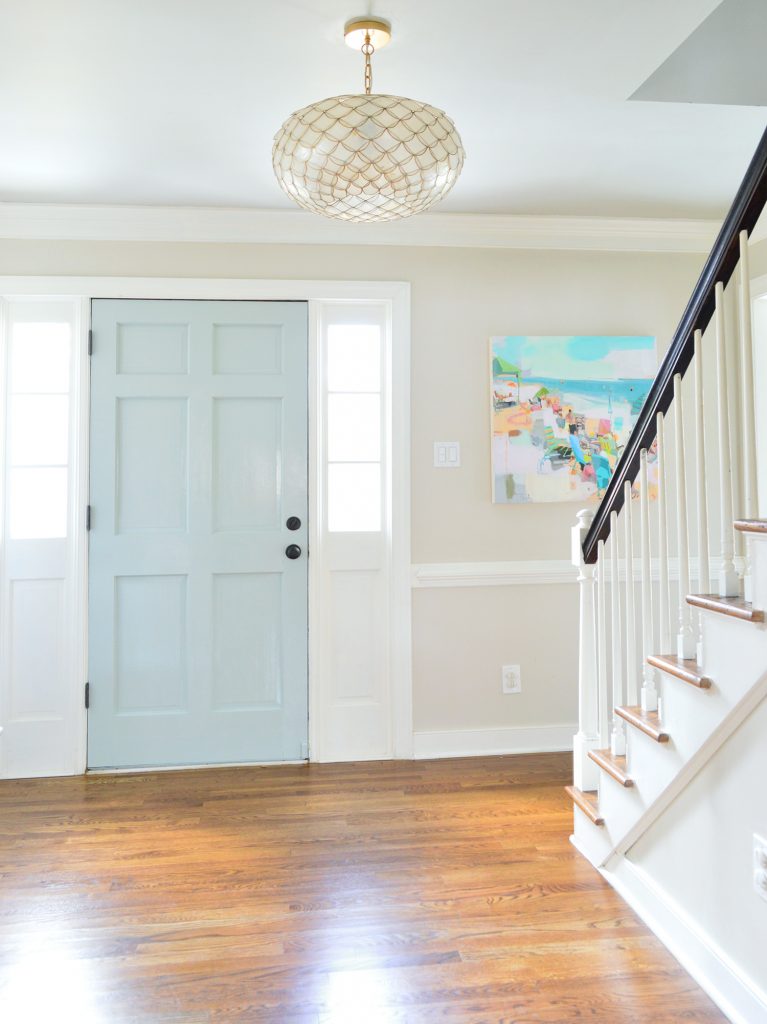
You can kind of see the light gleaming off the right side of the door panel above the handle in the photo above, but again, the glossiness is kinda lost in these pics, so make sure you watch the video. That’s where these doors really shine. Har har. There’s actually a super premium brand of paint called Fine Paints of Europe that costs $110 to $150 FOR A QUART OF PAINT, which sounds insane (is it made of GOLD?! Will it FOLD YOUR LAUNDRY?!) but it does look amazing. Super shiny. I just wasn’t ready to make it rain that hard with my painting budget, so I thought I’d try Grand Entrance, which it’s basically Benjamin Moore’s take on that same look, and it runs $44 a quart. 
That’s still a TON OF MONEY FOR A QUART, but I still have about 1/4 of the quart left and I’ve painted four doors (one on both sides, and the other three on one side since the other side of the door is staying white) so around $11 a door feels completely fine to me. Ok, so that’s why I love it. Now let’s get into the HOW of applying it. I just need to stress something I have already said, but feel like I need to say again, with emphasis. It’s really great looking…. but you can mess it up, so you have to do it right. Or you’re not going to be shout-it-from-the-rooftops-happy with the results like I am right now. You might actually hate it and have to redo your door. So this is one of those prep-and-diligence-actually-matters projects! 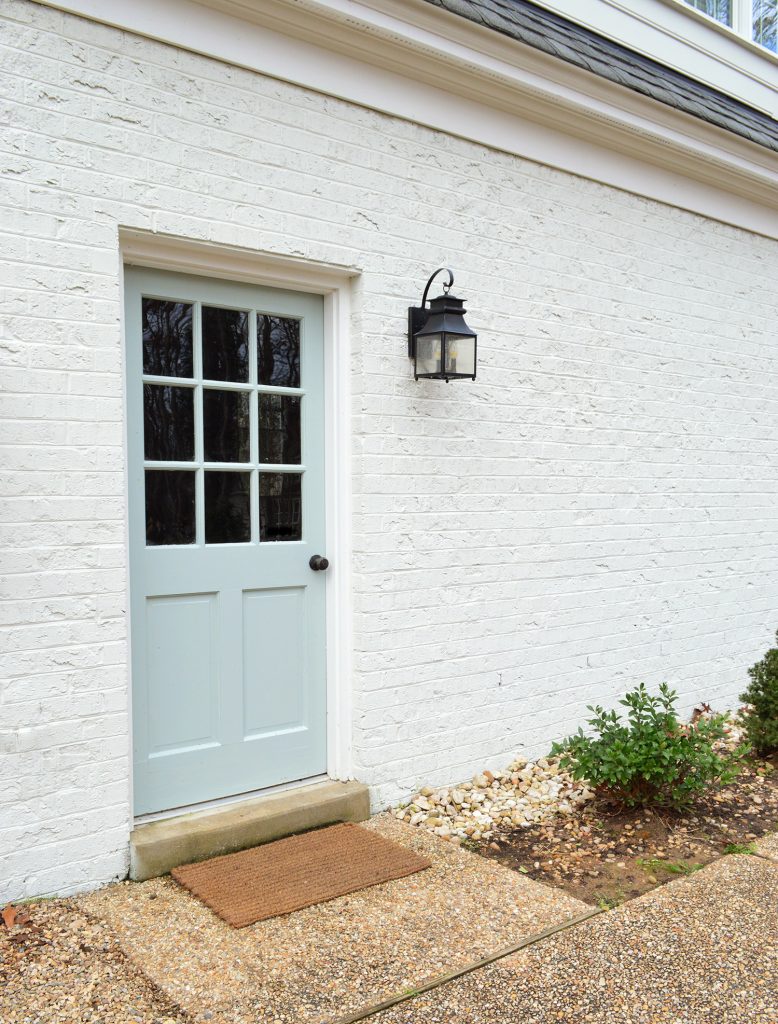
To further explain what I’m getting at, let’s go back to that Fine Paints Of Europe brand for a second. My friend shelled out over $120 for a quart to paint her front door a glossy red color up in DC. And even hired a handyman to paint it for her so she’d get the best result… and it was bad. Like so bad he had to sand it off and repaint it with regular paint. The paint itself wasn’t bad, but applying super high gloss paint is not for the faint of heart. It can magnify every last flaw on a door, so with improper prep, it can look battered and bruised and MUCH MORE dinged up than it did with regular old semi-gloss paint on it. You have to sand every last bump down before you paint, so that is lesson numero uno. Fill any crack. Sand any raised part. Scrub it down so it’s not covered with dirt or cobwebs. This paint shows no mercy if you skip that step. After my friend had that experience, I got super wary of high gloss paint (literally every expert says it’s the hardest to use since it magnifies flaws) but something compelled me to give it a try when we painted the house white. I walked into the paint store and I just felt like I needed to try it because I knew it would look amazing next to the extra matte brick paint we chose. And I’m SO GLAD I went for it.
Here I am painting the kitchen door that leads out to the garage, which had been a lighter and more chalky blue, but with the foyer door repainted, I wanted the kitchen one to match and have that same high gloss texture (which also looks great next to the tumbled marble tile). P.S. I paint with my clothes inside out, hence the tags you see below. 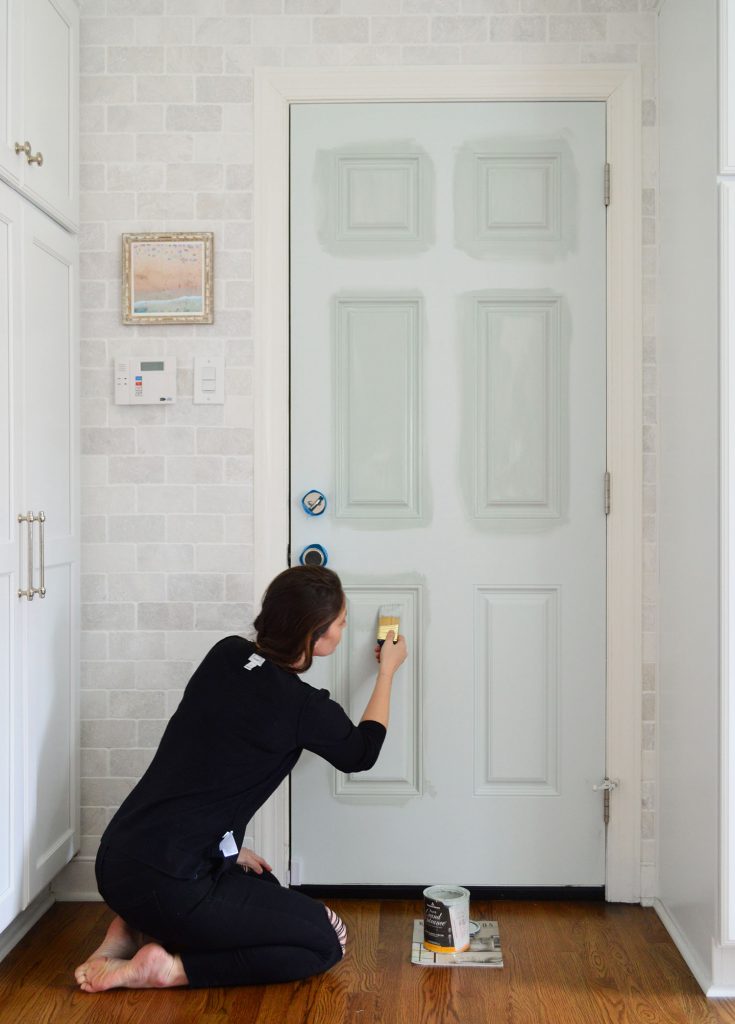
As for WHAT to use to paint with this stuff, I used a brush on every single part of every single door that I painted. I know that sounds weird. You’ll be tempted to ask me if you should spray it or use a small foam roller for a better result. The answer is no, use a high quality 2″ angled brush (this is our favorite kind), which will leave some subtle brush strokes, which you can sort of see here…
… but you’re bound to end up with SOME sort of stippled texture from your roller or sprayer with high gloss paint that shows this much of everything, so the long smooth brush strokes are actually much more pleasing to the eye when it comes to a project like this. We love how ours turned out. In fact, the pro painter who did our house’s brick exterior told me he only uses brushes for doors with high gloss paint. So there you go. Your girl $herdog & Lance The Pro Painter are Hashtag Team Brush for this project. 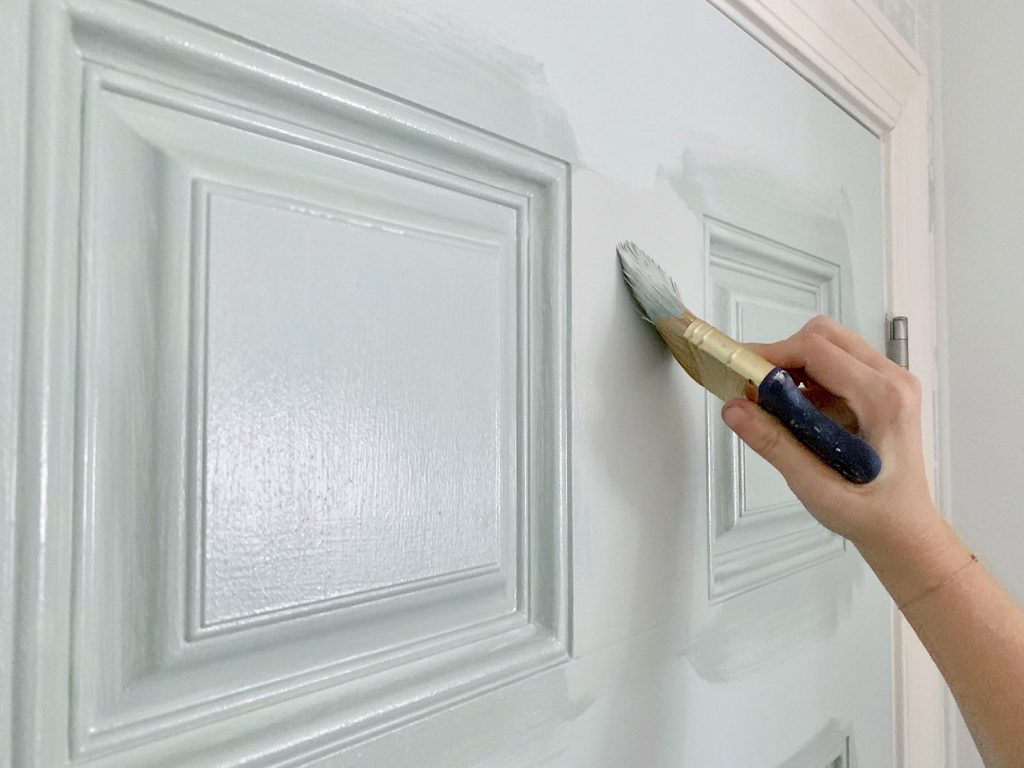
As for the process, when I’m painting any door with panels on it, I follow this order:
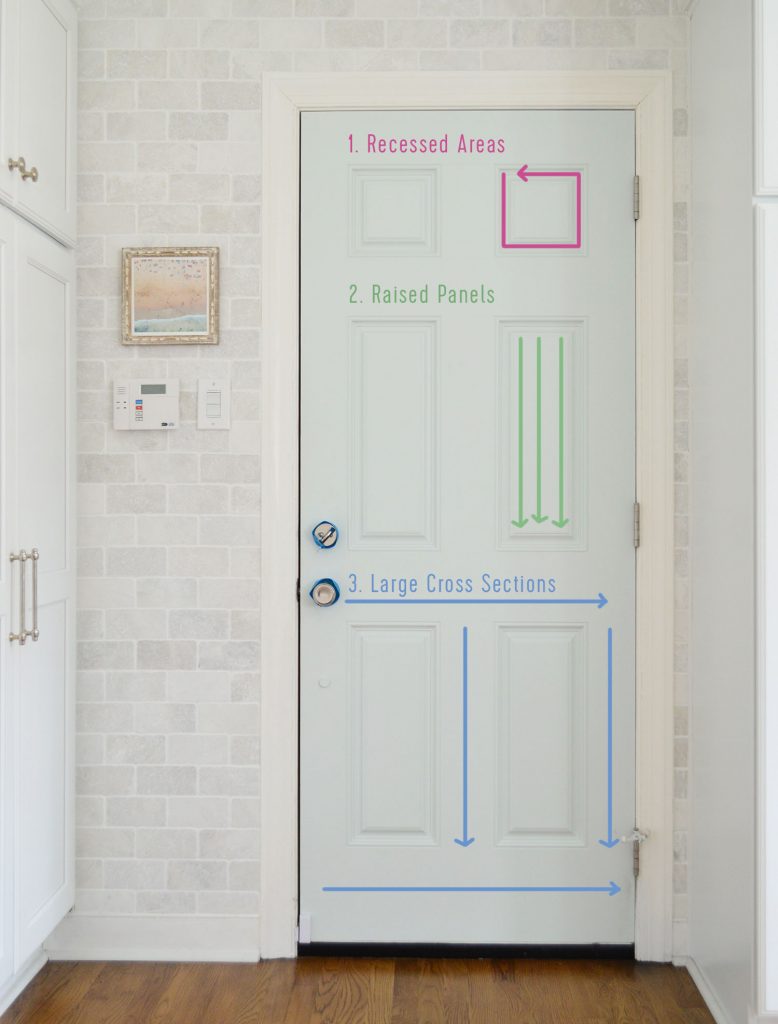
If you want to see the process in action (and see the super shiny result much better than in a still photo), John shot a quick video of me putting the first coat of the very last door on my list: NOTE: If you’re viewing this post in a reader, you may need to click through to see the video. You can also watch it here on YouTube. Oh but one thing to note, if you’re using this on doors with glass windows, I’m a fan of the paint-on-the-window-and-razor-it-off-later method, but this paint dries as hard as a diamond. Like for real. It’s Housewives tagline would be: “Diamonds might be shiny and hard, and darling, so am I” (*spin to camera to reveal super glossy shine*). So my big tip is that scraping it after waiting too long is super difficult. It was dulling my new blades in about a minute. So if you get paint on the glass, don’t wait a week to scrape it off like I did – attack it within a day or two if you can. You can see in the picture below that the door that leads to our garage used to be white when the house got painted. I’ll take a wider shot in the spring once the back yard doesn’t look all bleak and wintery, but it’s really nice to have a hit of shiny blue paint on that door, as well as on the french door that leads into the living room on the other side of the house. 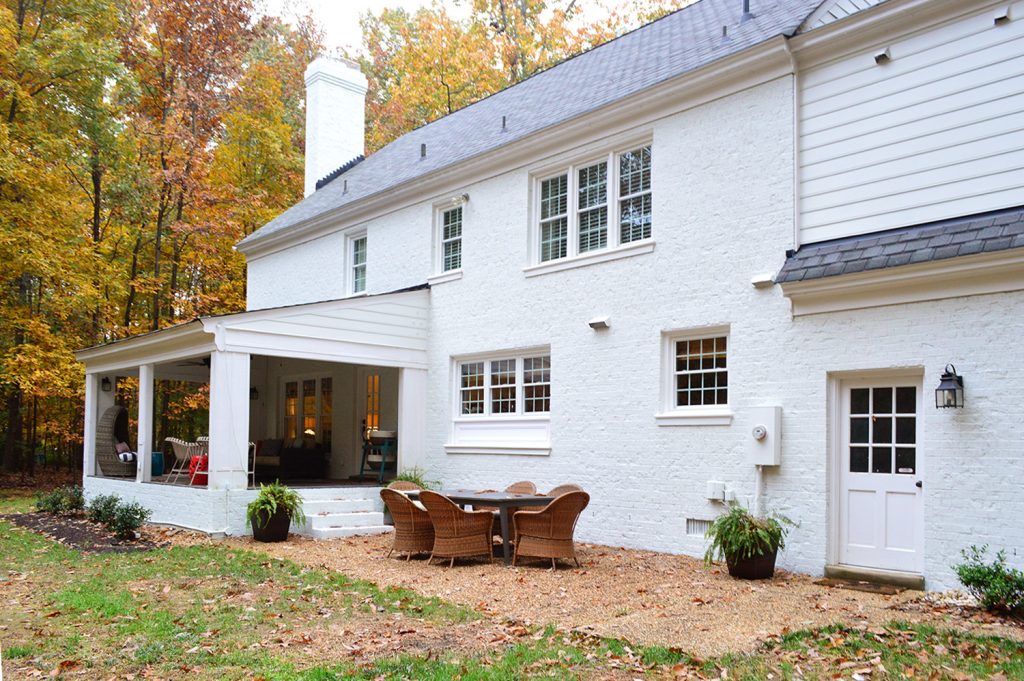
Here’s that other back door up close, which is under our covered porch and leads to the living room. 
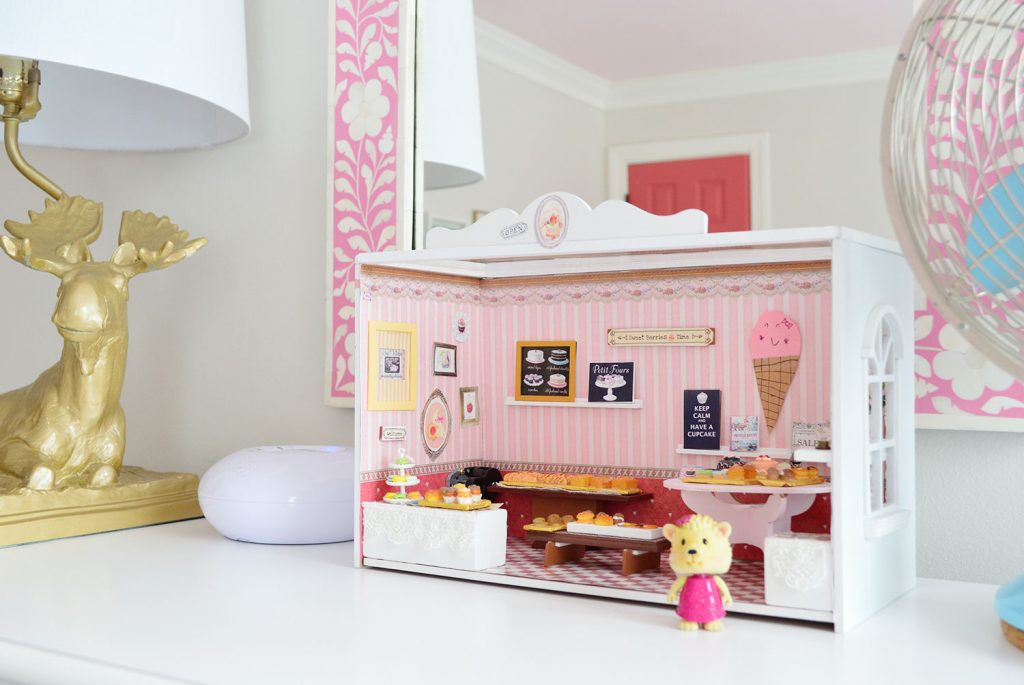
So there ya go. I hope hearing about this paint is helpful, and the video demystifies how I tackle a project like this. Most of all, if you’re my friend or neighbor who is reading this, you are totally invited to come pet my front door like the Fed-Ex guy. It really is my happy place to sing this paint’s praises to anyone who will listen. Oh and to revisit our post about painting the house’s exterior brick (what we used, how long it took, how much it cost) you can click here. And who remembers when we converted the back room off of the living room from a stinky sunroom into a covered porch and lofted the ceiling? Here’s a post about removing the sliding doors (and one about planking the ceiling and one about tiling the formerly carpeted floor). *This post contains affiliate links* The post My New Favorite Front Door Paint (& Tips For Painting A Door) appeared first on Young House Love. Via https://www.younghouselove.com/favorite-high-gloss-door-paint/ Can the colors, furnishings, and accessories that we choose for our home actually make us feel quantifiably happier? Today we dive into the science of joy and learn how some tried-and-true design tricks might actually be affecting our daily moods (and how to make tasks that we don’t love a little more enjoyable). We also pin down a few ways that we’ve unknowingly added joy to our house, and a few others that could still use some work. Plus, the lesson we learned from waiting too long to give up on a piece of furniture, and a big dollhouse fail. You can download this episode from Apple Podcasts, Google Podcasts, Stitcher, TuneIn Radio, and Spotify – or listen to it below! Note: If you’re reading in a feed reader, you may have to click through to the post to see the player. What’s New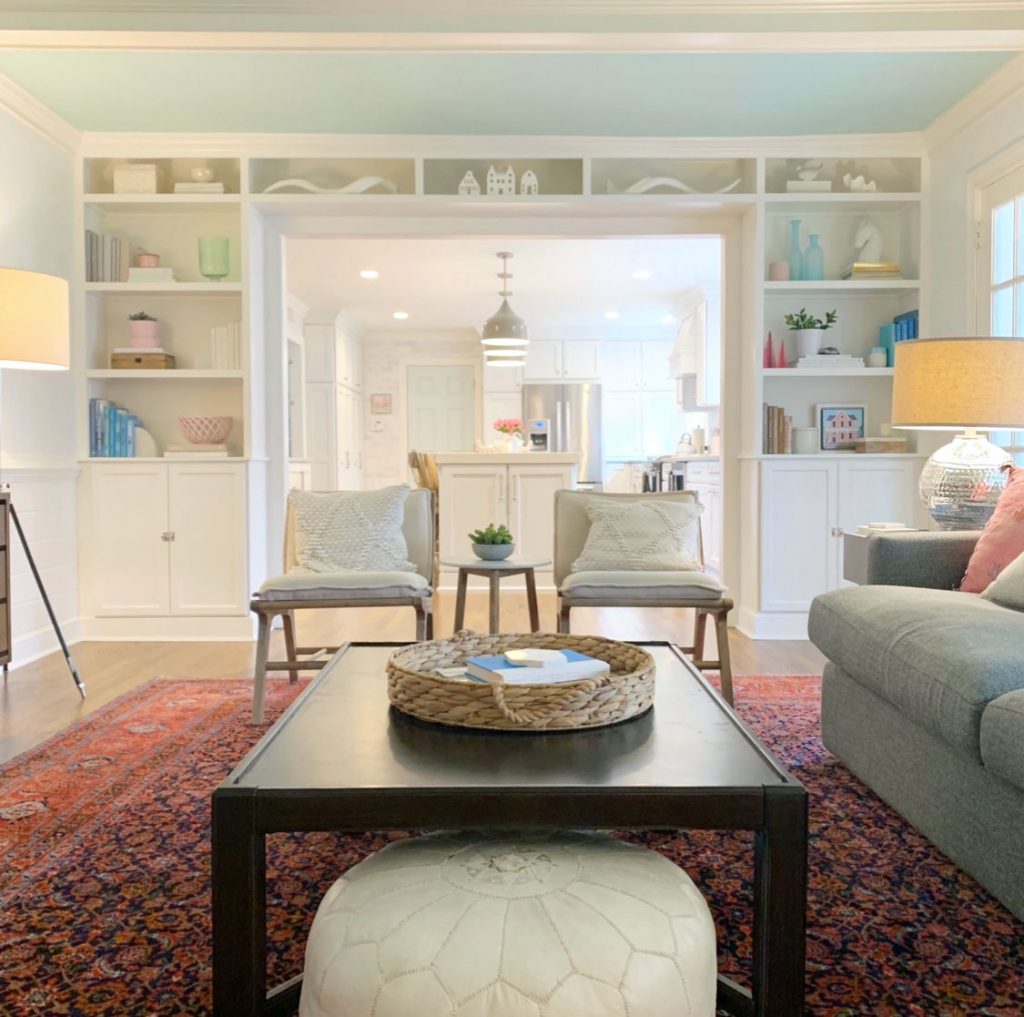

That’s Embarrassing
“Joyful†Decor Discussion

 We’re Digging

If you’re looking for something we’ve dug in a past episode, but don’t remember which show notes to click into, here’s a master list of everything we’ve been digging from all of our past episodes. You can also see all the books we’ve recommended on our Book Club page. And lastly, a big thank you to Annie Selke for sponsoring this episode. Their big Presidents’ Day sale kicks off this week on Thursday (Feb 14th, aka Valentine’s Day) and you can get 20% off basically the whole site! Check it out at annieselke.com/YHL. 
Thanks for listening, guys! *This post contains affiliate links* The post #130: Can Science Help Us Make Our Homes Happier? appeared first on Young House Love. Via https://www.younghouselove.com/podcast-130/ The duplex kitchens are looking more and more like real kitchens, and they took an especially big leap forward this past weekend after we got all of the cabinet hardware installed. But drilling holes into new cabinets can be scary and there’s not a whole lot of room for error or do-overs. So unless you’re a fan of buying a whole new door or drawer front, it’s important that you get everything centered and level on the first try. No pressure, right? 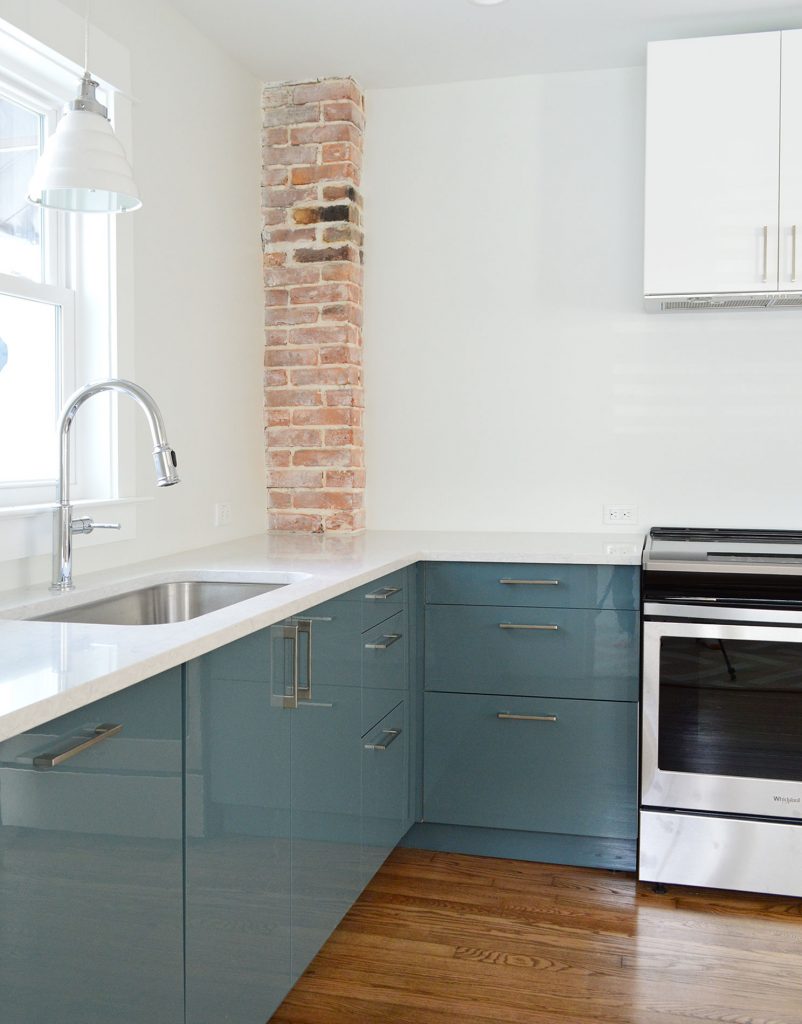 Thankfully, after installing three kitchens-worth of pulls and knobs in the last year and a half, we’ve perfected our system. So here’s how you can keep things straight, centered, consistent throughout the entire kitchen, and bring down the fear-factor when drilling into your brand new (or freshly refinished/repainted) cabinets.  We even included a short video that’ll take you through each step (and show you a sneak peek at the wood kitchen side of the duplex), so let’s get started. Installation Tools & Supplies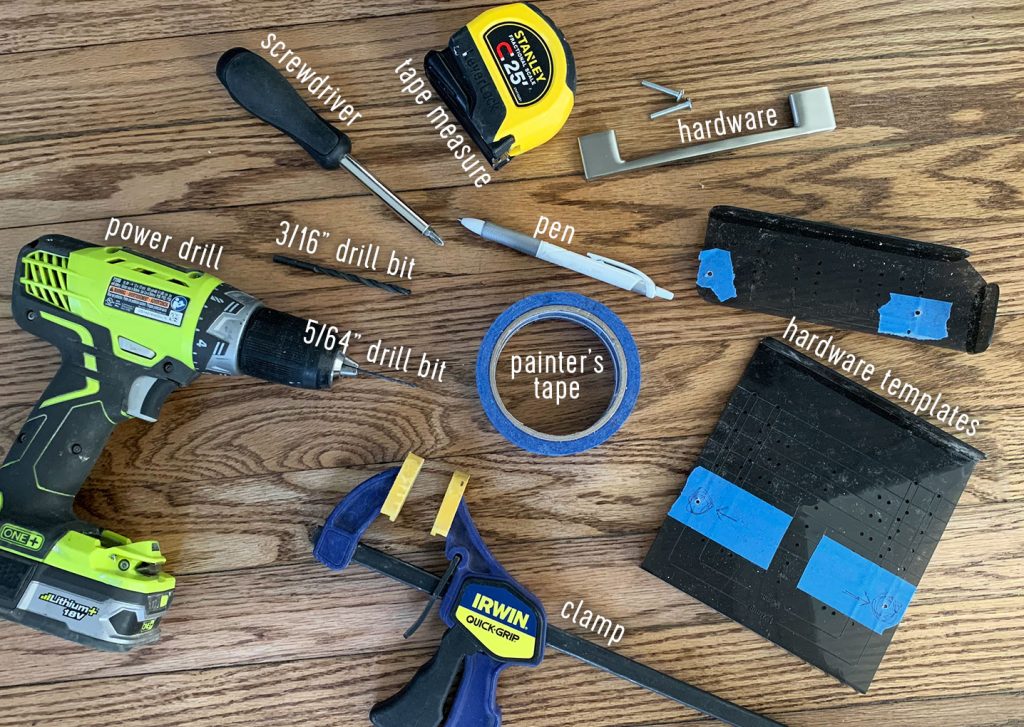 Here are the tools and supplies you’ll want to have on hand to help your installation go smoothly:
Video: Installing Your Cabinet PullsWe made a start-to-finish video while installing one set of drawers so you can see the process in real time. We’ve also shown each step in photos below if you’d prefer to see the steps that way, but the video will give you a really complete view of what’s involved (and show you a sneak peek of the wood kitchen side of the duplex). Plus you can play Where’s Waldo and try to spot Sherry’s slippers somewhere in this video. NOTE: If you’re viewing this in a feed reader you may need to click through to the original blog post see the video. You can also watch it here on YouTube. Step 1: Mark Your Hardware TemplatesThe hardware templates are the real heroes of this project, so if you’re hesitating to spend the $10 on them – THEY ARE COMPLETELY WORTH IT. They’ll save you so much time and stress. They have holes for all of the standard handle spreads (ours were 4″) and lots of options for how far down from the cabinet top you may want them placed (we did a 2″ drop). If you’re doing knobs, you’ll just use the holes down the center at whatever drop you choose, which is also nice and handy to keep things consistent. Once we’ve determined which holes will give us our desired handle placement, we use tape and a pen to mark them right on the template with a circle and a big arrow. There are a lot of holes in close proximity on these templates, and you don’t want to accidentally drill through the wrong one at any point, so whatever you have to do to idiot-proof the process is worth the few seconds it takes. This is what ours looks like after we’ve marked our chosen holes at the right spread (again, your pulls determine this – ours were 4″ pulls) and drop (remember we chose a 2″ drop for all of ours throughout the kitchen). 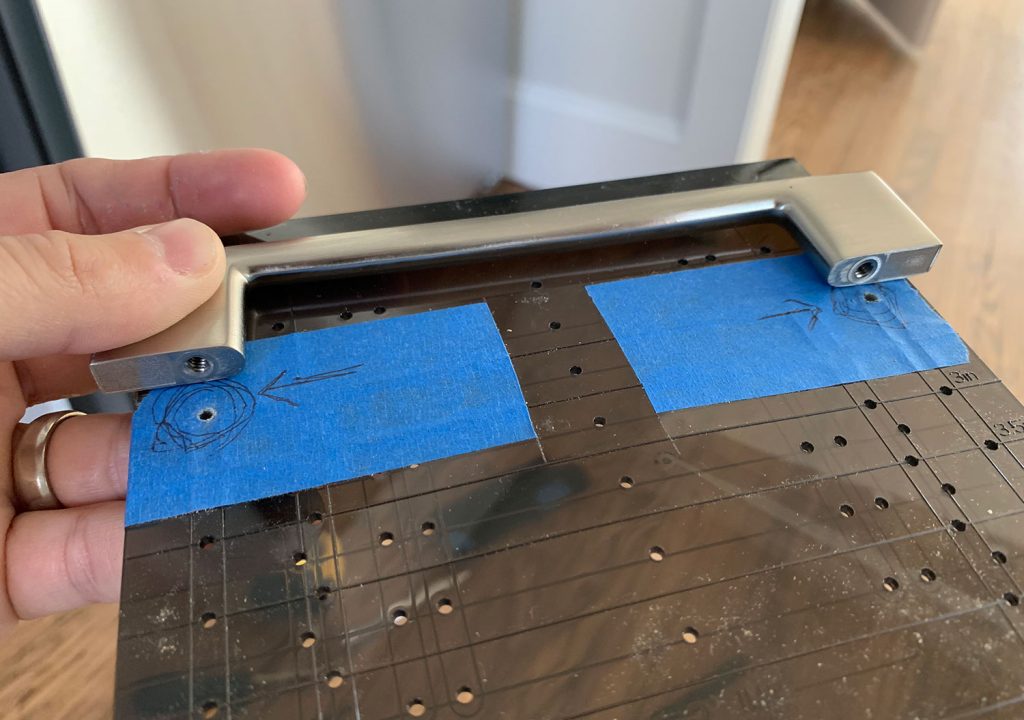 Step 2: Tape Off Your Cabinet FrontsBefore drilling, place painter’s tape roughly where you’re going to hang your hardware. This not only gives you a surface you can mark up without actually marking on your cabinets, it will also help prevent your cabinet finish from cracking or splitting as your drill into it. For efficiency, we like to tape off all of the drawers in one cabinet at the same time and work our way around the kitchen that way – just taking it one area at a time. 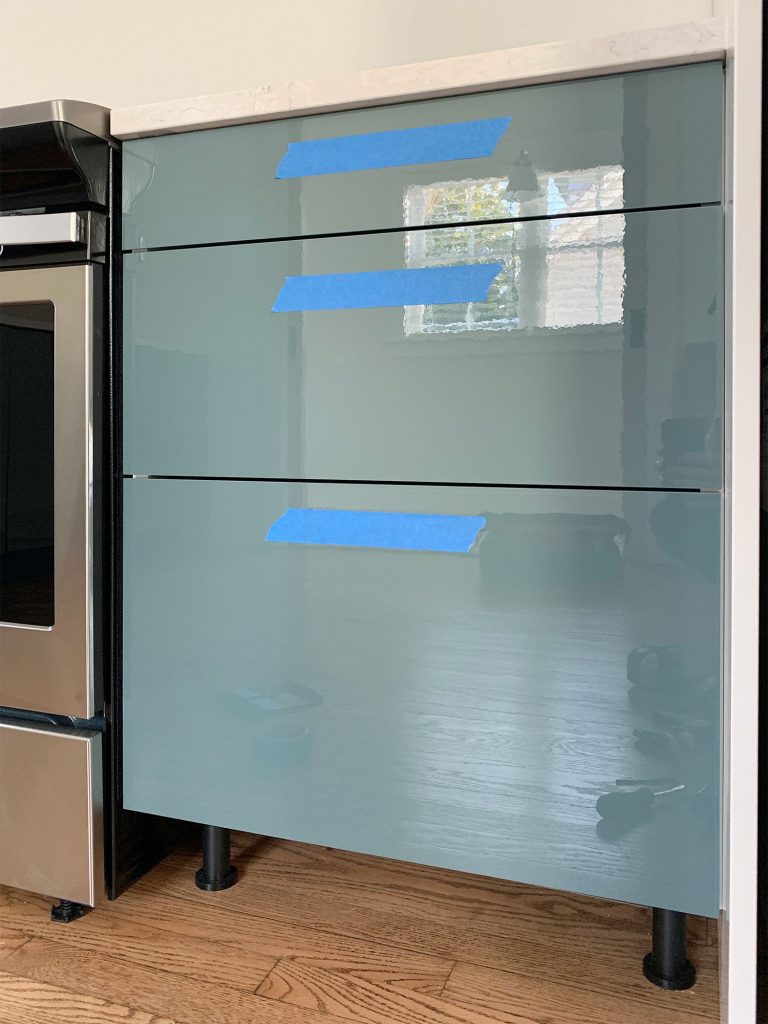 Step 3: Mark A Center Line On Each FrontThis step is important, especially on stacks of drawers like this because you’ll really notice if one handle is even slightly off-center or not level with the others. So we like to take our time and really triple check ourselves. First, measure the full width of your door. Even though ours is a 24″ base cabinet, the drawer fronts themselves are slightly smaller (23 7/8″). 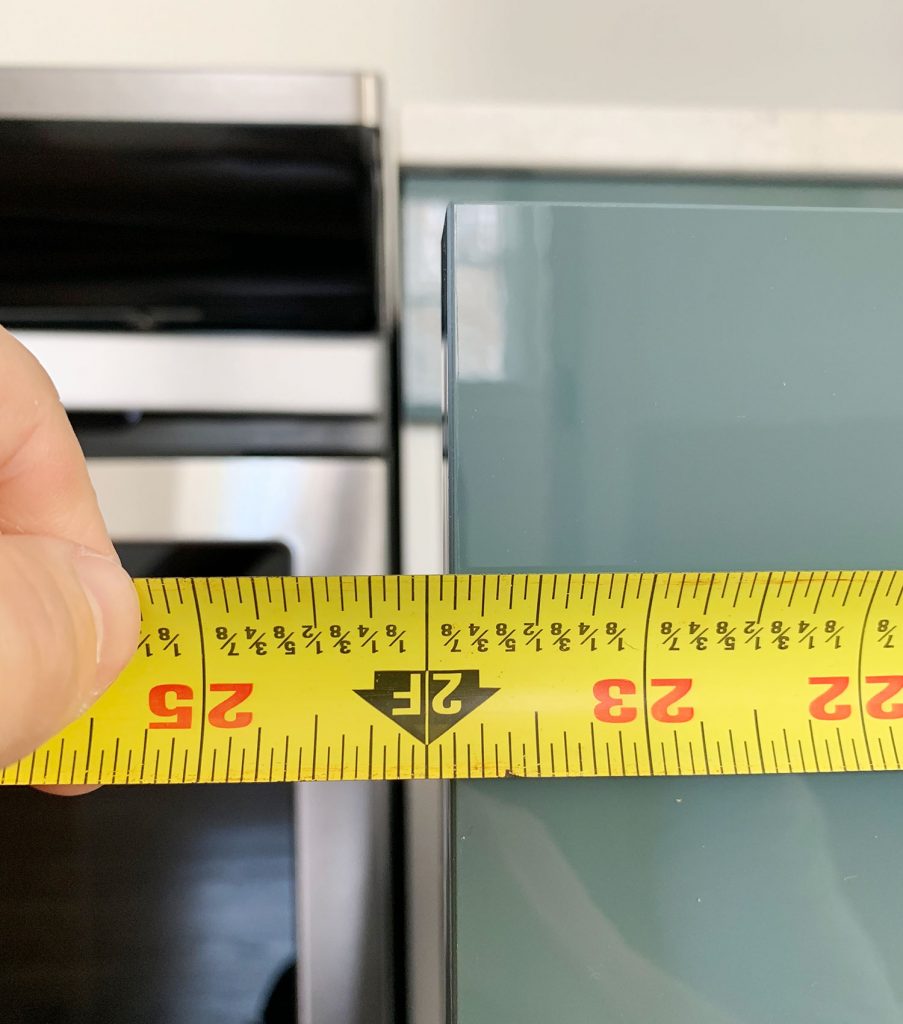 Then do whatever math you need to do to figure out half of your drawer front measurement (ours is 11 15/16″ – or just one tiny tick mark inside the 12″ line). Once you’re certain of your center measurement, mark it on your blue tape – then double-check yourself by measuring again from the OTHER side of the drawer to make sure it’s the same on both sides. 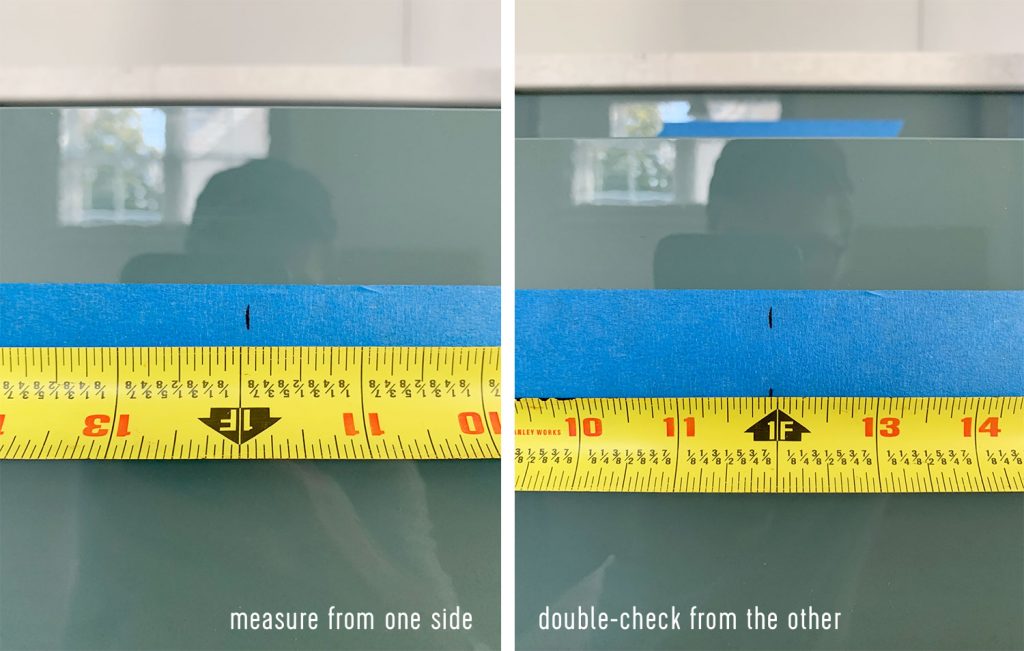 I know that last step may seem like overkill, but we caught our own mistakes a couple of times during this installation (once you’re on your 20th drawer, 12 15/16″ starts to look a lot like 11 15/16″). So double-checking from the other side saved us more than once from some badly placed holes. Once you’ve marked the center on each drawer (you may even want to do a quick visual confirmation that they seem to line up with one another) draw your marks a little bigger so they’ll be easier to see in the next step, and step back to make sure they all look lined up. 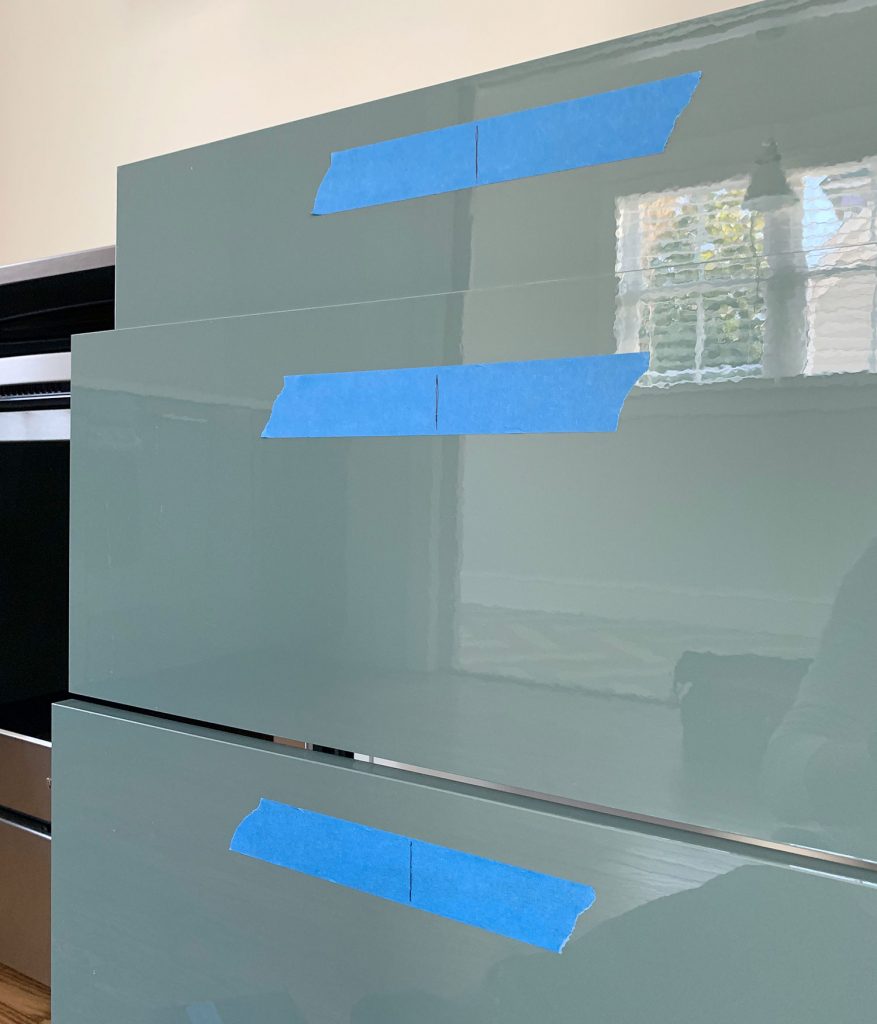 Step 4: Line Up Your Hardware TemplateOn your first drawer, rest the hardware template’s lip on the top of your drawer and then center it over the lines you just marked. This was a little easier with our old template (which was clear) but with enough squinting through those center holes on the template, we could see our premarked line on the blue tape behind it. 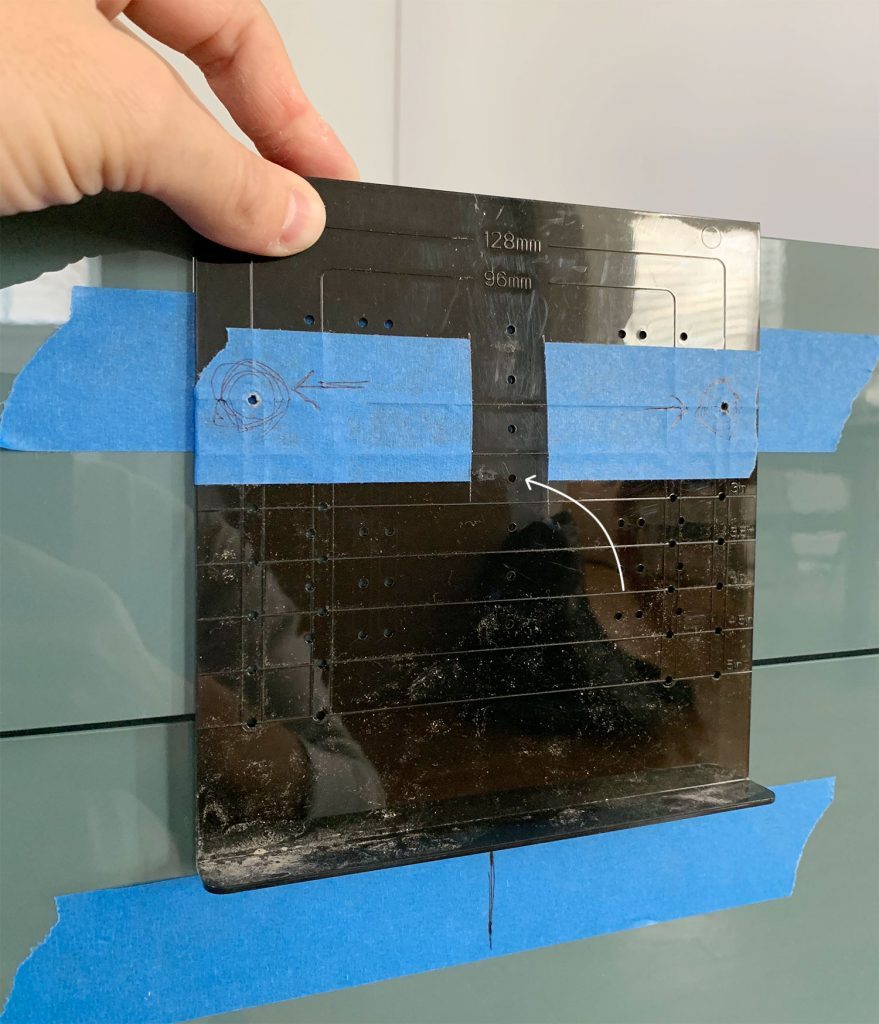 Once you’re sure you’ve got the template centered on your marked line AND evenly resting on the top of the drawer, we like to clamp ours in place so it doesn’t move during the next step. 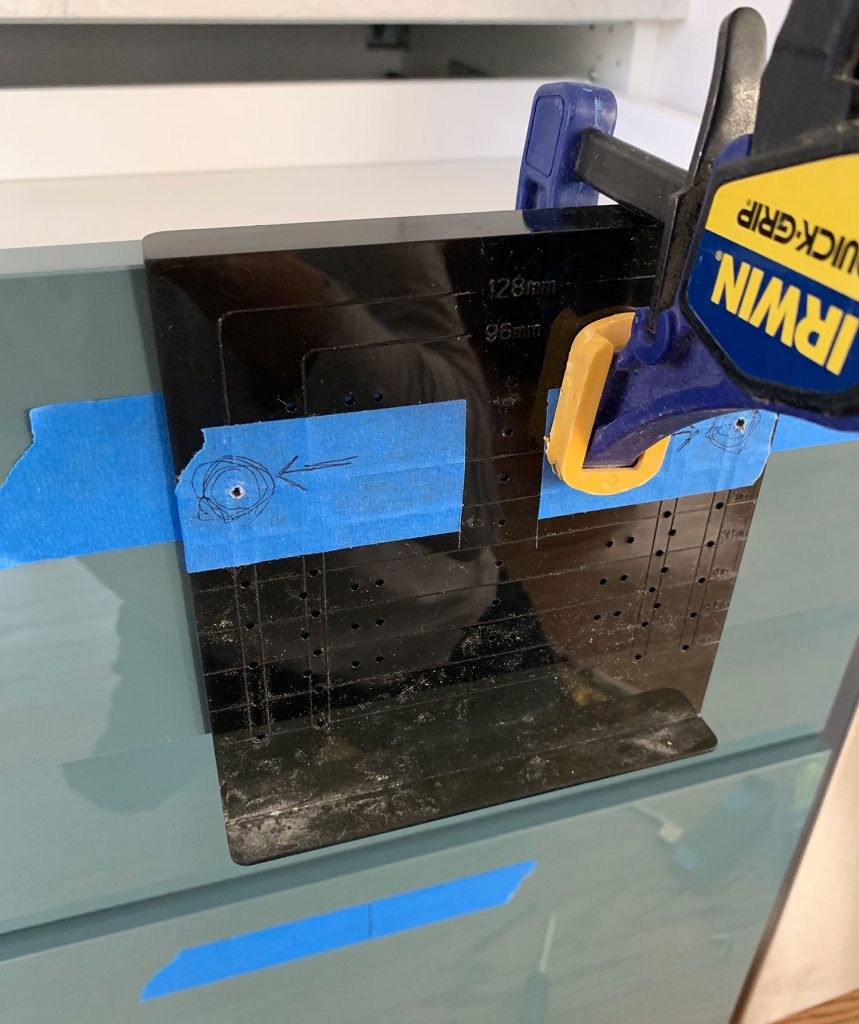 Step 5: Drill Pilot Holes Through Your Hardware TemplateSome people prefer to just mark their handle holes through their template with a pen (remember these are the holes in the template that you taped off with the arrow pointing at them), but we find that we’re able to get a much more precise hole if we drill directly through the hole in the template. You’ll need a pretty small drill bit to do this (ours was 5/64″) but you’d want to drill a small pilot hole to start each hole anyway (before moving onto the larger bit) so it’s nice to just do it through the template. 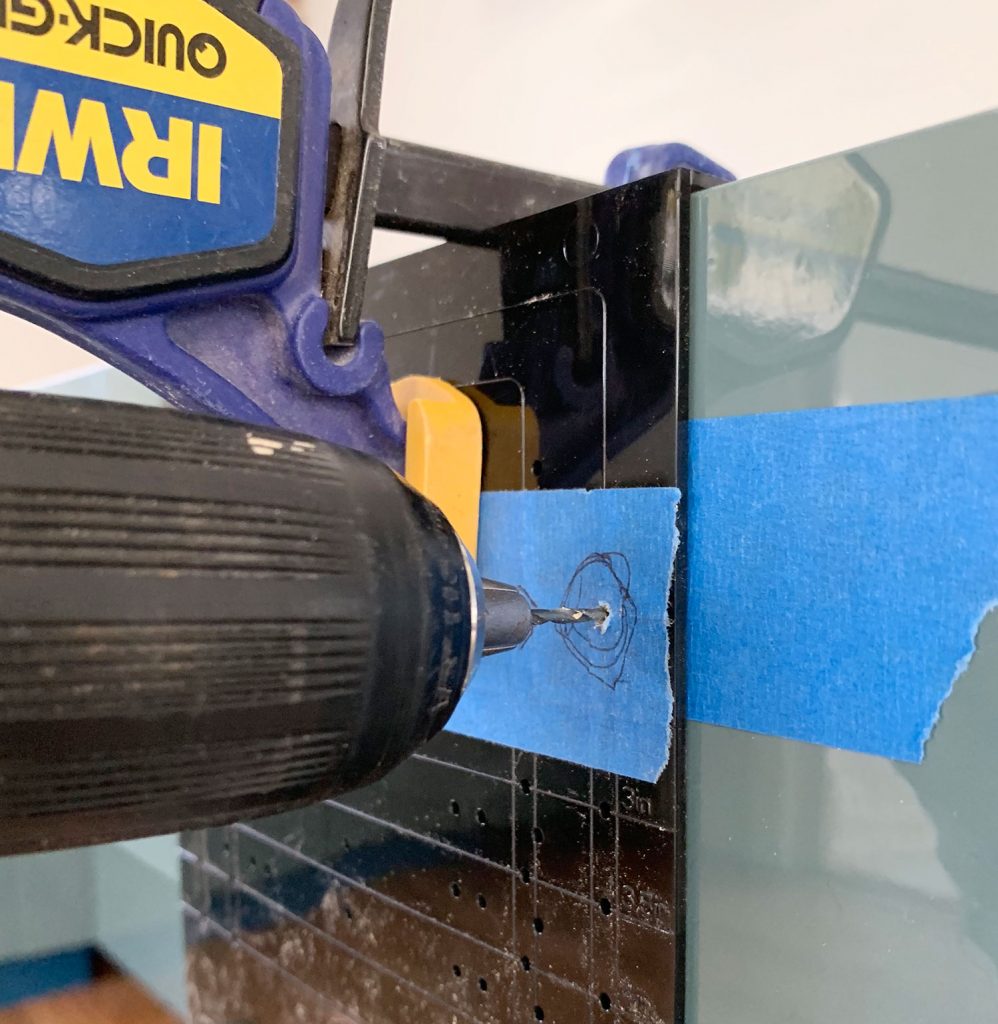 Assuming your cabinet hardware is like ours that screws on through the back of the drawer, you’ll want to make sure your pilot hole goes all the way through the drawer and pokes out the back. I show in the video how we tend to drill slowly as we go through the back to minimize any potential cracking on the backside of the drawer. You can also put more painter’s tape on the back of the drawer where your drill bit will poke through if you’re especially concerned about splintering on the back, but in most cases it will be covered by the screw head anyway. 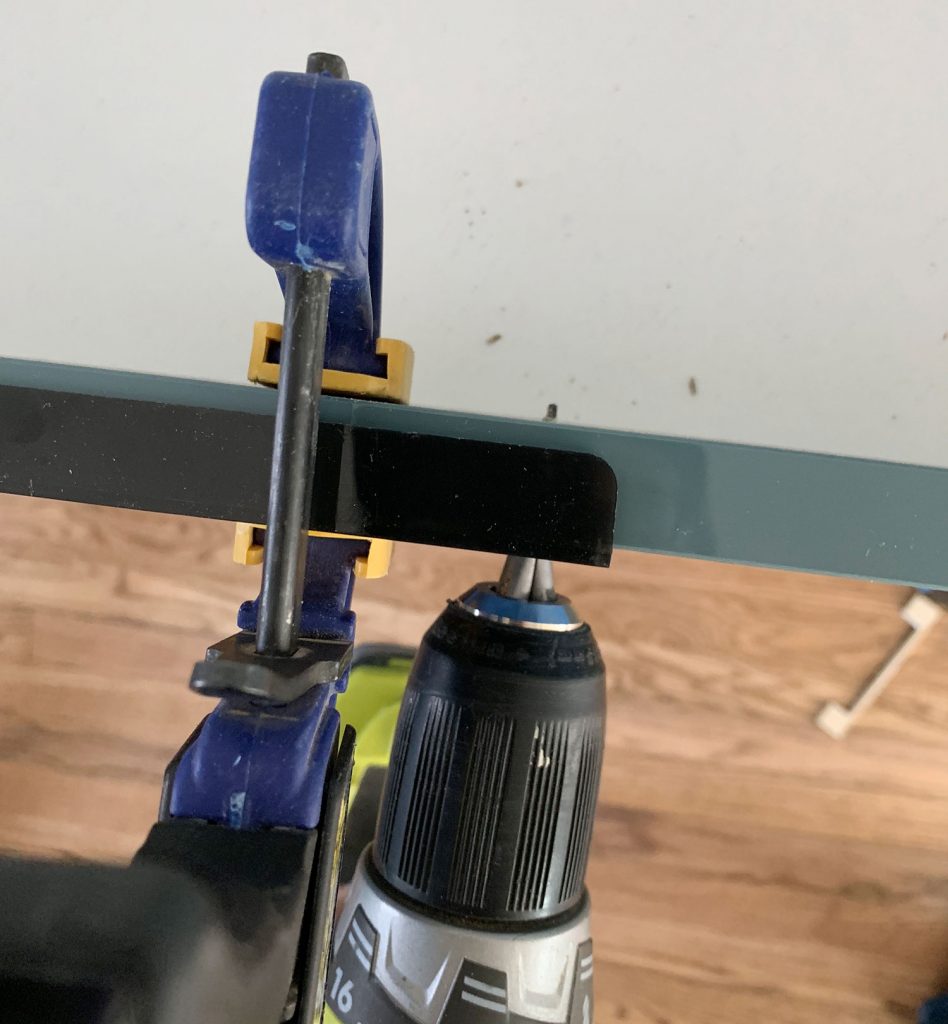 Once the first drawer is done, we like to repeat Steps 4 and 5 (center your template, drill pilot holes) on the rest of the drawers in whatever cabinet we’re working on so that we don’t have to switch our our drill bit back and forth for each drawer. Bulking stuff this way makes you faster and gets you into a nice rhythm.  Step 6: Drill Your Final HolesOnce you’ve made all of your pilot holes, remove your hardware template (but not your tape!) and switch out your drill bit for a 3/16″ bit. The hardware template actually comes with one because it’s the standard size for most hardware screws. But it doesn’t hurt to make sure it creates a large enough hole for your screws. Then, carefully drill through your pilot holes with the larger bit – again being sure to go through the back of the door, but without too much force. 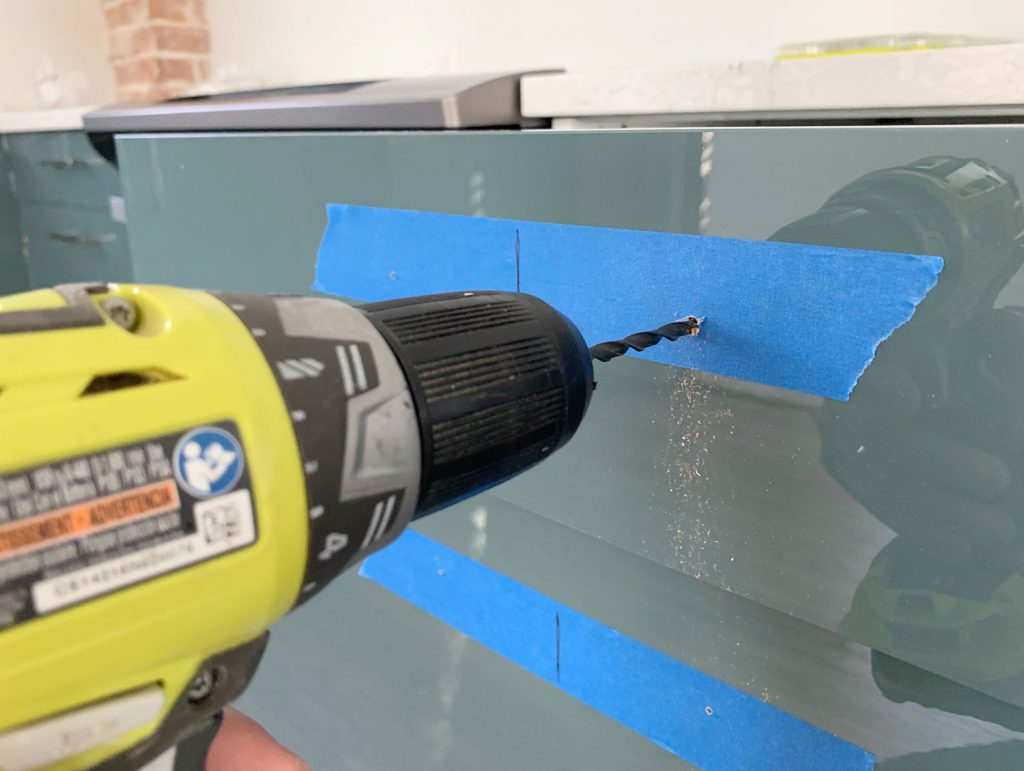 Once all of the larger holes are drilled, you can finally remove your tape. 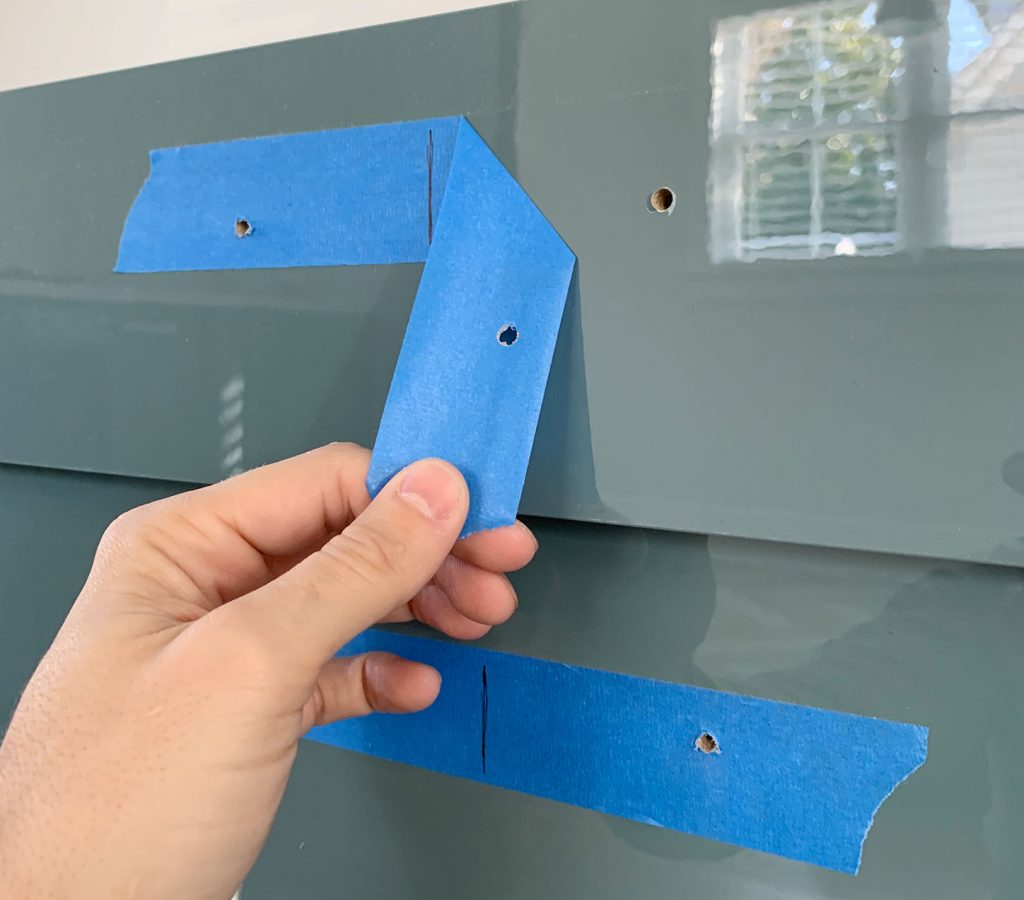 Step 7: Attach Your Cabinet HardwareNow you can screw your hardware onto each door or drawer front. Your screws will go through from the inside of the drawer, and I like to connect both ends before tightening each screw with my hands first. 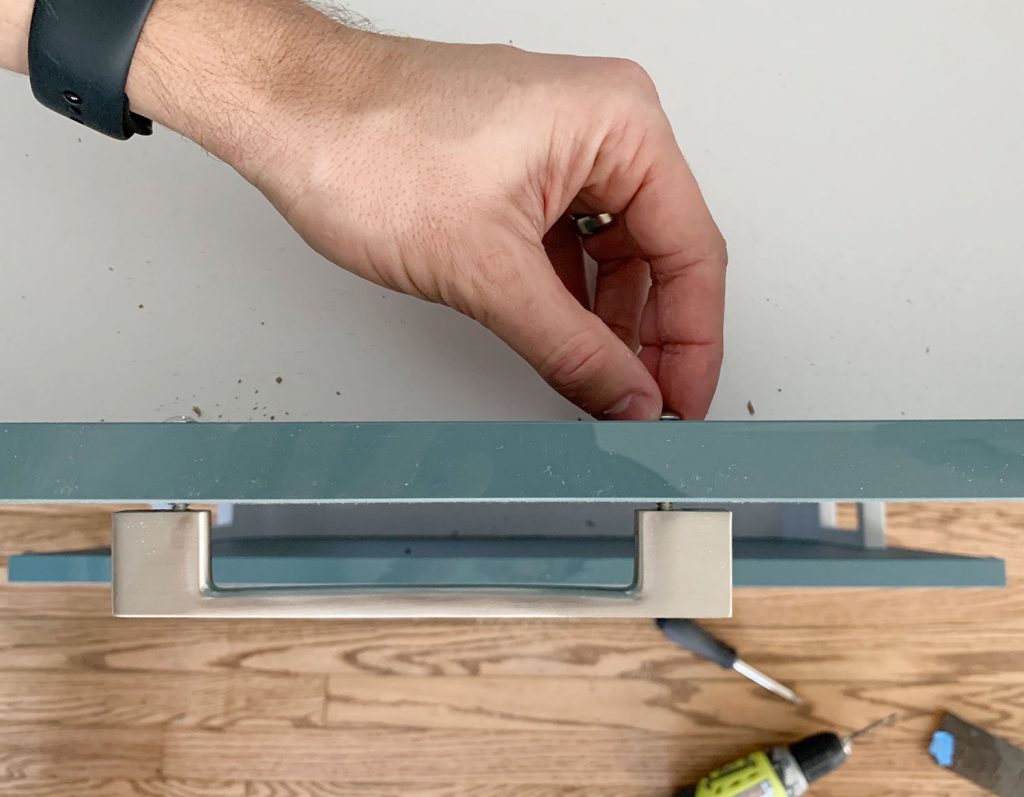 Once all of my pulls are loosely attached, I go back with a regular screwdriver and tighten everything so it’s held firmly to the door. I suggest NOT using your power drill here because screwing too tightly could cause damage to the door or drawer. 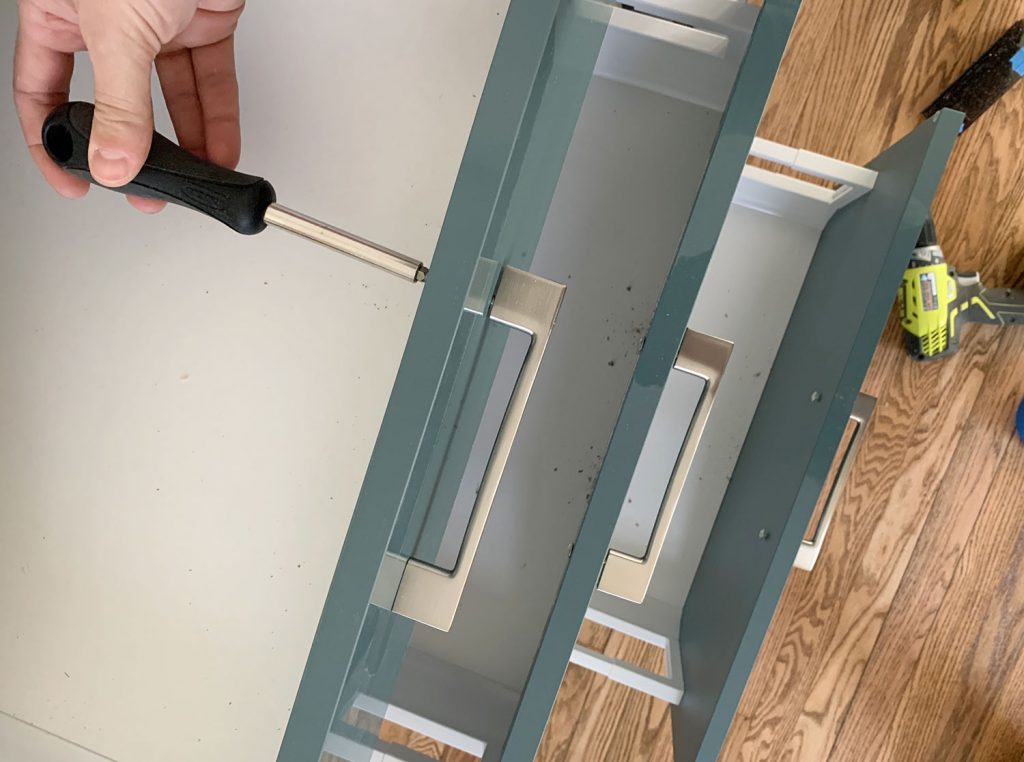 Step 8: Clean Up & You’re Done!The last thing you’ll want to do is break out your vacuum hose to suck up all of the drill shavings in the drawers, cabinets, and on the floor. But other than that, you’re all done. Well, or you move on and repeat these steps for the rest of your cabinets. And I should note that the process works pretty much the same if you’re installing knobs or pulls on a door like the cabinet fronts under the sink. You just use the OTHER template included in the set. It’s designed to rest along the corner of your cabinet door like the one you see below: 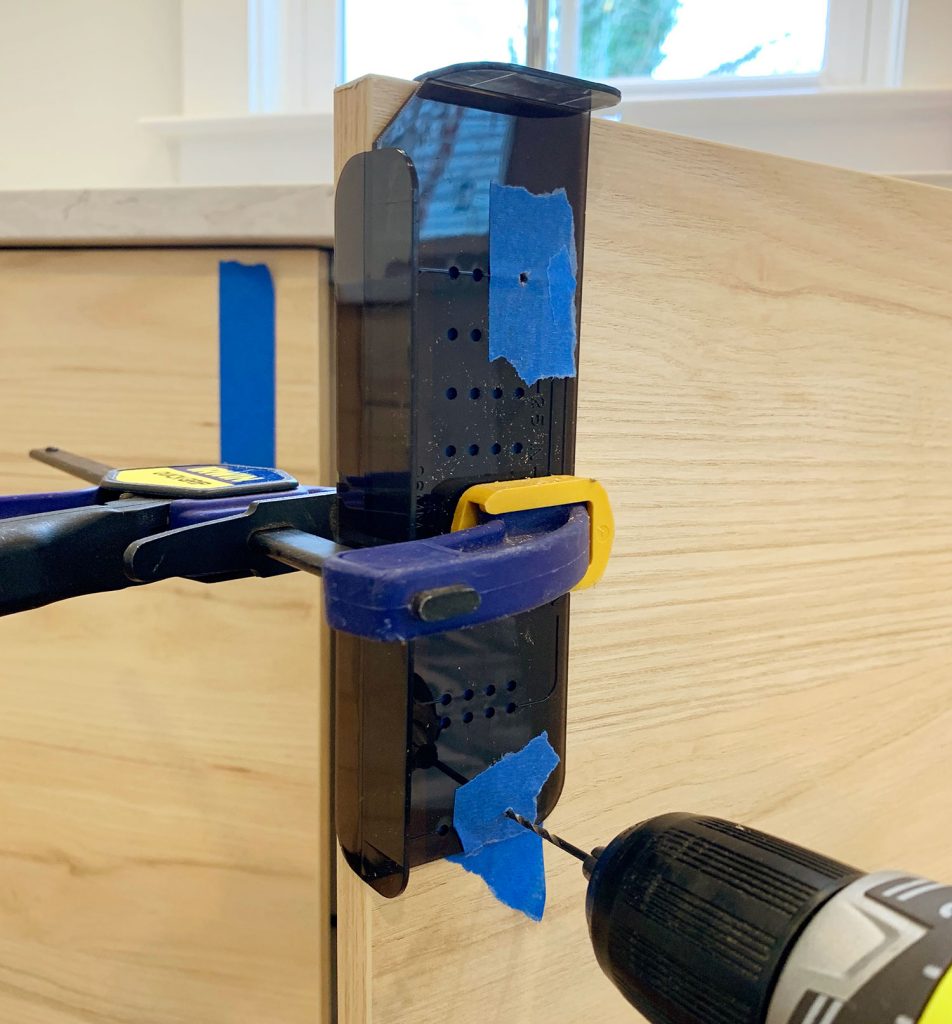 So I hope that helps take some of the fear and guesswork out of installing your own cabinet hardware. We’ll never not wince a little when making holes in cabinet doors, but following these steps helped us knock out both duplex kitchens in less than two hours – without a single crooked or off-center handle! And for everyone who wants to see the entire kitchen and hear a bunch of tips for installing Ikea cabinets, stay tuned for a post coming up where we talk more about the process as a whole. Since we’ve gotten lots of practice installing Ikea kitchens, we have some tricks we wanna pass along. In the meantime, here’s a previous post oninstalling Ikea cabinets that will give you some info. Want more kitchen how-tos? Check out these posts below:
*This post contains affiliate links* The post How To Install Cabinet Hardware (With A Video!) appeared first on Young House Love. Via https://www.younghouselove.com/install-kitchen-cabinet-hardware/ |
