|
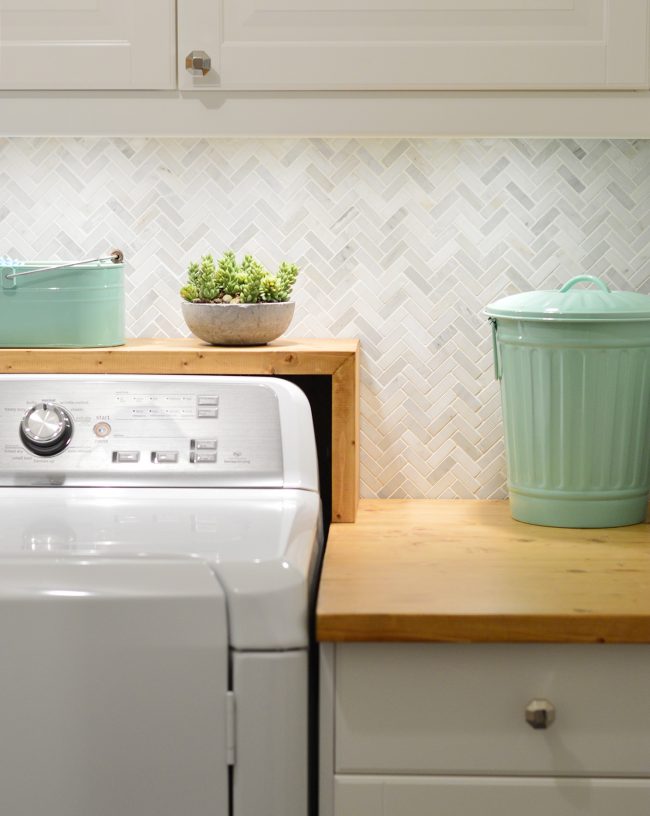
We’ve done so few upper cabinets in our recent kitchens that we actually haven’t installed under cabinet lighting in ANY of them. But we did install it under the cabinets in our laundry room and – surprise! – I just came across a bunch of pictures of the installation process that I took waaaaaay back in 2014 but never shared. It’s a remarkably straightforward process, so it could be an easy upgrade if you needed more task lighting in your kitchen, laundry room, or any other space with upper cabinets.
The cabinets in here are from Ikea, so we also used one of their stock under-cabinet lighting options called GRUNDTAL Spotlights. These don’t appear to be sold anymore, but the current OMLOPP spotlight seems to be a similar (even improved!) version. The OMLOPP ones are now LED and are lower profile, plus some cord management covers are included, which is nice. Based on the downloadable instruction sheet, the new ones install almost exactly the same way, so the same basic steps I’m about to outline for you here still apply.
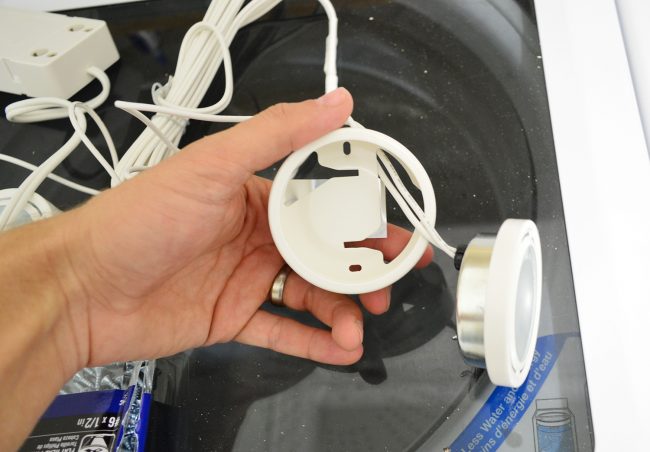
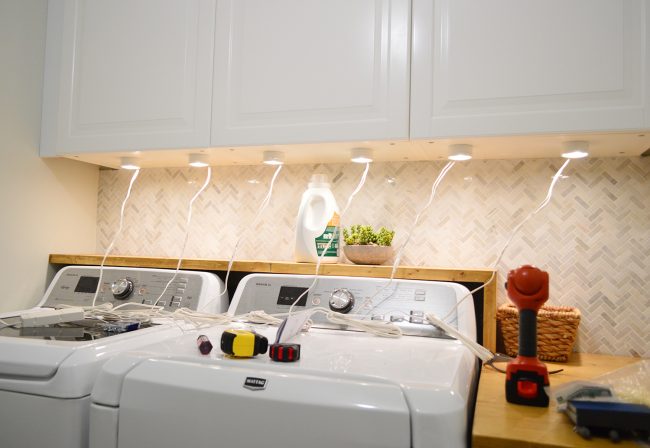
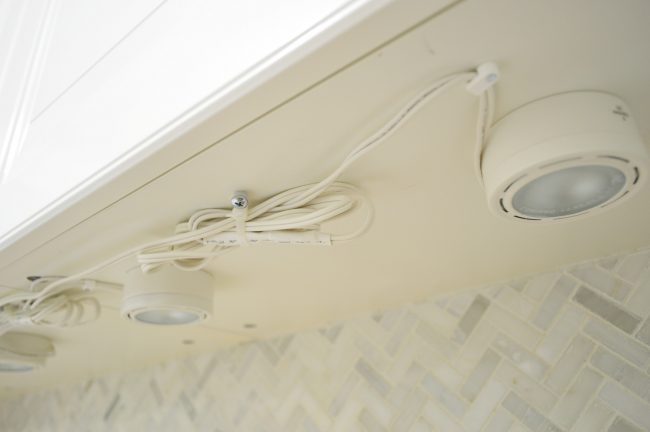
Most people do one spotlight per cabinet but we wanted to give the appearance of one continuous bar of light, rather than distinct spotlights under each cabinet, so we decided to do more. The GRUNDTALs were sold as 3 packs, so we did 6, but 4 or 5 probably would’ve done the job just fine. The first step, once everything is unpackaged, is to pop the actual lightbulb portion of each spotlight out of its casing, leaving the wiring in place.
This exposes the holes that you’re supposed to screw through to secure the light to the underside of your cabinet. Just be sure to measure and mark your placement before you start doing this. We centered each spotlight front-to-back on the cabinet and spaced them equally apart side-to-side (around 10″ away from the next one). We secured ours using 1/2″ screws so that they wouldn’t poke through the inside of the cabinet. Then the light just snaps back into place.
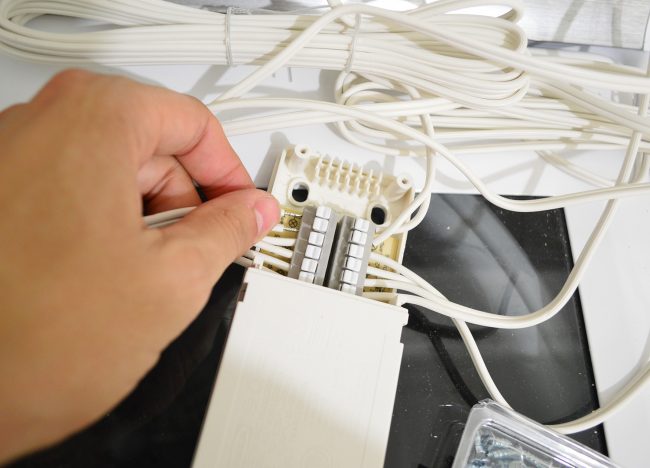
Once all of your spotlights are secured, you need to connect everything to the transformer box. This is sold separately from the new OMLOPP spotlights, as is the power cord. I know that sounds kinda crazy, but they sell things a la carte like that because the number of transformers and power cords you need depends on how many spotlights you’re installing (you can add up to 9 spotlights per box, and up to 10 boxes per power cord). The photo below is how I wired my spotlights to the transformer box, but the new stuff is even easier – it’s basically like plugging in a phone charger.
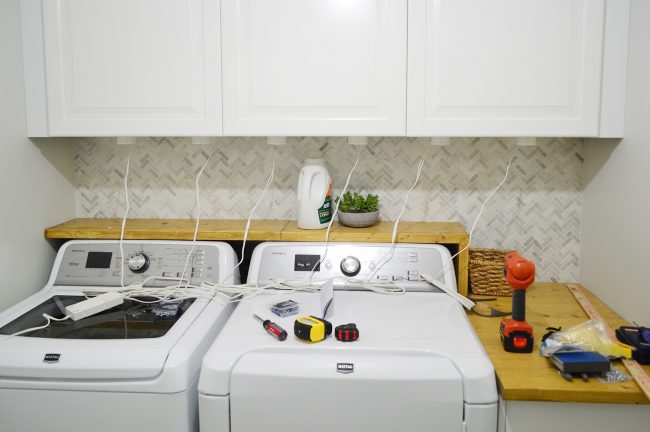
At this point your installation may look something like this. The cord situation is not very pretty, but before dealing with that it’s always a good idea to check that all of your connections work.
The transformer just plugs into any regular outlet and it has a toggle switch on the cord, so you can get everything powered up without the help of an electrician. So it was super easy to get ours working within minutes.
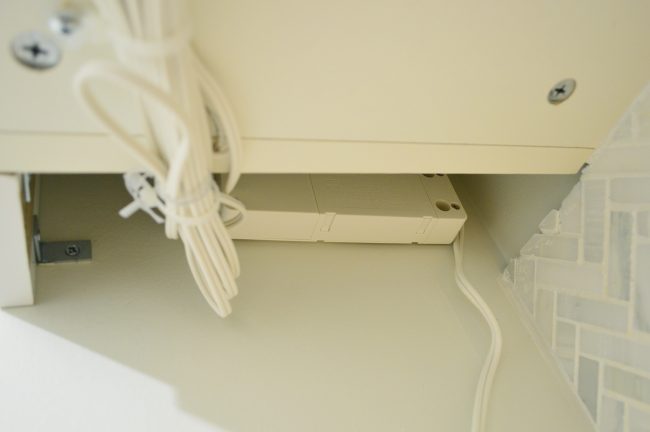
The newer spotlights come with some cord covers to help hide the wires against the bottom of the cabinet, but you still might have to get creative with all the extra wire between the cabinet and the transformer. I picked up a variety of cord management options from the store and the most helpful items ended up being these mounting ties (basically a zip tie with a screw hole) and some wire staples (you may need to swap in different nails or screws if the provided ones are long enough to poke through your cabinet bottom).
Yours probably won’t look quite this messy with the newer system, but you can see what I did with ours. I wrapped up most of the excess wire in a zip tie (screwed in place) and then kept everything else tight to bottom with the wire staples.
You see zero of this chaos thanks to a cover piece that you add later. You’d pretty much have to lean over the washer and dryer and put your head under the cabinet to get a good look at it once it’s boxed in with that cover piece, but I’ll get to that in a minute.
Back to the whole “wire management” thing. You also have to find a place to hide your transformer box. Ours got mounted behind a gap on the side of one cabinet that’s hidden with a filler piece in front of it (the transformer box comes with holes for mounting it with screws). That placement also allowed the power cord to hug the corner as it snakes down to the outlet.
A couple of years after our initial installation we had an electrician hardwire the power cord to a switch on the wall, and that makes it even easier to flip on and off. But when there was a wire tucked along that left corner, it wasn’t really that bad. You can hardly see it in this photo:
One more word about the transformer box: I actually think a more popular location for that is ON TOP of your cabinets, but you may need to install an outlet up there. Ikea sells a remote so you can turn everything on and off without needing to have access to the power cord switch. Pretty smart. The last thing we did was to install that cover strip I mentioned across the bottom of the cabinetry to hide the lights and their wiring. It’s just a spare filler piece that Ikea sells, mounted in place using small L-brackets and caulked at the seams.
We don’t really mind the cover piece on the bottom, but I do feel like it’s one shortcoming of the Ikea system. Their cabinets are totally flat on the bottom, as opposed to lots of other cabinets that have a slightly recessed area that’s great for tucking lighting into. That’s probably why they’ve improved this new system by giving it a slimmer profile and including cord covers.
I don’t have my receipts saved from this project, but the same set up with the new system would be about $75 ($90 if you include the remote). And you could cut the cost down to about $45 if you just did three lights and used this smaller transformer.
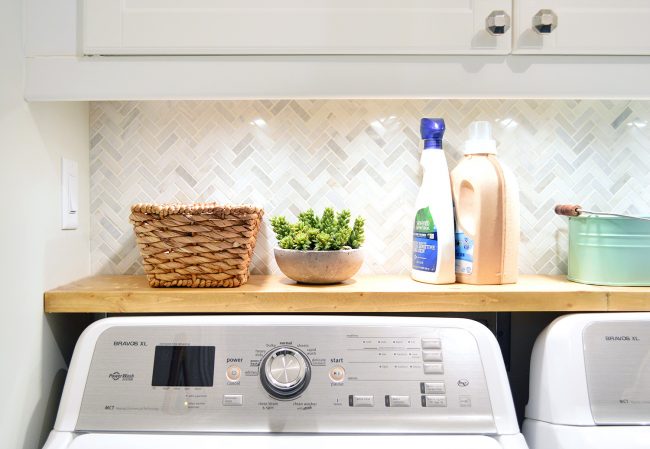
Here’s an updated photo taken this month of the switch we had installed that turns ours on easily. We probably only use these lights around 50% of the time, just because the ceiling light is pretty adequate for such a small room, but we still think they’re a great “nice to have” upgrade. Especially if you have an area that could use a little extra light.
So if you’ve been dying to add them somewhere or have just wondered how hard they are to install, hopefully this project illuminates (har-har) the fact that it’s not a very daunting or expensive task to take on. Any beginner can do this one for sure. P.S. You can check out a summary of our entire laundry room makeover (including a full budget breakdown here). And if you’re looking for a source list (paint colors, where you can find the green tins, etc) that’s right here. *This post contains affiliate links* The post Installing Your Own Under-Cabinet Lighting appeared first on Young House Love. Via https://www.younghouselove.com/how-to-install-under-cabinet-lighting/
0 Comments
Today we’re talking about a small space that’s stumping us at the duplex and we’d love to hear what your family would like to rent most. You’ll also hear how an unexpected Christmas request from our daughter sent us on quite the hunt for a house-related gift – and how we stumbled across a new 4-in-1 tool that’s extra handy to have in your junk drawer. Plus we’re asking the hard-hitting questions, like can your astrological sign really help you decorate your home? You can download this episode from Apple Podcasts, Google Podcasts, Stitcher, TuneIn Radio, and Spotify – or listen to it below! Note: If you’re reading in a feed reader, you may have to click through to the post to see the player. What’s New

Duplex Bed Nook Dilemma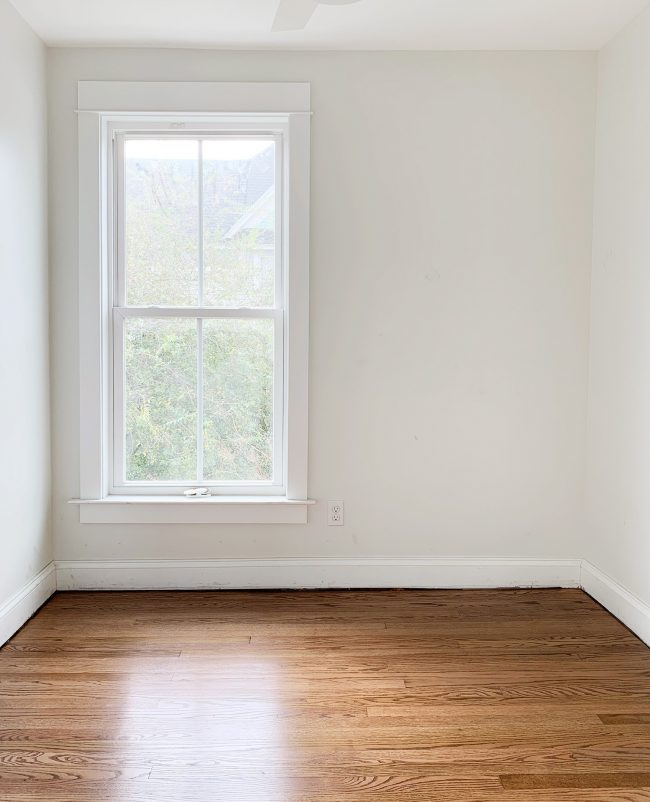
Option 1: Side-by-Side Twin Beds
Option 2: Twin Bed With Trundle
Option 3: A Large Wall-to-Wall Mattress
What do you think?
We’re Digging
If you’re looking for something we’ve dug in a past episode, but don’t remember which show notes to click into, here’s a master list of everything we’ve been digging from all of our past episodes. And lastly, a big thank you to The Citizenry for sponsoring this episode. You can see their beautiful goods from artisans all over the globe at CitizenryPodcast.com/YHL and use the code YHL to get $50 towards your first purchase of $200 or more! 
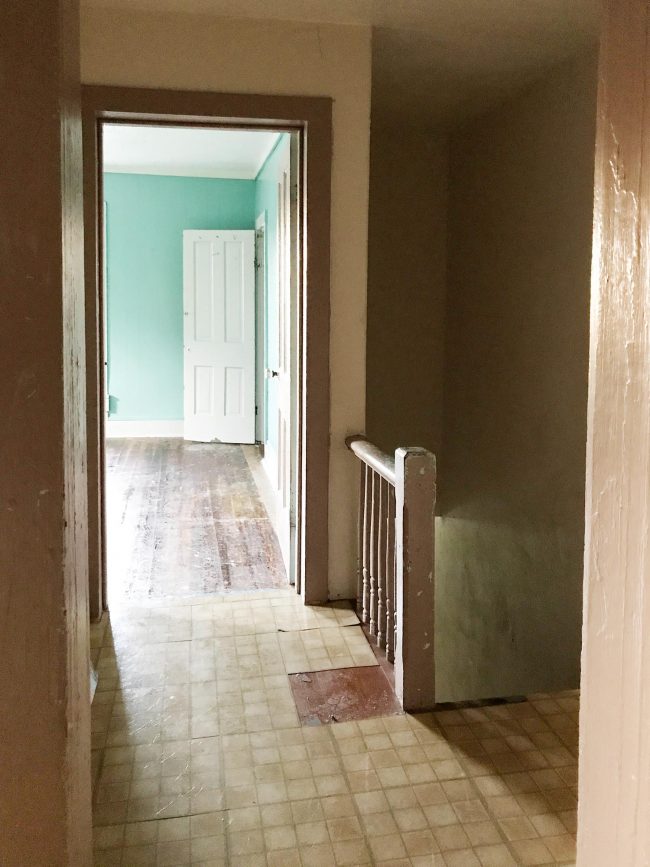
Thanks for listening, guys! *This post contains affiliate links* The post #124: One Small Space And Three Options (HELP!) appeared first on Young House Love. Via https://www.younghouselove.com/podcast-124/ Last week Sherry and I got to see the freshly refinished floors at the duplex for the first time. And despite having just gone through this last year at the pink beach house, we were still taken aback by what a HUGE difference it makes. Which explains why we’re about to hit you with a bunch of before & afters right now. 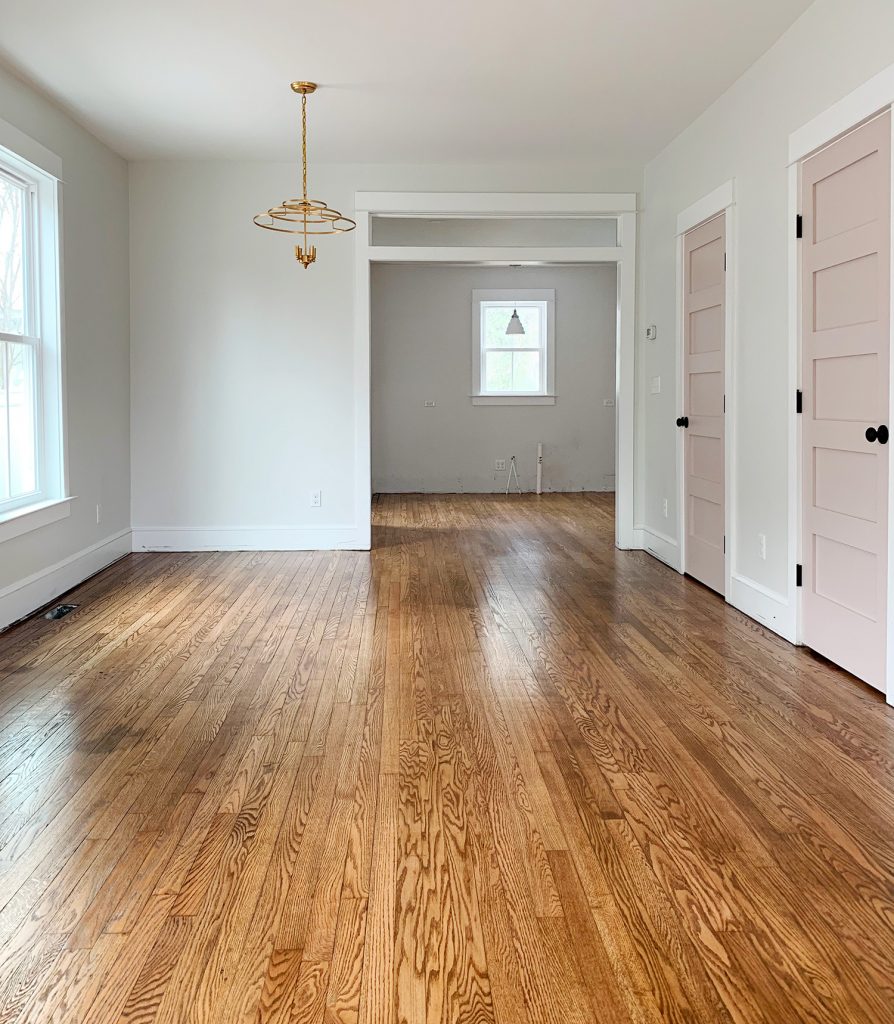 We can’t get over how finished it makes everything feel. It’s like changing this one surface suddenly takes the whole place from “renovation zone†to “move-in ready.†I mean, let’s just appreciate how far we’ve come for a second. This is that same room (the living room on the left side of the duplex) when we bought it last September. That yellow stuff is an old carpet pad that was literally glued to the floor in a bunch of places and wouldn’t come off. 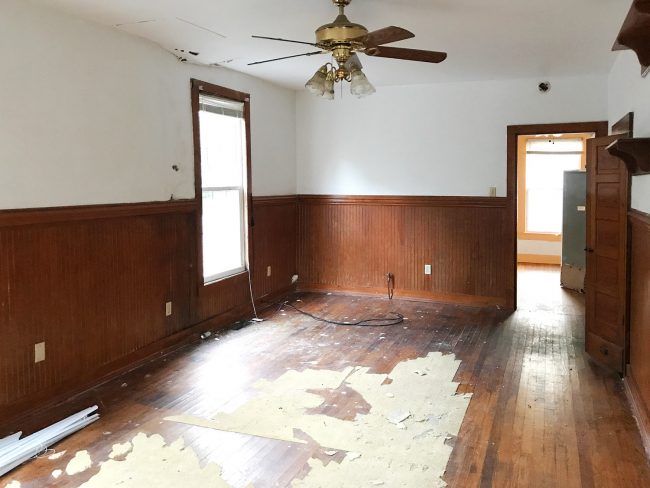 Here’s the same view in May during reconstruction. The floors actually look WORSE here because everyone knew that a full sanding/refinishing was happening later, so they were sporting a nice layer of dust that tends to build up during a reno. 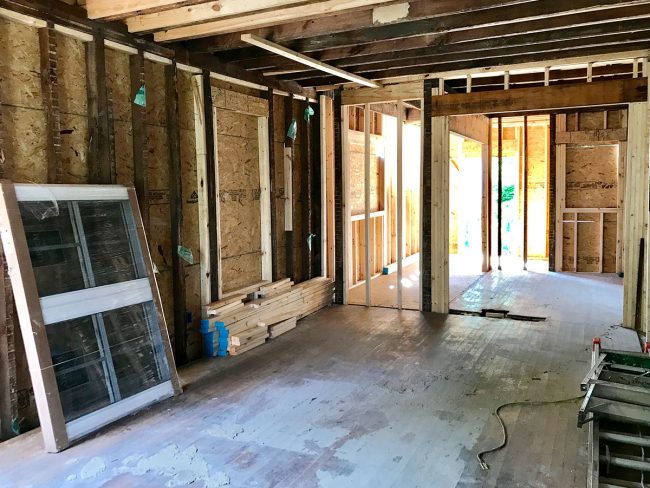 Even after drywall started going up in September, the place was still looking pretty rough. Especially the floors. 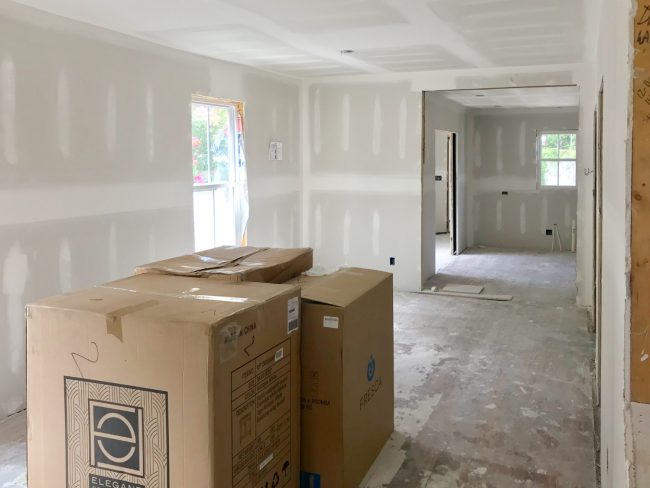 So it feels like a MASSIVE leap forward to suddenly walk in and see this shiny refinished oak underfoot. We still need to add quarter round trim along all of the baseboards to finish things off, but, woah. The difference is huge. 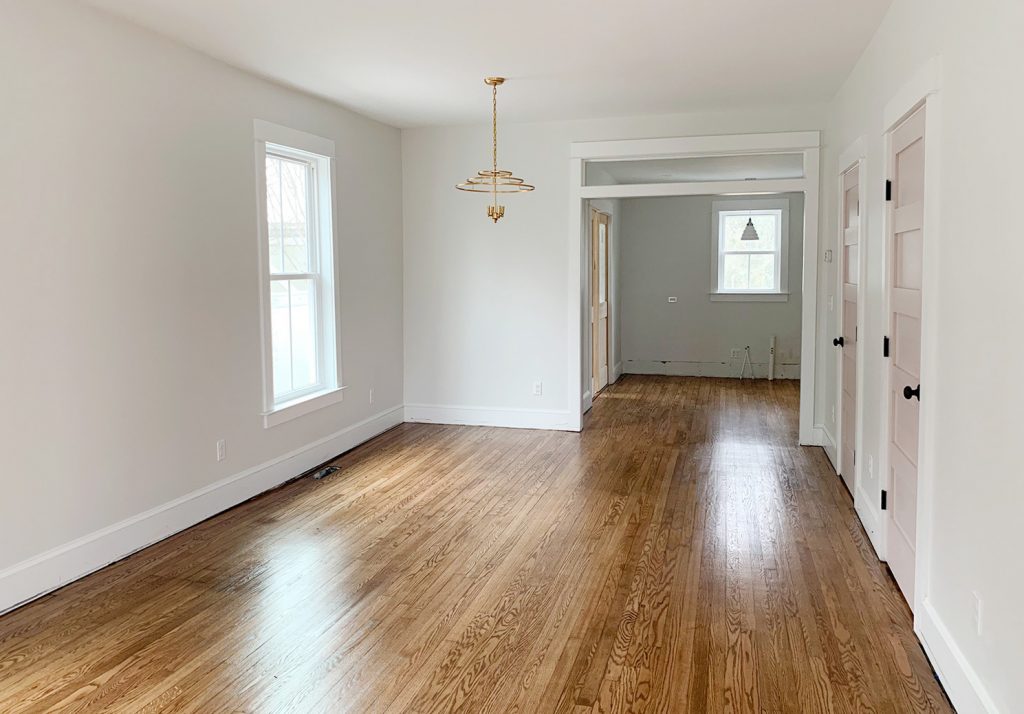 I’ll save you some scrolling and put the before picture right here just so you can see them right next to each other. The wider opening to the kitchen and the interior transom window that we added above it also make a pretty huge difference and really open up the space. But back to the floors. Adding hardwoods (plank by plank) seamlessly into the giant holes and deeply water-damaged areas was above our skill set, so we hired the same crew who helped us revive the wood floors of the pink house last year. The company is called ShenValley Floors and they do work on the Eastern Shore and out in the Shenandoah Valley, if you’re interested. They’re great because in addition to sanding, staining, and sealing the floors – they also do great repair work (including sourcing and installing reclaimed old oak or pine – or whatever hardwoods you need for your project). And BOY did the duplex need lots of repairs. One big issue was rot, which we had in a few pretty large spots on each side. This particular area was in what used to be the upstairs bathroom. The water damage from years of a leaking pipe had rotted through both the original pine floor and the newer oak floor that had been laid on top of all of the original pine flooring at some point (the entire house has two layers of flooring, and we couldn’t pull up the oak to reveal the old pine because it was too far gone). You can see both layers of flooring better in the shot below: 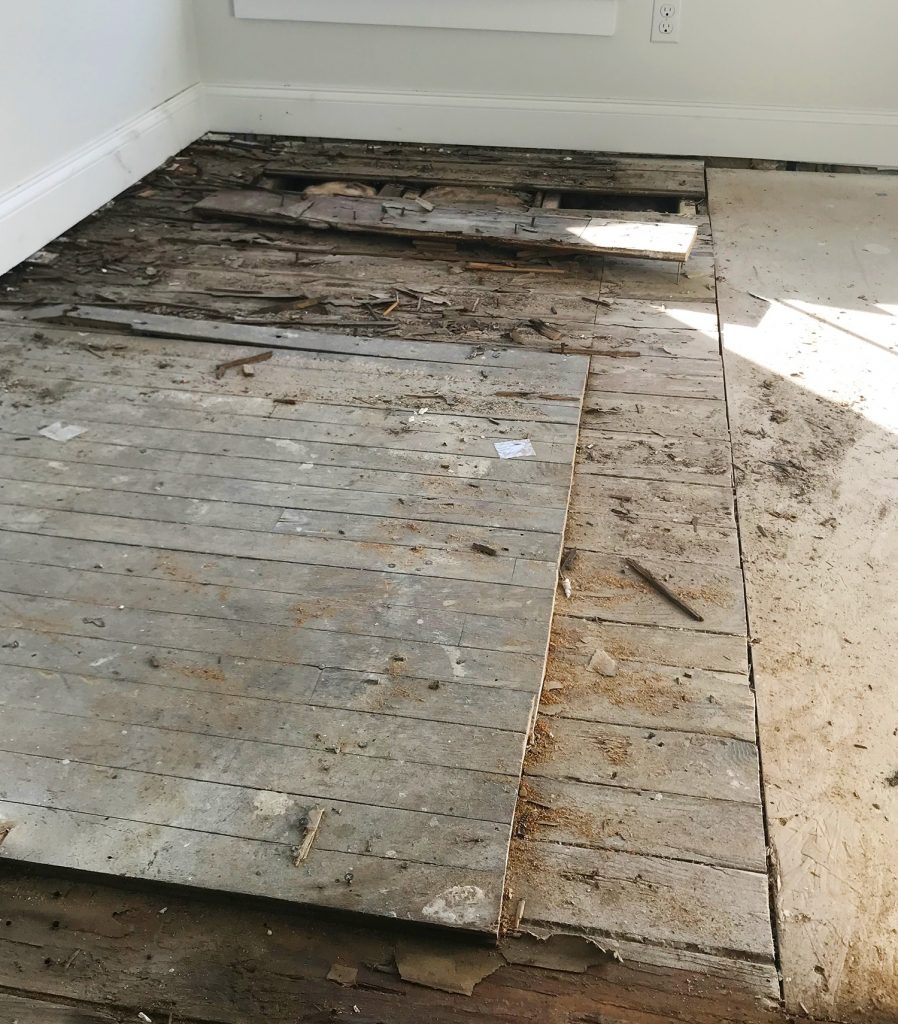 In addition to patching the rot, the changes we made to the floor plan had also left some gaps in the flooring. So ShenValley brought in 100-year-old oak flooring they had reclaimed from another project to fill the gaps and give us a nice seamless end result.  This is what that rotted area now looks like now that everything has been patched, sanded, stained, and sealed.  This is another view that shows how the patching works. Rather than just cutting in a small strip of new flooring, they actual pry up more of the existing floorboards so everything can be blended in seamlessly without a harsh straight line where the new boards meet the old boards. This staggered integration is key for hiding the transition between old and “new†boards (which might also happen to be old if they’re reclaimed). 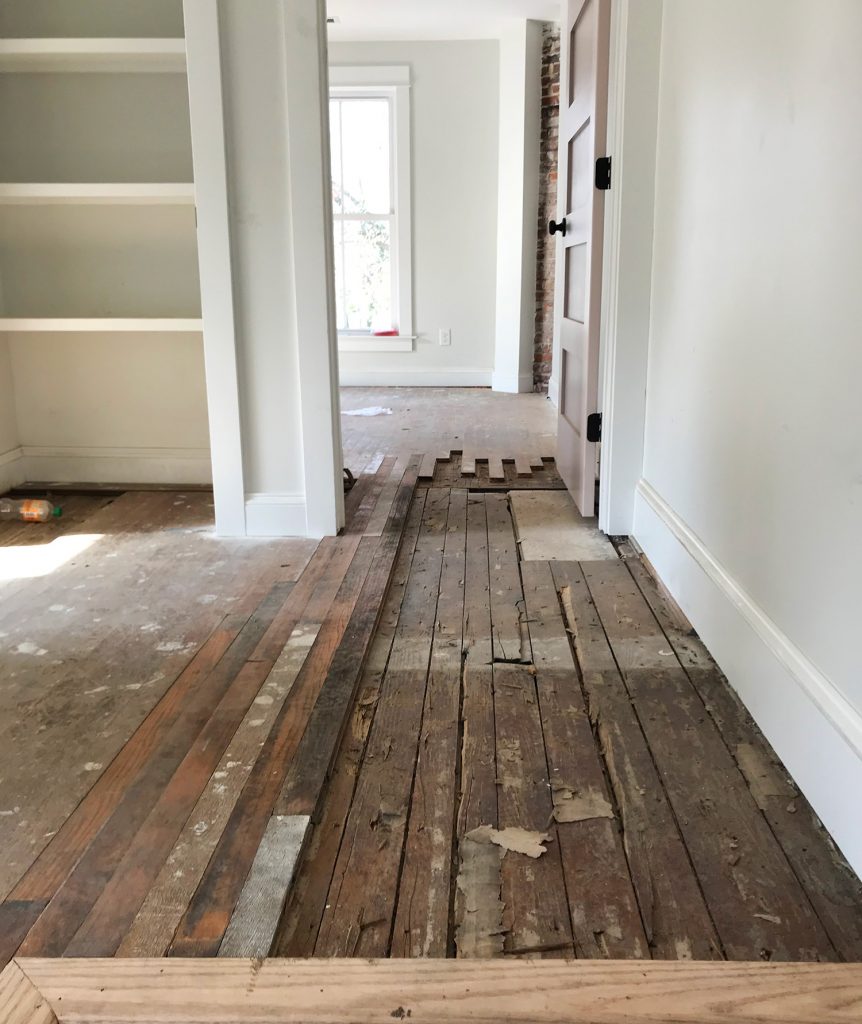 It certainly is more trouble, but the final result is well worth it. You can also learn more of this process from this post about the floor refinishing at our own house. 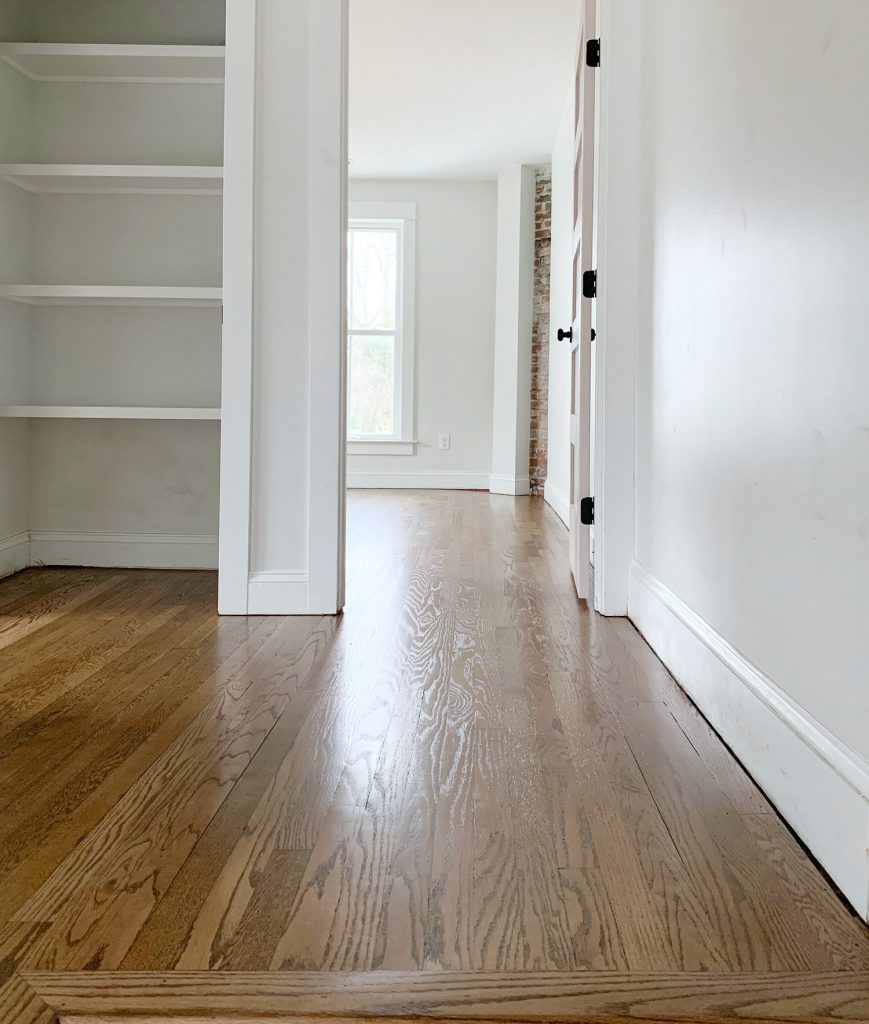 And if you heard this week’s podcast, you know we got a little curveball thrown our way right in the middle of this floor refinishing project. Our original plan had been to clear seal the oak floors so their natural color would come through – just like we did with the pine floors at the pink house. But after the crew finished sanding everything down, they called to say there were several areas with dark blotchy stains that wouldn’t lift (they were too deep to sand out) AND that the previous person who had worked on the floors – likely many decades ago – had used two different species of oak in the house. Both white and red oak. Yeah, it was a surprise to all of us – and we were warned that clear sealing them would further bring out those aforementioned stains AND put more emphasis on the variation in board color. So to help minimize both of these not-exactly-ideal issues, the pros recommended that we choose a medium stain to help unify everything. 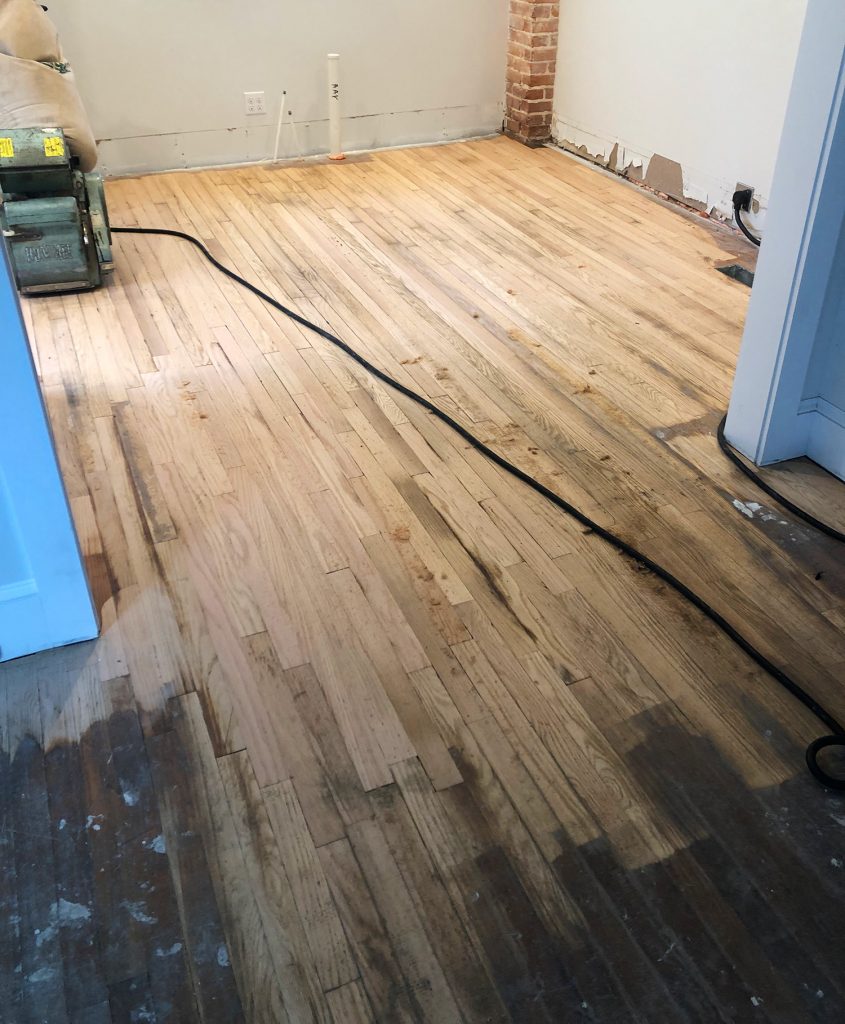 Looking back at old photos like the one below, you can actually see some of the color change that nobody had noticed until sanding (even the flooring pros missed it during our initial walk-through). Although part of this floor upstairs had also been painted at some point AND had had sticky tiles placed over it, so I’m not sure how much was caused solely by the different species of oak. 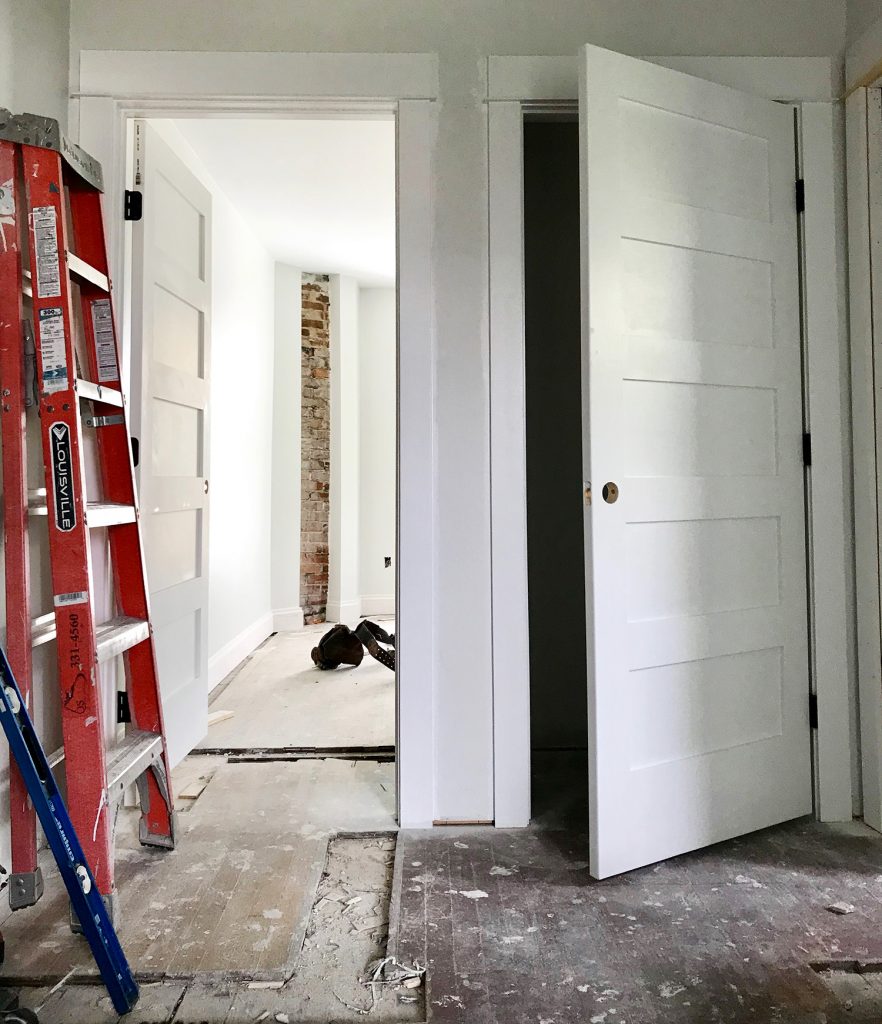 We chose one of the stain colors that the refinisher specifically recommended – Special Walnut – and it definitely helped a lot. In fact, this area shown is the only spot Sherry and I could make out any visible transition between the white oak in the hallway and the red oak in the bedroom. And thankfully it looks even less noticeable in person than it does in this picture. Once furniture and rugs go in we doubt anyone would even pick up on it unless we prompted them to study the floors. 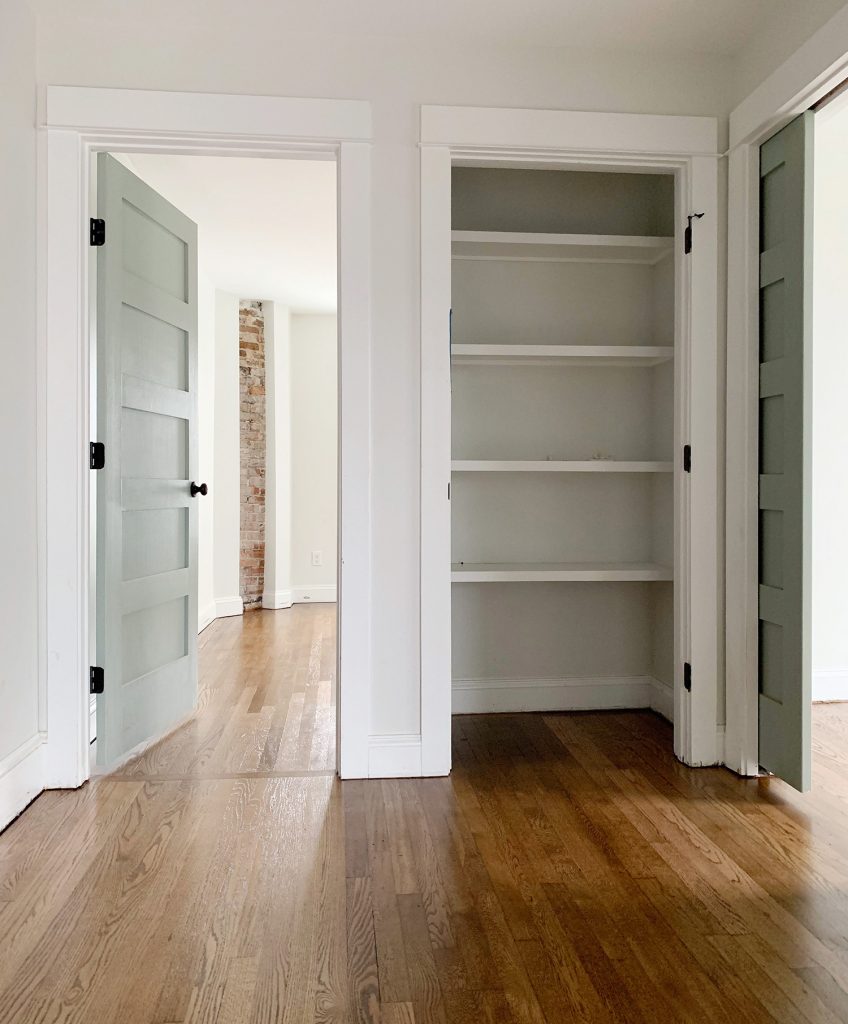 It was a little bit of a bummer to have to adjust our plans away from the natural light-looking floor we’d always pictured, but that’s just how these things go. And in the end, how can we be mad at progress like this:  That’s the upstairs hallway on the right side, which is where those sticky tiles used to be (that whole front bedroom was like walking on flypaper). And now it looks like this (new railing still to come): 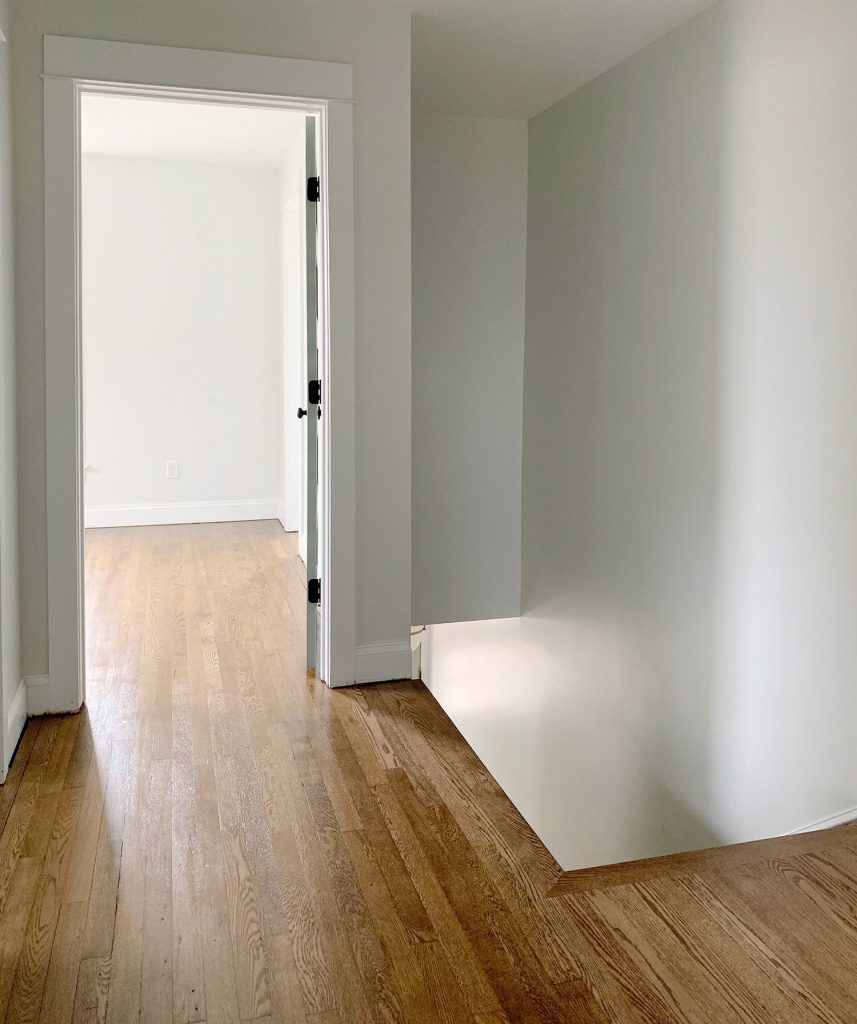 Here’s the view looking down those stairs towards the front door as it looked when we bought it… 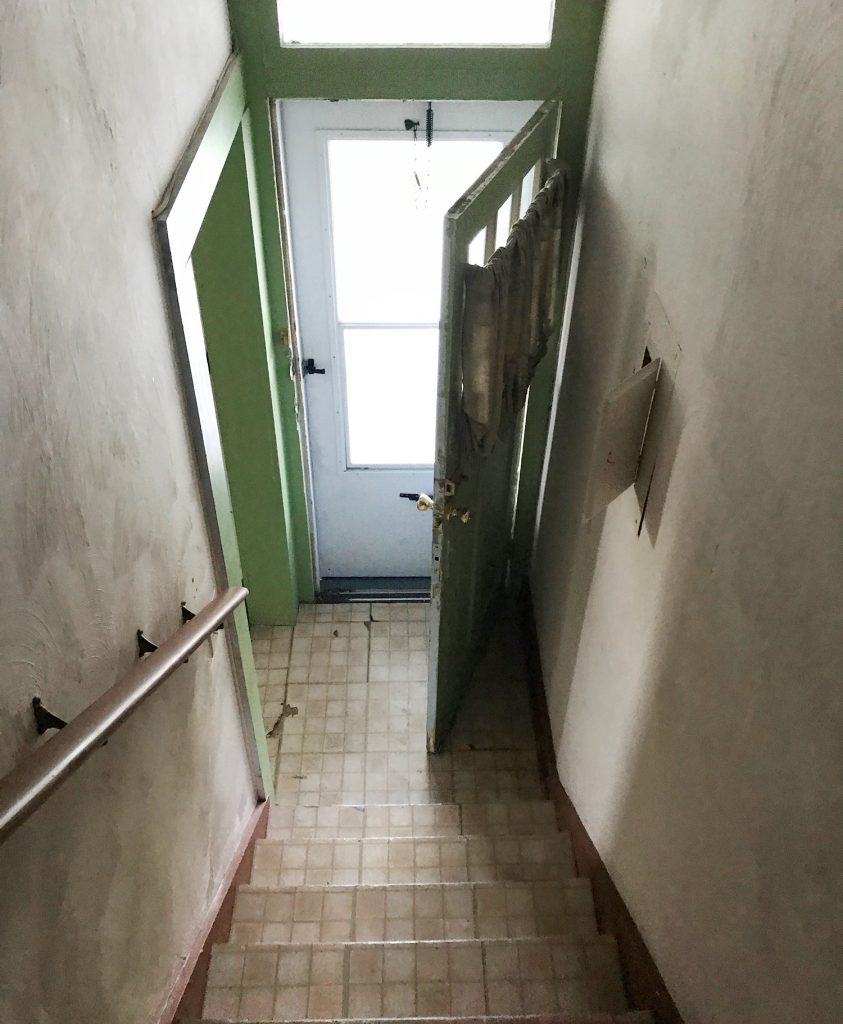 …and here it is now. We still need to paint the sides of the stairs (and there’s some dusting to do around the door frame), but man, this is progress, sweet progress. 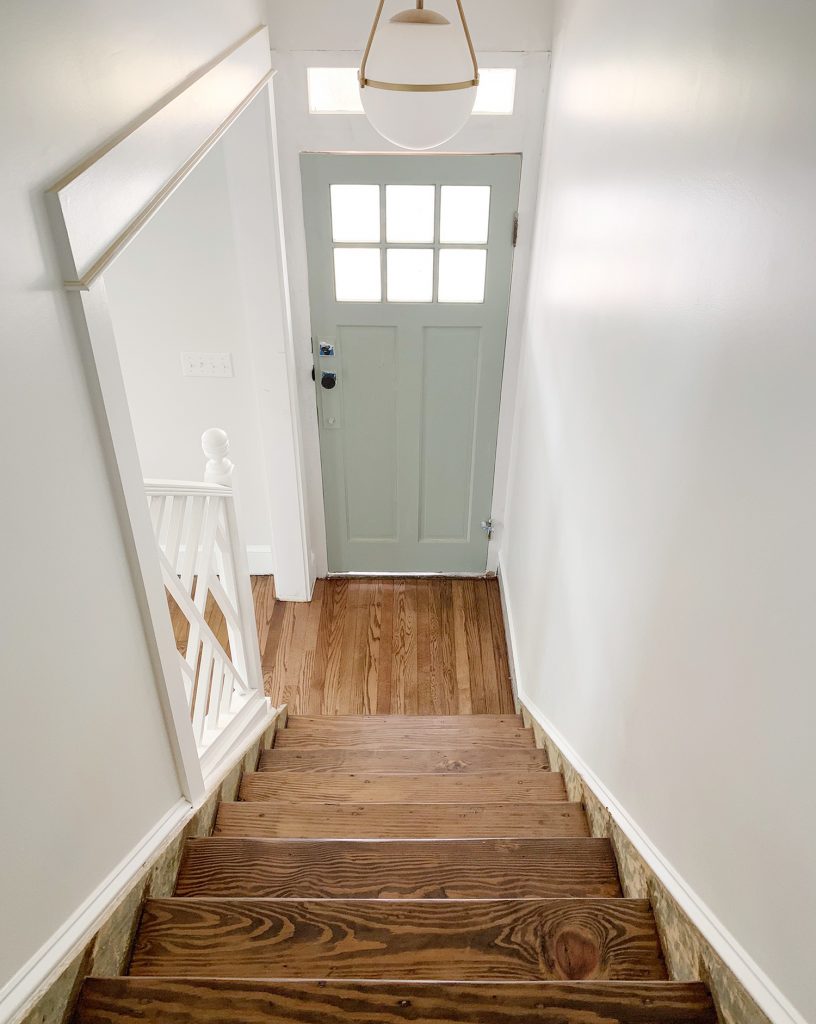 Sherry and I dug up this photo and it took us both a minute to figure out which room is was (neither of us remembered the carpet or the dark walls). Turns out it was the back bedroom on the right side. 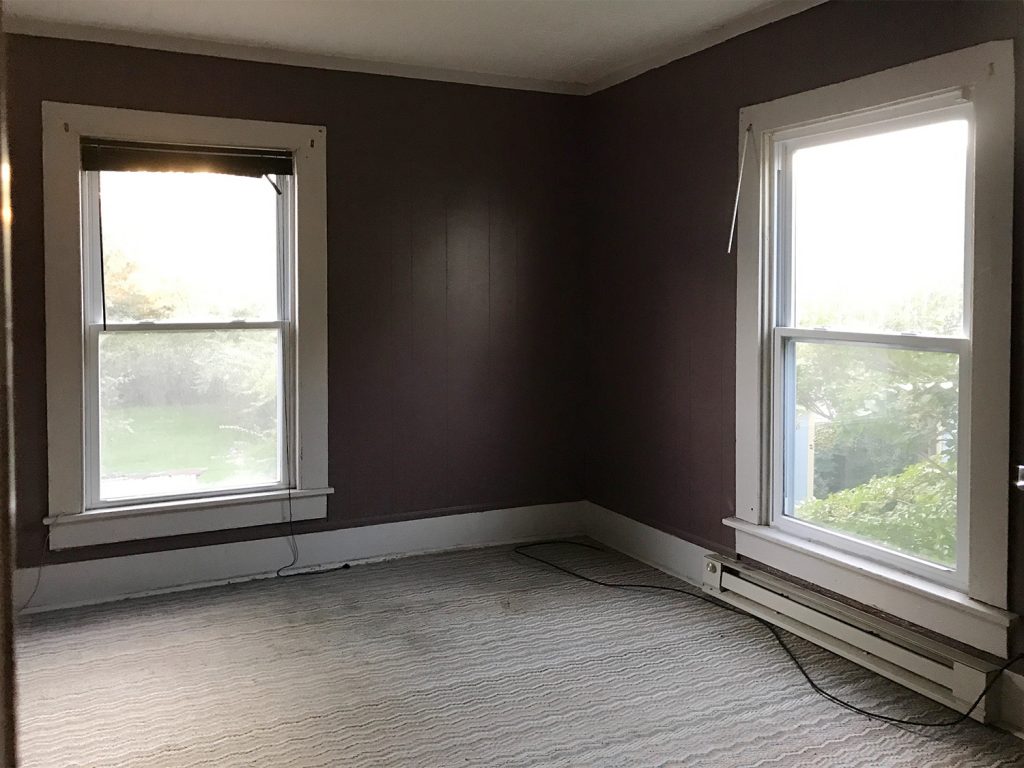 In fact, we had forgotten it so much that we first thought it was the front bedroom on the right side, and we took the after photo below of that room. Which looks super similar but is, in fact, a completely different room. Oh well, you get the idea. 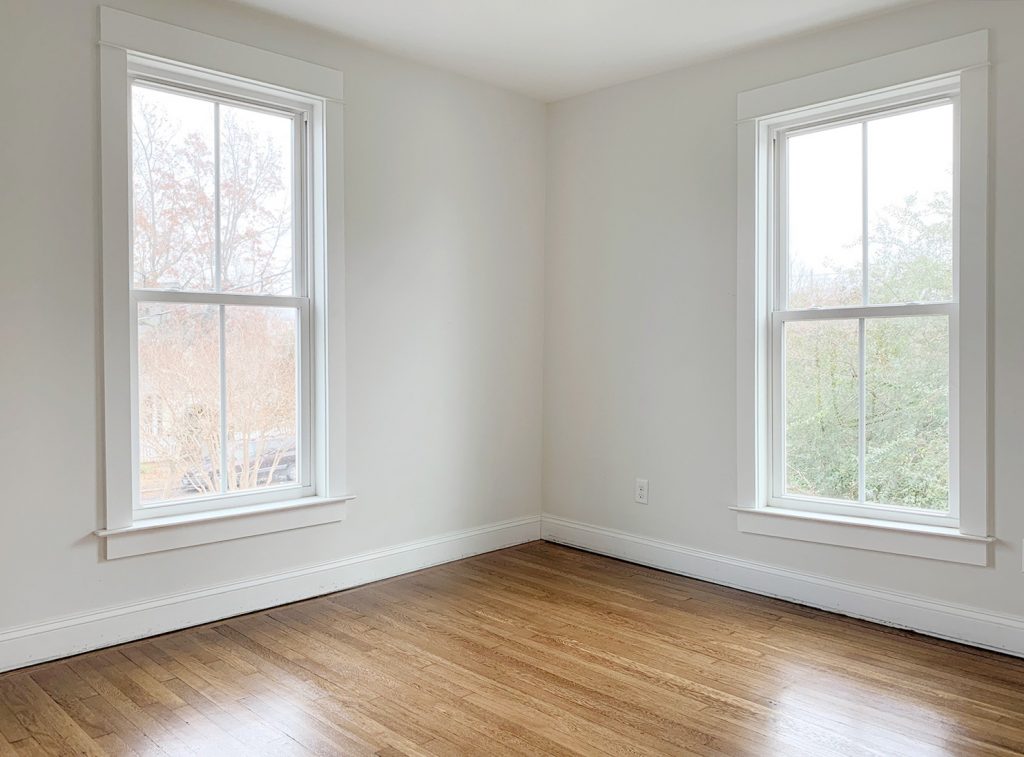 I could dig up pictures like these all day, but I’ll force myself to stop – mostly because I know there’s even more fun stuff to come as we start to install the kitchens (this weekend!!!) and move furniture in (hopefully over the holiday break!!!). So I’ll leave you just like we started: with a before & after of the living room, this time on the other side: 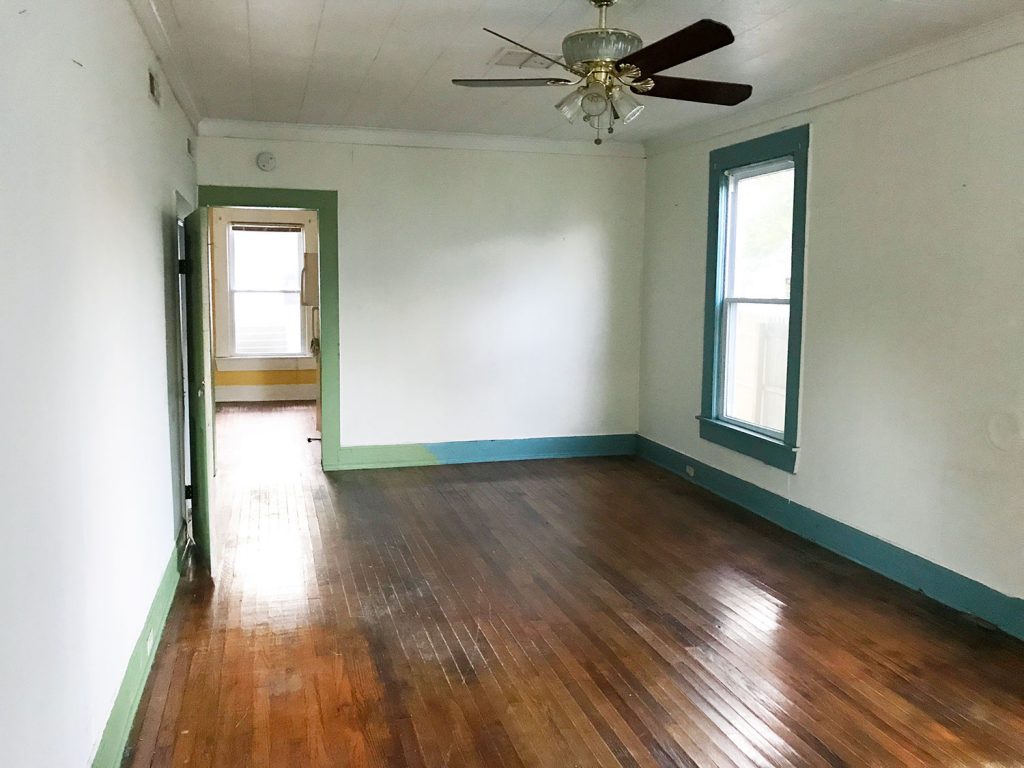 The funny thing is that the floors aren’t that wildly different here (this was the one spot where they weren’t in terrible shape). So maybe the whole snafu with having to stain the new floors was just the house trying to reclaim some semblance of its former self. 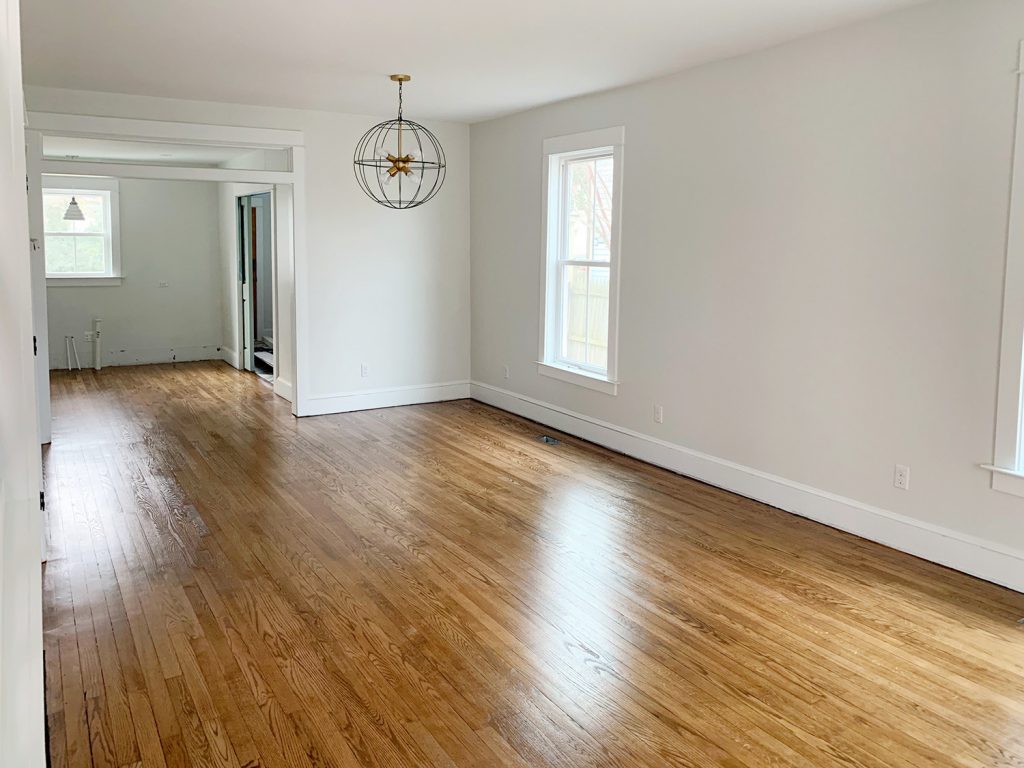 Just don’t expect us to start painting the trim in shades of blue and green… P.S. You can catch all of our previous duplex posts and projects right here, and if you’re interested in going back to read all of our pink beach house updates and posts, here’s that category for you. The post How Floor Refinishing Totally Transformed The Duplex appeared first on Young House Love. Via https://www.younghouselove.com/duplex-floor-refinishing/ As is the tradition, I’m a little late with this. Ha! But here it is! (I’m also late with my actual gift buying, so I better get cracking). We like to put all of our gift guides in one place, so below you’ll find the one we made for grown-ups, another one for kids, and (my personal favorite) one full of stuff that’s under $15. Gifts For Grown-UpsHere’s what we’re loving, either firsthand stuff we bought for ourselves and have really enjoyed – or things we’re getting for friends & family (or hoping to find under the tree).

Gifts For KidsOnce again we put things we actually own and love in here, along with stuff we’re buying our kids this year, or considering for other little cousins & friends.

Gifts Under $15Here’s my favorite list to make each year, just because I’m always amazed at how many budget-friendly things are out there that’ll make so many people smile BIG.

And since there are some pretty great sales going on right now, here’s what I’ve found so far:
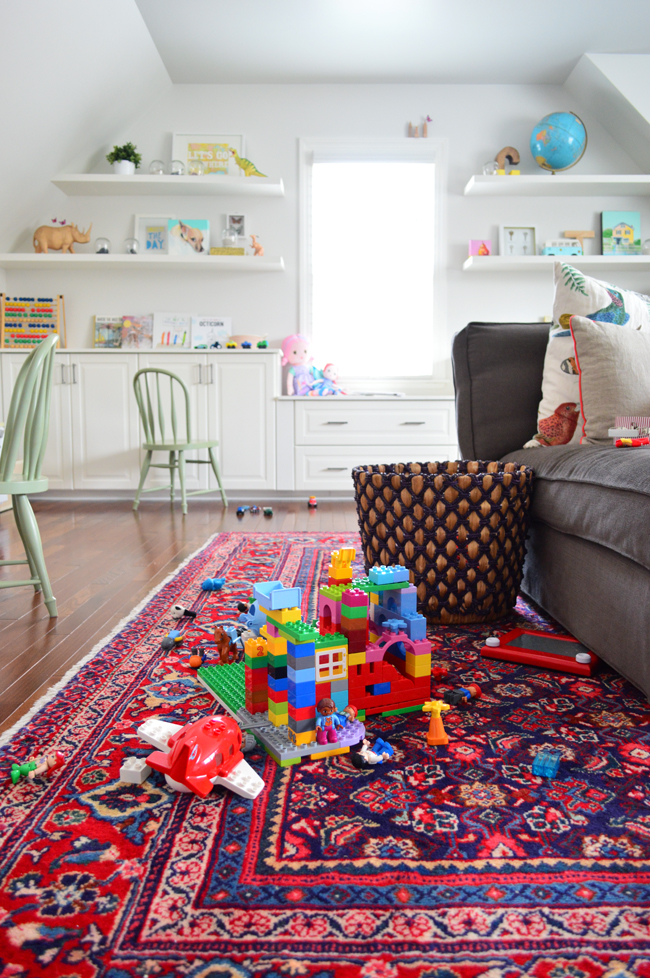
Psst – To see last year’s lists, a lot of which is still linked and for sale, click here *This post contains affiliate links* The post Holiday Gift Guides for Everyone On Your List (With Stuff under $20 – And Even $5!) appeared first on Young House Love. Via https://www.younghouselove.com/holiday-gift-guides-2018/ We recently realized that storage baskets may be simultaneously helping AND hampering our home organizing efforts (and yes, hampering was a pun). Also, the duplex has passed an important renovation milestone: floor refinishing! But even though we had planned for it to go a certain way, we were thrown an extremely last minute curveball and our entire plan changed in the final hour. Plus, a compelling counterpoint to one of our “must have” home features (thanks to you guys and your feedback from last episode!) and some simple tips for how to use decor to de-stress your home. You can download this episode from Apple Podcasts, Google Podcasts, Stitcher, TuneIn Radio, and Spotify – or listen to it below! Note: If you’re reading in a feed reader, you may have to click through to the post to see the player. What’s New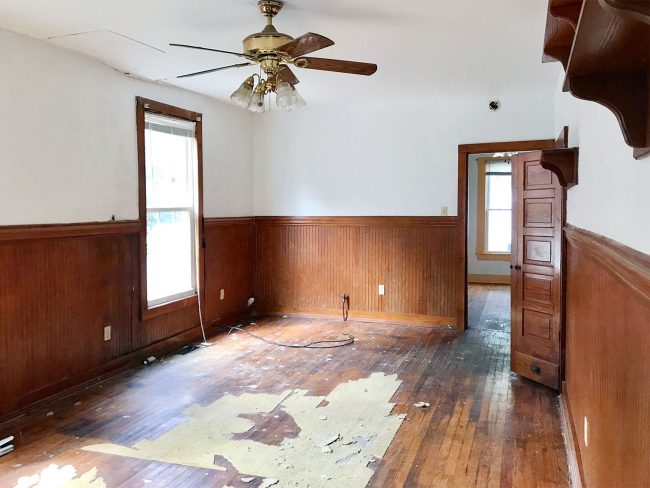
Updates
What’s Not
Can We Just Talk About: Baskets
We’re Digging

If you’re looking for something we’ve dug in a past episode, but don’t remember which show notes to click into, here’s a master list of everything we’ve been digging from all of our past episodes. You can also see all the books we’ve recommended on our Book Club page. And lastly, a big thank you to Grove Collaborative for sponsoring this episode. Sign up at Grove.co/YHL to receive their FREE holiday gift: a trio of Mrs. Meyers cleaners, a set of walnut scrubber sponges AND the special edition red tin cleaning caddy! SUCH an awesome freebie! 
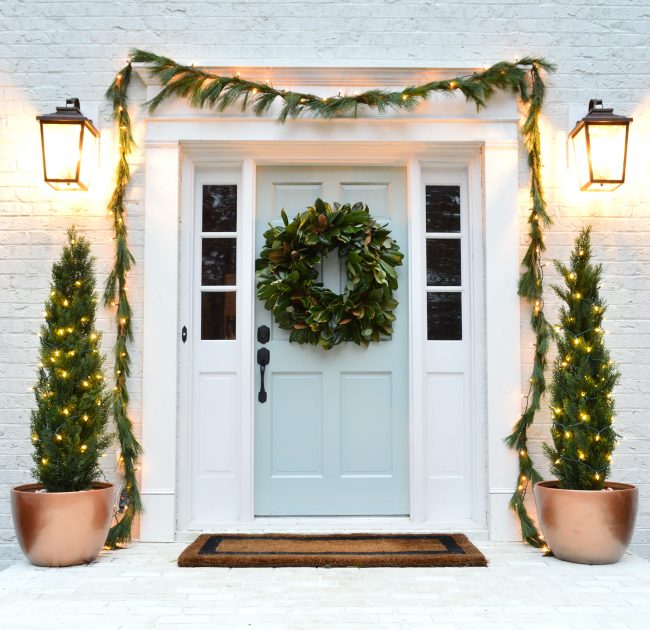
Thanks for listening, guys! *This post contains affiliate links* The post #123: Baskets: Friend or Foe? appeared first on Young House Love. Via https://www.younghouselove.com/podcast-123/ Wanna see how we decorated our house (and the beach house) for Christmas? We have a ton of photos for you, so let’s get right into it. Since we got an entirely new exterior for Christmas (literally all I wanted for Christmas was a white brick house, ha!) we had so much fun trying some new things out front.
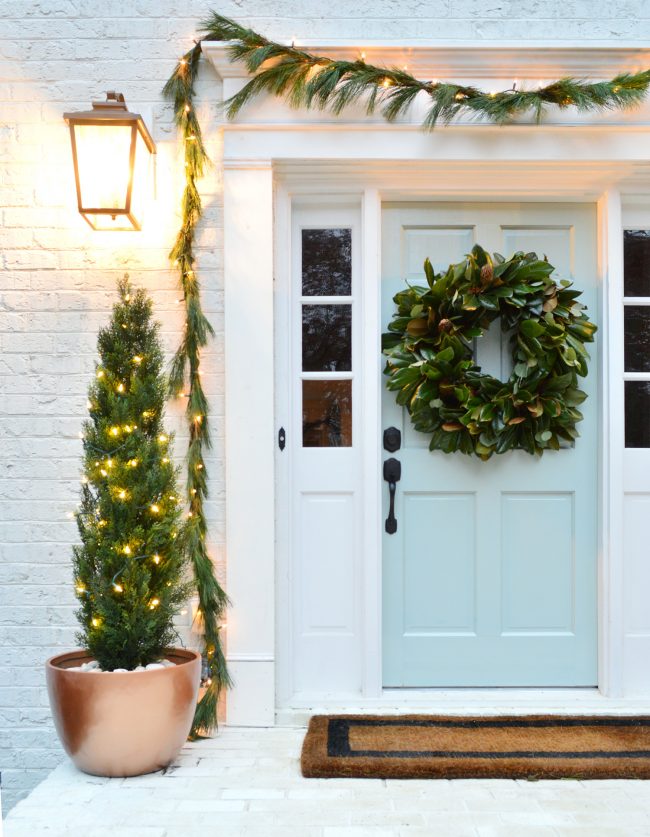
We did some simple warm white exterior LEDs (why are those so hard to find?!) on the trees on each side of the door. Remember I upgraded those to these larger faux ones because I can’t kill them and the taller height looks nicer on the porch with all the white brick. Those pots are actually the same ones we have had for 4+ years… I just spray painted them “Copper Rose” by Rustoleum (built in primer for the win – took about 30 minutes tops). And of course I added my magnolia wreath that I make at this fun Wine & Wreath event that I go to with some of my favorite ladies every year (and every year my wreath gets bigger… I’m learning to let go you guys). This year we also added two fresh 14′ evergreen garlands from Trader Joe’s (just $7.99 each!) and I gotta say, we love the real greenery so much that I think that’ll be an annual tradition right along with my wreath-making pilgrimage (John strung up some more of the same warm white LEDs in there and we put the garland lights and the potted plants on the same automatic timer so they switch on and off every night on their own).
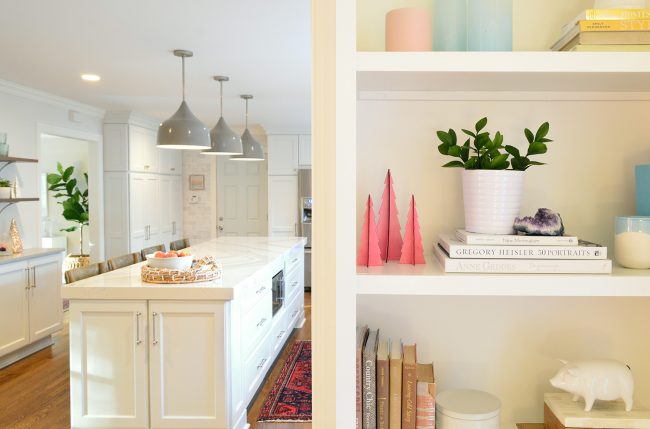
Other than that we just have our favorite LED battery candles in all of the front windows (more timers for the win! no running around turning them on and off every night – they’re completely autopilot!). We debated adding some more lights to the bushes and I’m not gonna lie, I campaigned hard for these white deer for the porch… but John was just not that into them. So while the exterior decorations don’t exactly rival the Griswolds, we do have FOUR CHRISTMAS TREES INSIDE (!!!) so our Christmas spirit is still alive and well. I can’t wait to take a picture of the house all covered in the ultimate holiday decoration… snow! I might just lose my mind when I see it blanketed in fluffy white stuff for the first time. So, picture of that to come! We also grabbed one more of those fresh 14′ garlands from Trader Joe’s to hang around the windows in the kitchen, which only took a few minutes (we just tapped a small picture nail into the top of the molding on each side of the window – which is also how we hung the one outside around the door surround). They’re such small nails that we put into the very top of the trim in both cases, so they’re basically invisible. So lazy me is debating just leaving them there year-round so they’re ready to hold garland each December.
I also tucked a few of my favorite little holiday things around the house, like these pink wooden trees that I got a few years back, which I stuck together in a group on our living room built-ins.
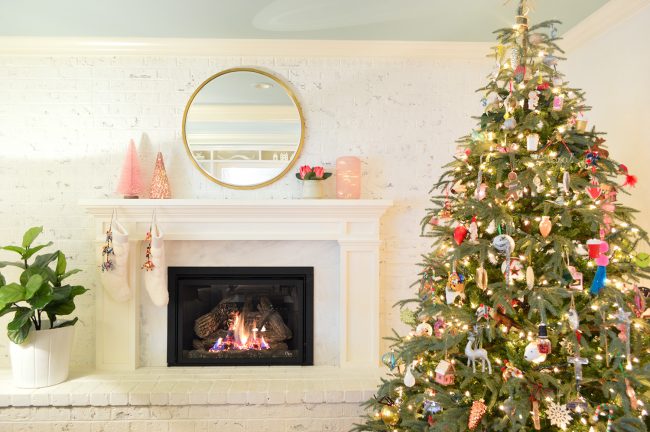
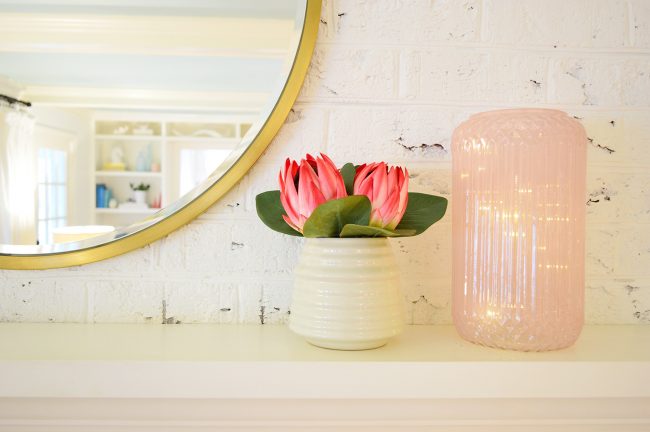
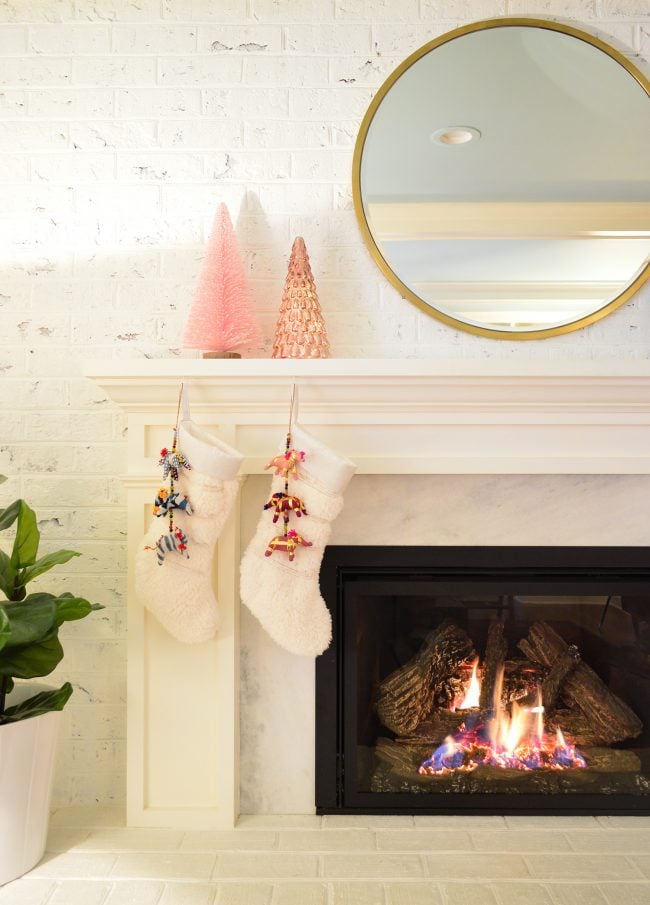
I kept the mantel simple this year with one of my favorite big pink bottle brush trees (it’s from Target years ago but here’s a similar one). I also added a pink mercury glass tree that I picked up (one of my only holiday buys this year – they’re just so sweet I couldn’t resist – and they have little lights inside that glow thanks to two small batteries in the base).
On the other side of the mantel is a little faux flower pot that I got maybe 6 months ago at Target (they didn’t sell them as holiday decor – I think they were actually out in the spring) but they look so festive with their red & green (and pink – ha!) tones to me. And then I dragged in this pink vase I got maybe a year ago (sadly no longer sold) and added a little strand of battery lights to the inside because DANG IT’S SO CUTE balancing out the glowing pink tree on the other side of the mantel.
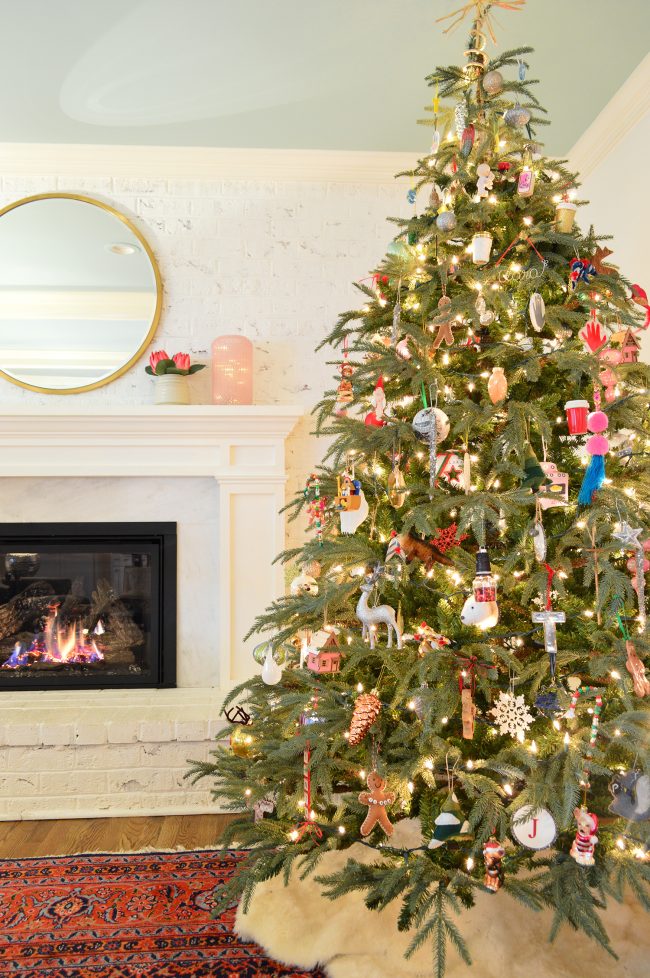
This is the exact tree we have (I think, they keep moving the link & changing the name) and it hasn’t had a “theme” in years. We just pile it full of handmade ornaments from the kids and friends and things we have made ourselves (like these silhouette & handprint ornaments and these made from kid-art along with ornaments we’ve collected over the years, or during our travels. Viva la mish-mash!
The kids’ stockings are the same ones I got a few years back (here are some similar ones). Each year I add little elephant chains (random alert!) just because it’s a fun pop of color and hey, if I can’t get John to go for leopard print stockings, at least I can get some sassy little elephants in there.
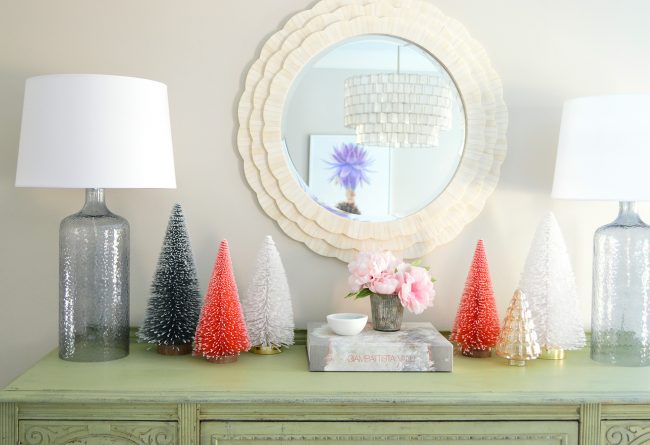
Over in the dining room I grouped my remaining bottle brush trees (all collected over the years – here are some similar ones) on our old green sideboard and called it good.
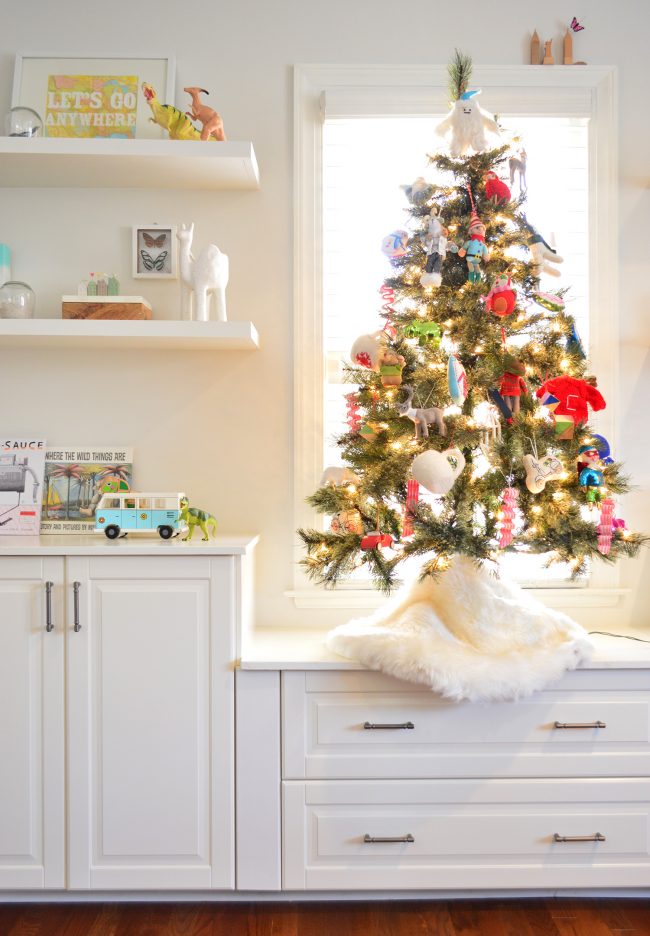
But about those four Christmas trees I mentioned… while we’re pretty minimal with most holidays (like zero decor for Saint Patrick’s Day or Valentine’s Day or Thanksgiving) I think Christmas is just our fav. And I can’t tell you how much we enjoy seeing this little tree glowing in the bonus room window at the end of the hall. We spend movie nights in here and can even see it glowing in the window when we pull into the garage, so it’s a nice spot for a little tree. And the kids love hanging the mostly felt & plush stuffed ornaments all over it – complete with the abominable snowman on top.
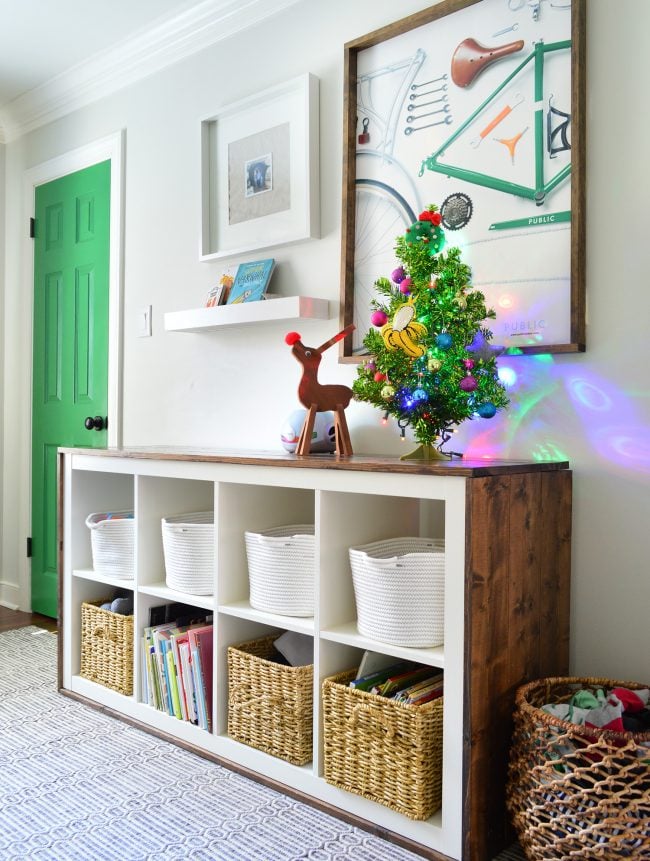
Oh and just like we do downstairs, we use a faux sheepskin rug around the base. We only need one for this little tree, and our main tree in the living room gets three. Another tree lives in our son’s room, and it’s a retro feeling green tinsel one (here’s a similar one) with colorful lights that our boy picked out himself last year. It looks really fun with his bright green closet door (it’s Irish Moss by Benjamin Moore). Also that sequin banana ornament is from Target and he loves it. Oh and the wooden reindeer next to the tree was made by John’s grandpa many decades ago.
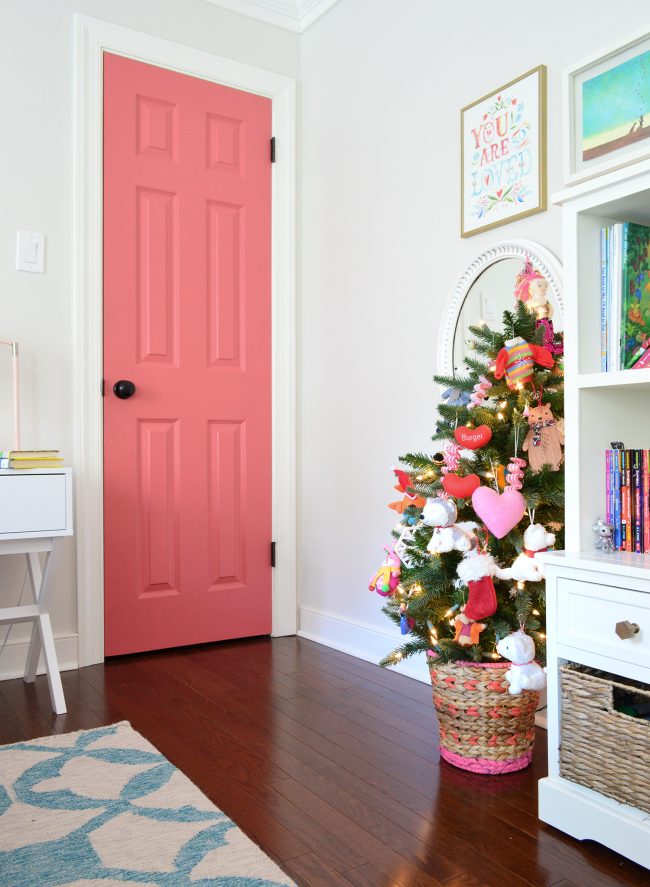
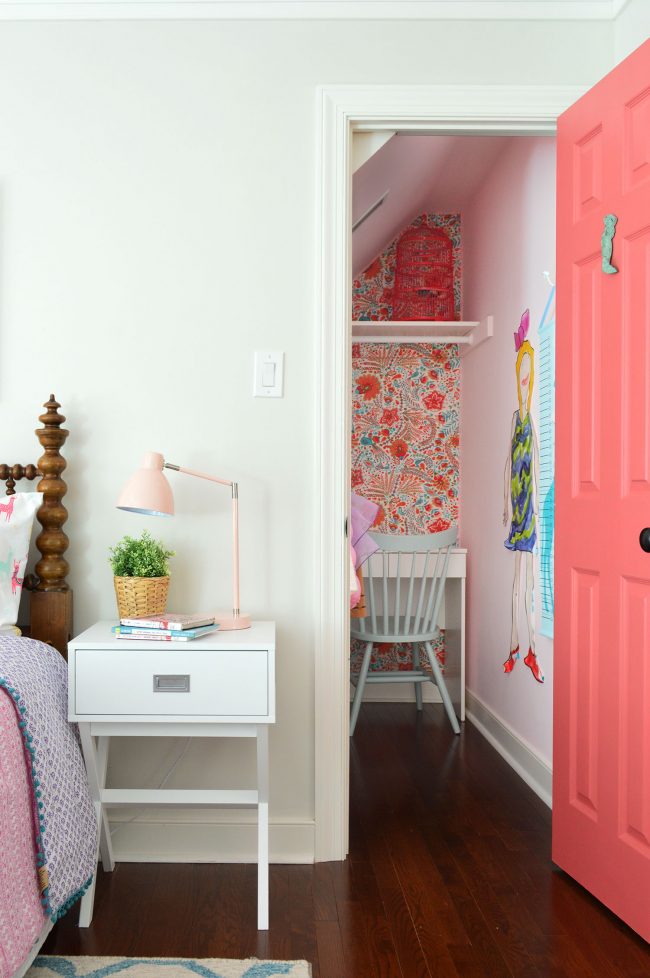
Before bed each of our kids walk into the hallway and ask Alexa to turn off their tree and it magically goes off, which thrills them to no end. Speaking of which, John “Lover Of Smart Tech” Petersik made a quick video to show you how a smart plug can make turning a tree on and off whenever you want a LOT easier (especially one with the plug in an annoying spot). You don’t need Alexa or some other hub for this plug, by the way – you can just control it from your phone, which is nice. Sure, we could put this tree – or any of our other trees – on a basic timer like our exterior lights, but we love that we can turn on all the trees in the morning with one command (you can bulk multiple actions to happen at once). And similarly, we can turn all four of our trees off at once if we’re running out the door to a meeting or dinner. Note: You may need to click through from your blog reader to view the video player. And you can watch it on YouTube here. Our daughter has also loved having a tree in her room for a few years now (here’s a similar one) and she takes great joy in redecorating it pretty much every morning. I like sticking her tree into a colorful basket that I painted (it’s a fun deviation from having a tree skirt – and it looks cute with her bold closet door, which is painted Cinco De Mayo by Benjamin Moore).
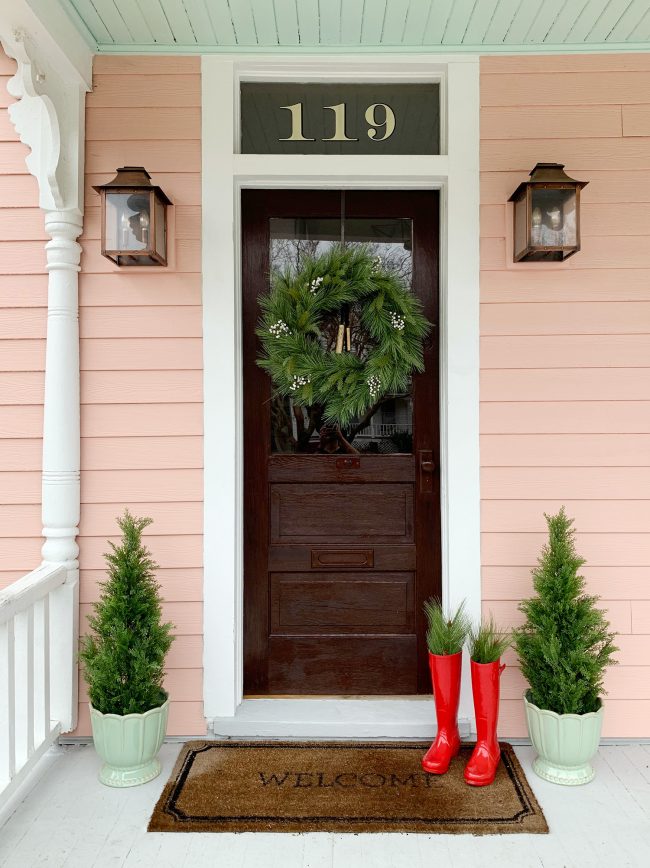
If you listened to our latest podcast, you know we thinned out our decorations in an attempt to keep things simpler this holiday season (since I’ve been working on simplifying the house in general over the past year, I didn’t want to undo all my efforts by cramming every surface with holiday decor). And thanks to that pairing down session, we ended up with a bunch of “overflow” holiday decorations that we could bring to the beach house! We’ll be spending some time there with family over the holidays too, so we were really excited to decorate it for the first time. So three cheers for not spending a ton of money throwing all the things into my cart at Target, and getting to basically decorate this entire house with leftover stuff (aka: free!!!). I did purchase one tree – but literally even the ornaments on it are things we already had, so I’m calling it a win. You probably remember seeing these red boots with faux evergreen branches all over our house (both out on the porch and inside under the console table, depending on the year) and now they’re living it up at the beach house, along with these little faux trees that used to be on our porch before we upsized them.
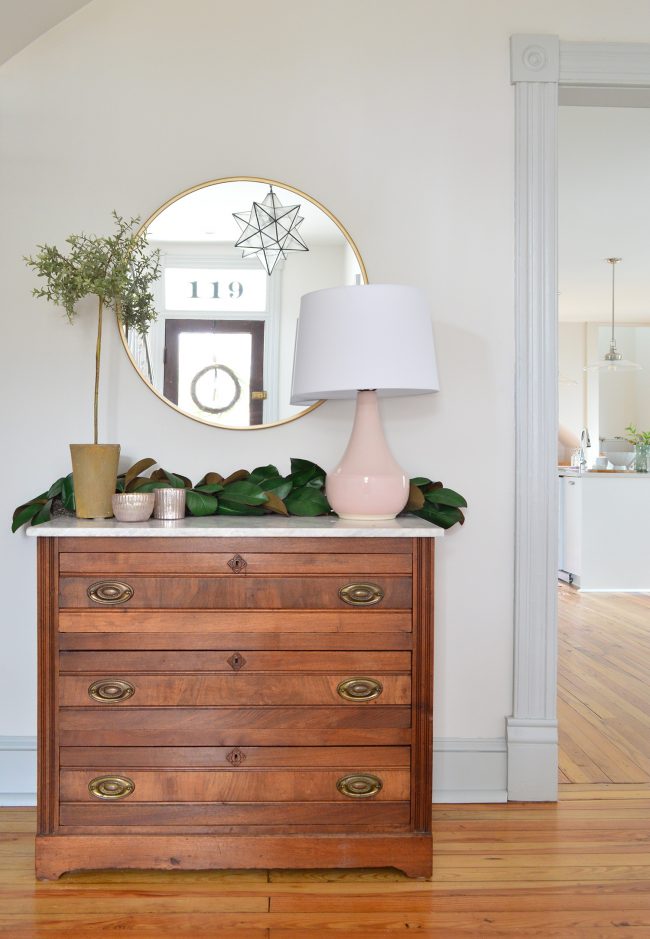
The wreath on the door is one that we bought last year but they still sell it (I LOVE the little gold bells with the gold transom numbers over them). Everything was so simple to plop down on the porch, and I love the bright red color of the boots with the pink siding (see this barn for more on my love of pink & red together for the holidays). Inside you’ll probably remember this faux magnolia garland as the one I used last year on the mantel. I liked keeping the fireplace mantel more cleared off next to the big green tree this year – and adding our garland to this table was a nice way to bring some rich green color into our mostly-white-and-gray entryway. Plus I was able to double it up so it looks extra thick on that marble top (more on that amazing dresser here).
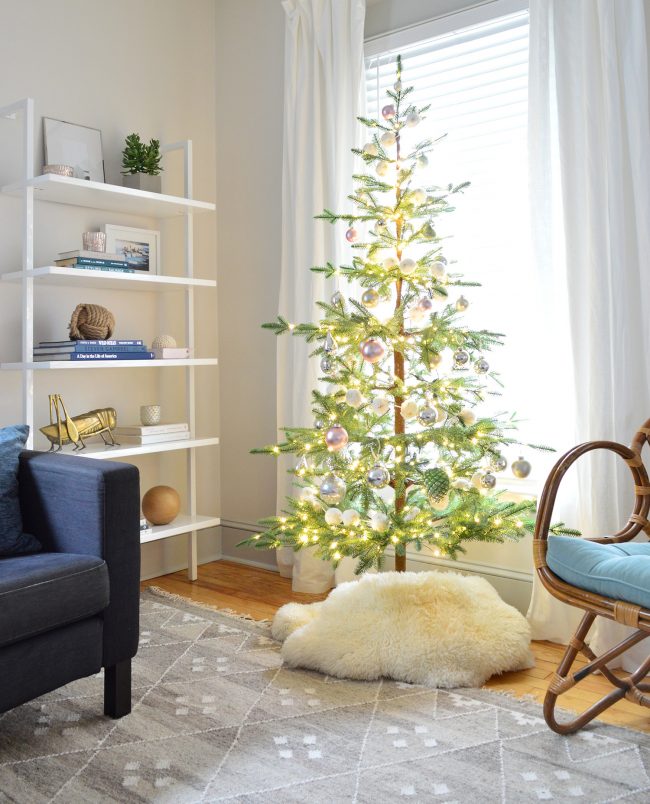
Over in the living room is the tree we bought – the single solitary purchase we made for the entire beach house decorating effort. I’ve always wanted one of these “Charlie Brown Christmas Trees” with charmingly sparse branches – and they had a big pre-holiday sale so I got this 6.5′ one for around $160.
All of the ornaments are ones that we already had from trees we did ages ago (we did a pink and green tree waaaay back in the day, and have also done a citrus one which is where the little green pear is from – oy, don’t mind those horrible photos from like a decade ago). We’ve found as we add more collected and homemade ornaments to our main tree in the living room of our house, the themed ornaments from those older trees have been used less, just because we don’t need 10 pink balls when we can have 10 random preschool masterpieces – ha! But I’m so glad we saved them because they’re perfect for this little tree here! Especially since it’s the pink house ;)
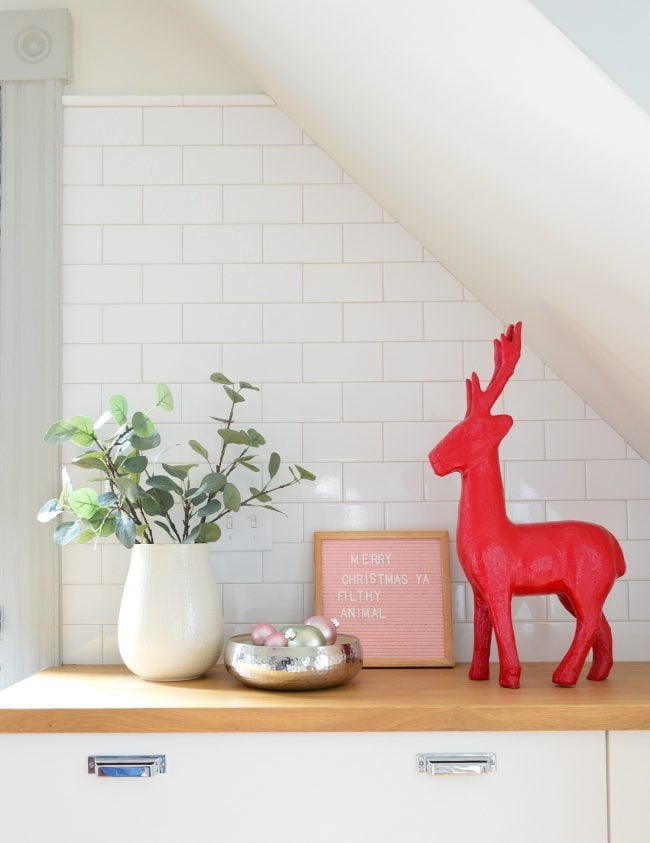
Oh wait, but we did buy the garland! I love that little yarn pom-pom stuff. It took three of them to do our 6.5′ tree and honestly if there had been four that would have been even better, but I got the last three. Over in the back wall of the kitchen are a few other things I’m sure you’ll recognize if you’ve seen past holiday tours. Like these red reindeer that I painted seven whole years ago (how does time fly that fast?!?!) and a hammered bowl full or ornaments I’ve had forever on all sorts of surfaces. I also added a few feather trees to the kitchen and the pantry and in about 4.5 seconds it was feeling pretty jolly. My favorite thing is the letter board my girl did for me. I gave her free reign and just said “how about a holiday quote?” You can tell we watch a lot of Home Alone around here.
The funny thing is that John later remembered that I put that same quote on a black letter board last year. Apple doesn’t fall far from the tree. And I like her spacing better than mine. Over by My Favorite Pink Stove Of All Time (yes, that’s its proper name), I leaned up a little plate I got a few years back (here’s a similar one) and two white ceramic nutcrackers I’ve had for years. It’s so sweet how just a few things can make the entire kitchen feel ready to host a whole group of friends and family. I love that it doesn’t take much!
So there it is, a tour of our house all decked out for Christmas, along with some sweet stuff that we mostly repurposed for the beach house. We’d love to hear what you guys are doing to decorate for the holidays over on Facebook or Instagram, and if you’d like to see last year’s holiday tour, and the one from 2016, here are those links. We also have a few other holiday ideas for you below:
*This post contains affiliate links* The post Holiday House Tour 2018 & How We Decorated The Beach House! appeared first on Young House Love. Via https://www.younghouselove.com/holiday-house-tour-2018/ |


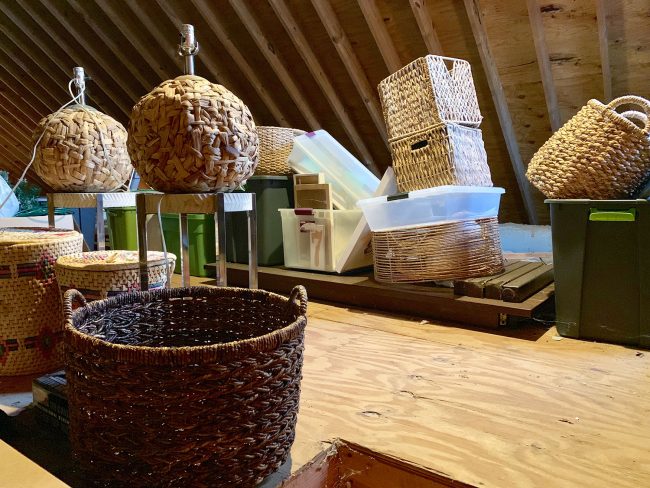
 (Not shown: all of the smaller baskets that are nested inside the larger baskets that you see here)