|
It surprised us to realize it has been nearly two years since our last video house tour. And we were even more surprised to realize how much our house has changed in that time!
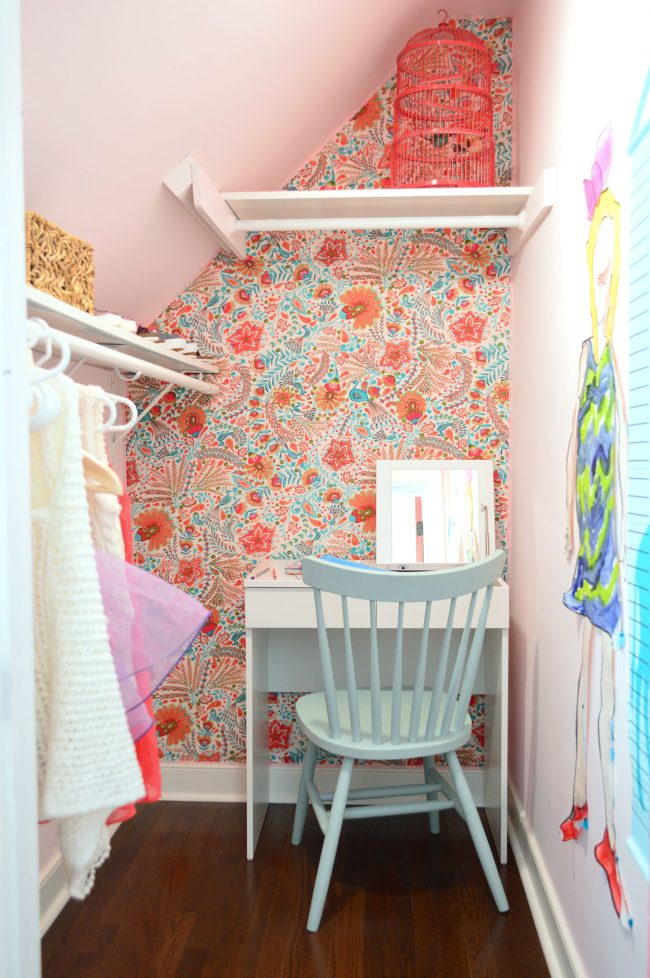
In my head, we hadn’t really done much here in Richmond since we’ve been focused on the beach house and the duplex renovations, but when we re-watched those 2016 videos it felt like AGES ago – we hadn’t turned our son’s nursery into a big boy bedroom, our daughter’s room was mid-makeover, and Sherry had yet to go on her minimizing spree. There were also some pretty noticeable changes in our master bedroom and our living room, so it reminded us that we haven’t ignored this house as much as we thought we had! The biggest change, maybe of our entire 5+ years of living here is definitely going on outside right now though…
We’ll share more info about painting our brick exterior once it’s complete in a giant detailed post with all the what, how, and how-much-it-costs details, but for the time being you can follow along on Instagram Stories or – better yet – turn your attention to the inside and take these tours around our ENTIRE first and second floors (we spared you a look into our third story which is just an unfinished attic). Let’s start downstairs. Sherry and I relied on our go-to videotaping technique once again: I walked with the camera while Sherry narrated (we’re playing to our strengths here, folks). But I have to disclaim that the video was a little shakier than I realized, so I put a stabilizing filter on it afterward. It smoothed things out, but it caused it to look a tad glitchy in a couple of spots. But it still gives you a really accurate depiction of what it’s like to walk through our house – except our dining table is already full of junk for the duplex again (we recorded this a few weeks ago). *If you can’t see the video above, you may have to click through to the post (they don’t always show up in a reader like Feedly/Bloglovin’) or you can watch it here on YouTube The upstairs tour is a little longer because there are more rooms to see – and more rooms that are unfinished! And I should note that we shot this before Sherry’s closet video tour (hence the mirror not being hung in this one) and before we added the treadmill to the bonus room. *If you can’t see the video above, you may have to click through to the post (they don’t always show up in a reader like Feedly/Bloglovin’) or you can watch it here on YouTube For anyone who watched those videos and thought: “I wonder where they got that table/chair/lamp?” or “I wonder what that wall color is?” – we created this source page with all of that info for you. It has every room on each floor broken down for you. And now that you’ve watched both of those you should totally take a time jump back to 2013 when we shared our FIRST video of this house when it was in its before state. And if nothing else, just click play to see our old brick of an iPhone at the beginning. Sheesh! *One more time for the people in the back… if you can’t see the video above, you may have to click through to the post (they don’t always show up in a reader like Feedly/Bloglovin’) or you can watch it here on YouTube We hope you enjoyed the tours! And we can’t wait to share more details about the exterior painting. I had to write this post because Sherry has had trouble forming words all week with all of the excitement around here, and is currently outside formatting a plan for how we’ll be replacing the portico that WE TORE OFF OF OUR HOUSE. So yeah. It’s been a pretty exciting past few days.
P.S. Remember you can find all of our house’s paint colors and a full source list of where we got our furnisings/accessories/window shades/lights/etc here. The post New Video House Tour! appeared first on Young House Love. Via https://www.younghouselove.com/new-video-house-tour-2/
0 Comments
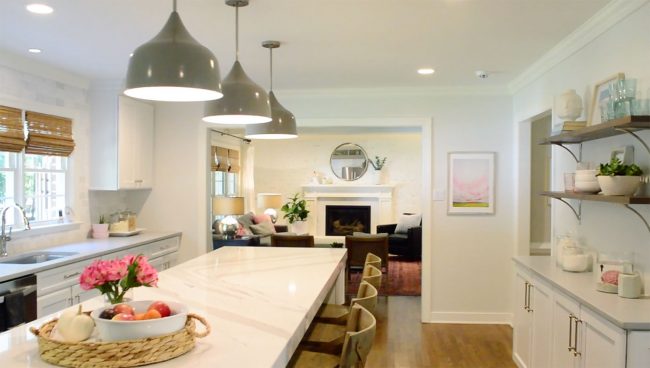
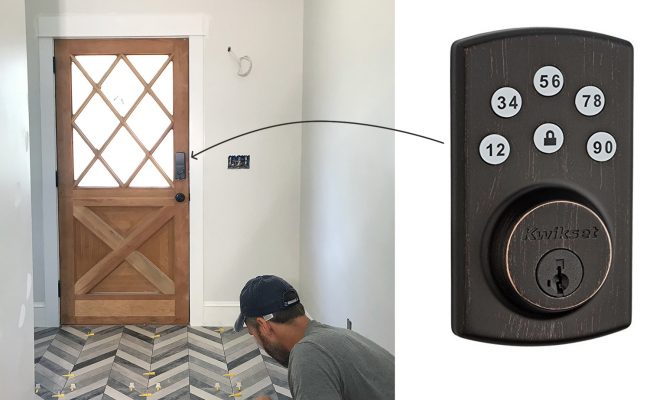
We recently passed the one year anniversary of moving furniture to our beach house, so this week we’re looking back on how we kept our sanity while decorating an entire house all at once. It made us realize that there are some flaws in our usual method of taking things slow and going one room at a time – so if you’re struggling with your own home, we have some ideas. We’re also recapping our trip to Chicago for the Domino Magazine Awards. Plus, I defend my take on navy cabinets and smart locks while Sherry buys something exceptionally ugly for our house. You can download this episode from Apple Podcasts, Google Podcasts, Stitcher, TuneIn Radio, and Spotify – or listen to it below! Then use this page to check out any links, notes, or photos we referenced. Note: If you’re reading in a feed reader, you may have to click through to the post to see the player. What’s New
Updates
Decorating A Whole House
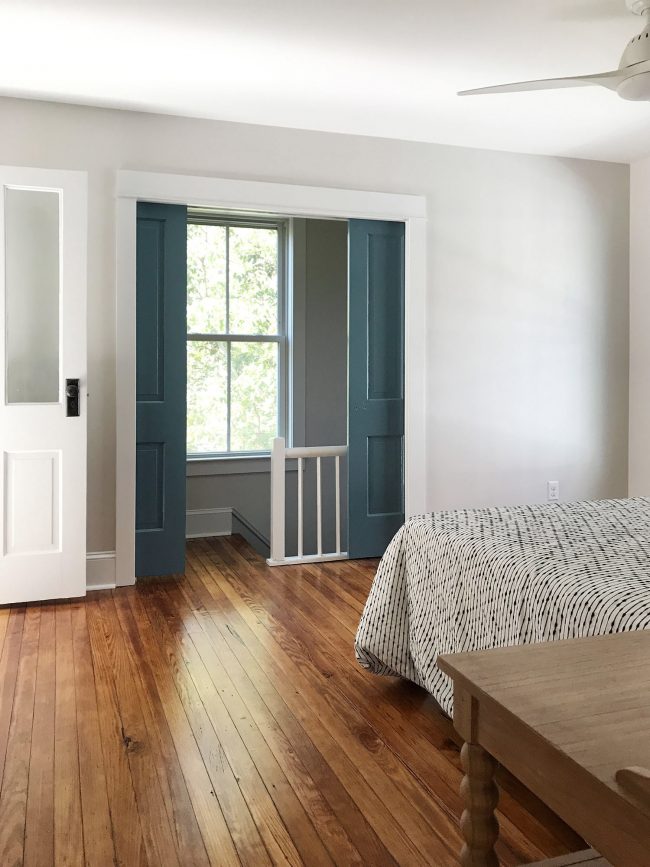
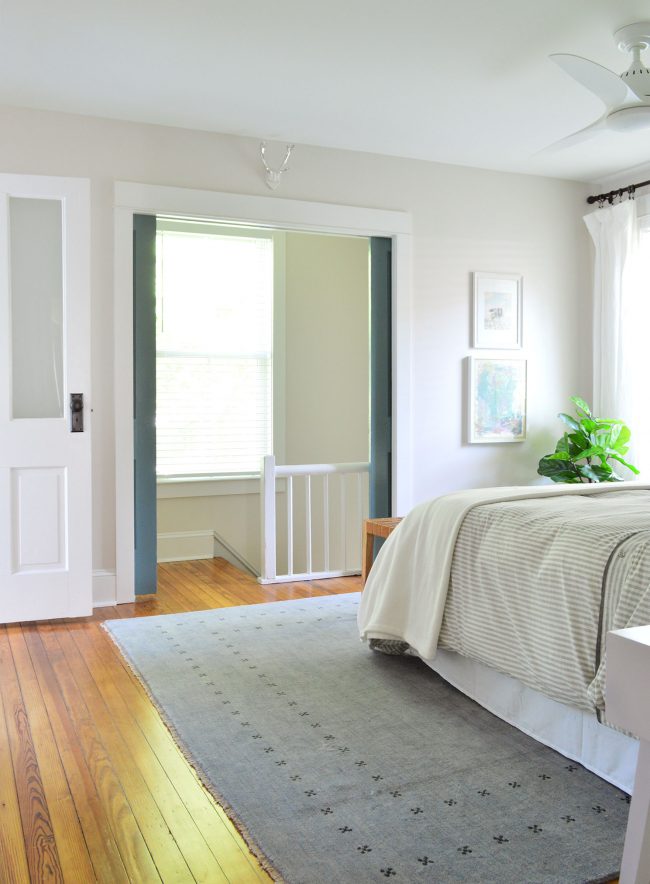
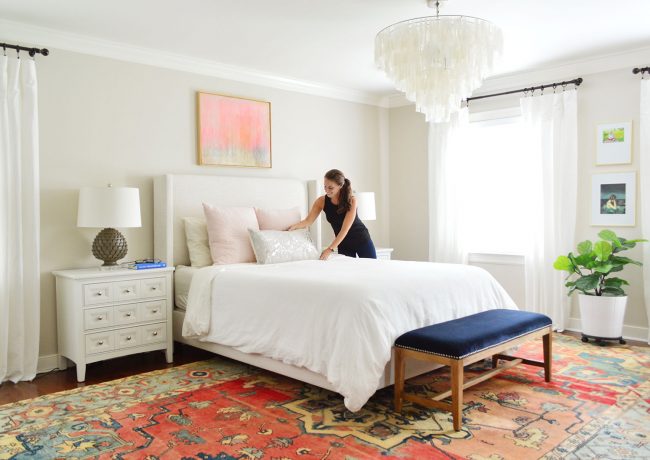
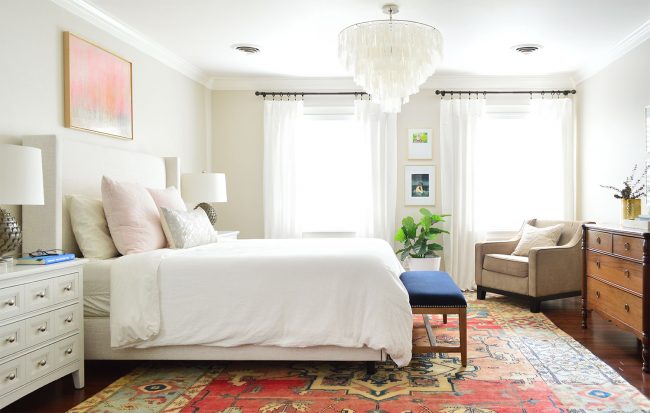
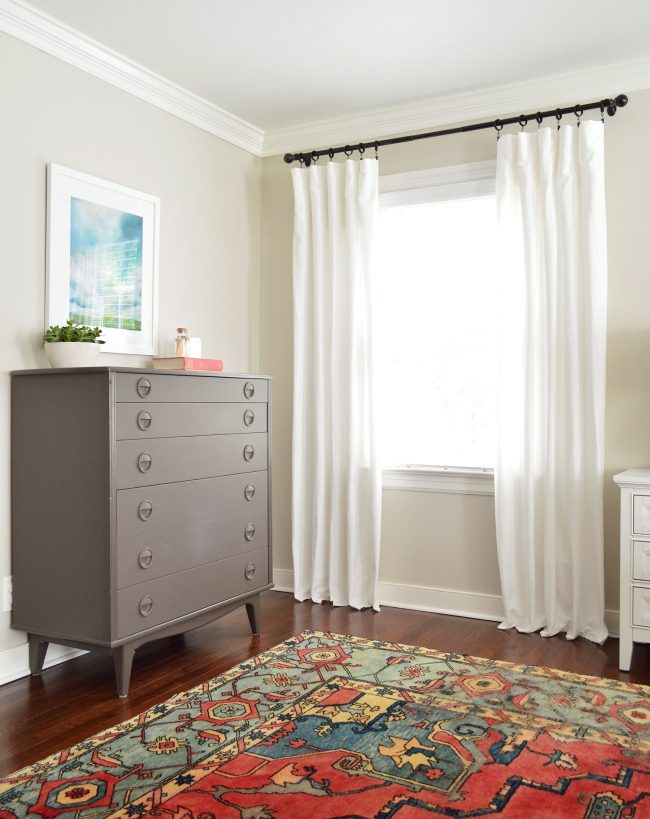
chandelier / ceiling medallion / rug / bookshelf / curtain rod / curtains
rug / bedding / nightstand / fan
We’re Digging
If you’re looking for something we’ve dug in a past episode, but don’t remember which show notes to click into, here’s a master list of everything we’ve been digging from all of our past episodes. You can also see all the books we’ve recommended on our Book Club page. And lastly, a big thank you to Grove Collaborative for sponsoring this episode. Sign up at Grove.co/YHL to receive a trio of Mrs. Meyers cleaners and a set of walnut scrubber sponges, or if you’re already a Grove customer, visit that link to still get the free sponges!
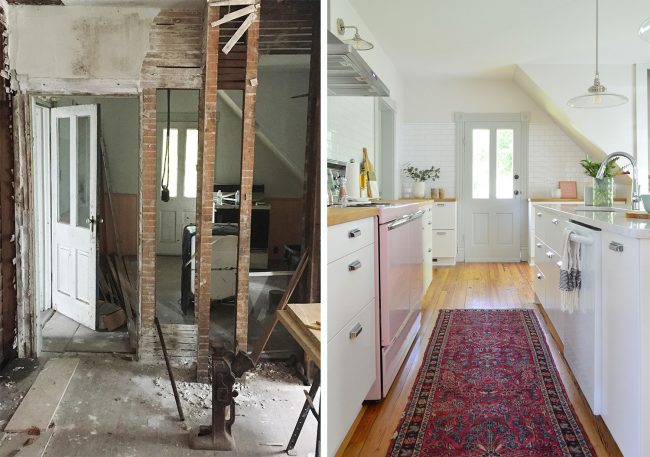
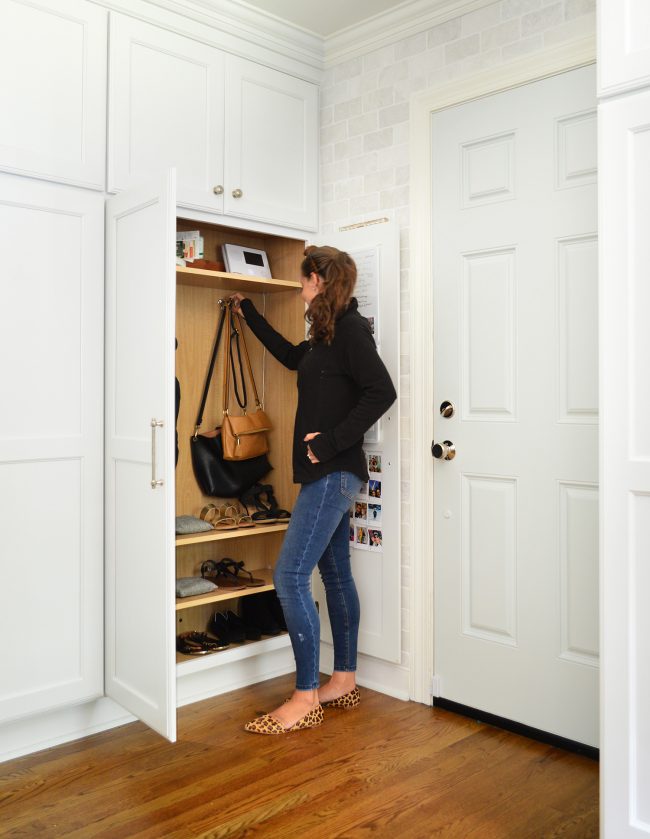
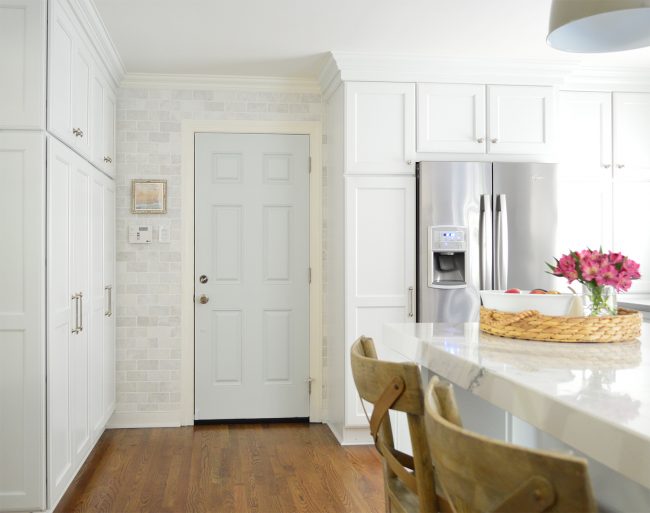
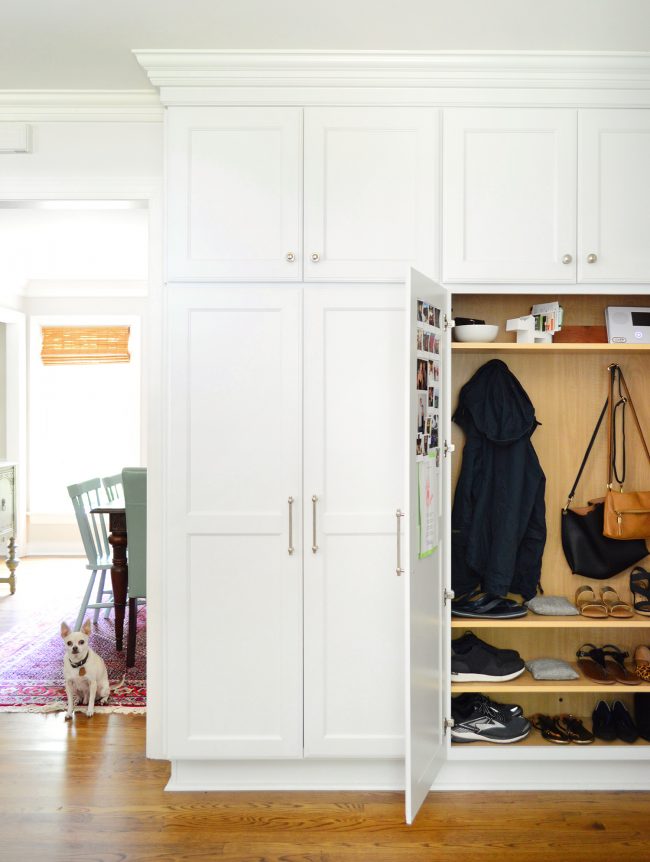
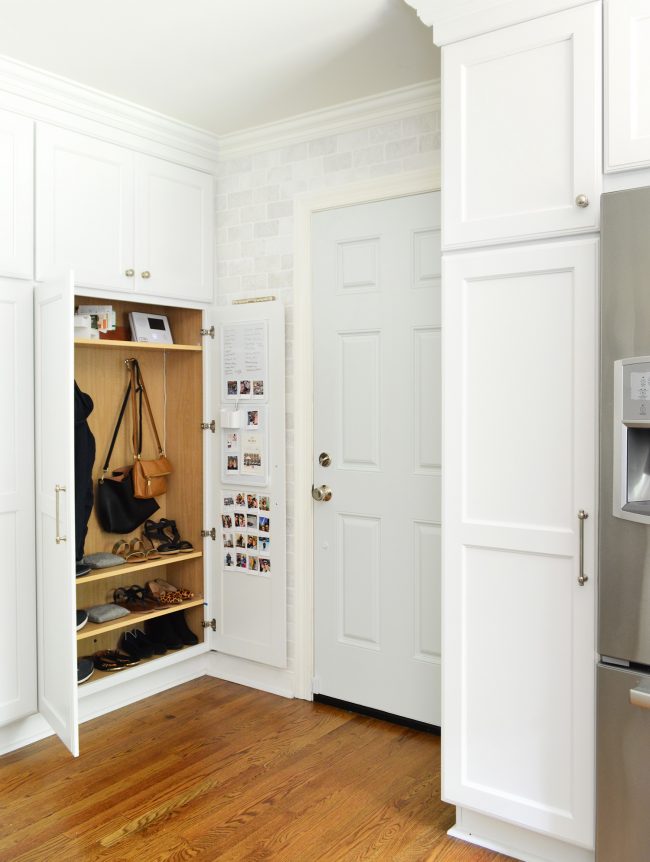
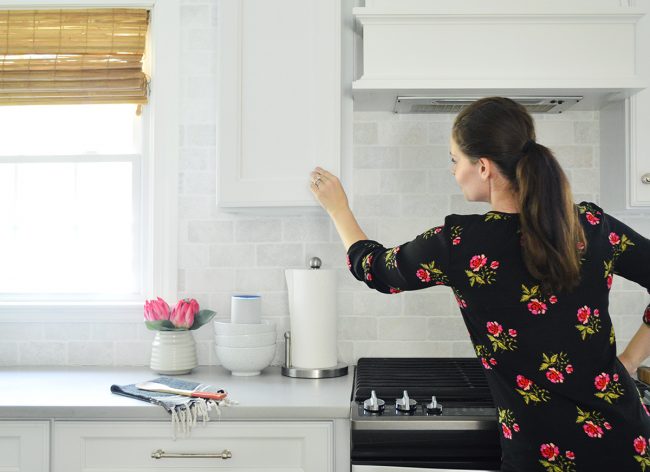
Thanks for listening, guys! *This post contains affiliate links* The post #117: The Downside To Decorating One Room At A Time appeared first on Young House Love. Via https://www.younghouselove.com/podcast-117/ Since we don’t have a proper mudroom in our house (our garage door, which we use every day just dumps us right into our kitchen), you may remember that we squeezed the function of one into our big kitchen remodel by placing large cabinets – kinda like lockers, but prettier – right next to the door that leads to our garage. But now that we’ve lived with them for over two years (how has it been over two years since our kitchen renovation?!), we realized that a few easy tweaks would make these hidden cubbies work a lot harder for us.
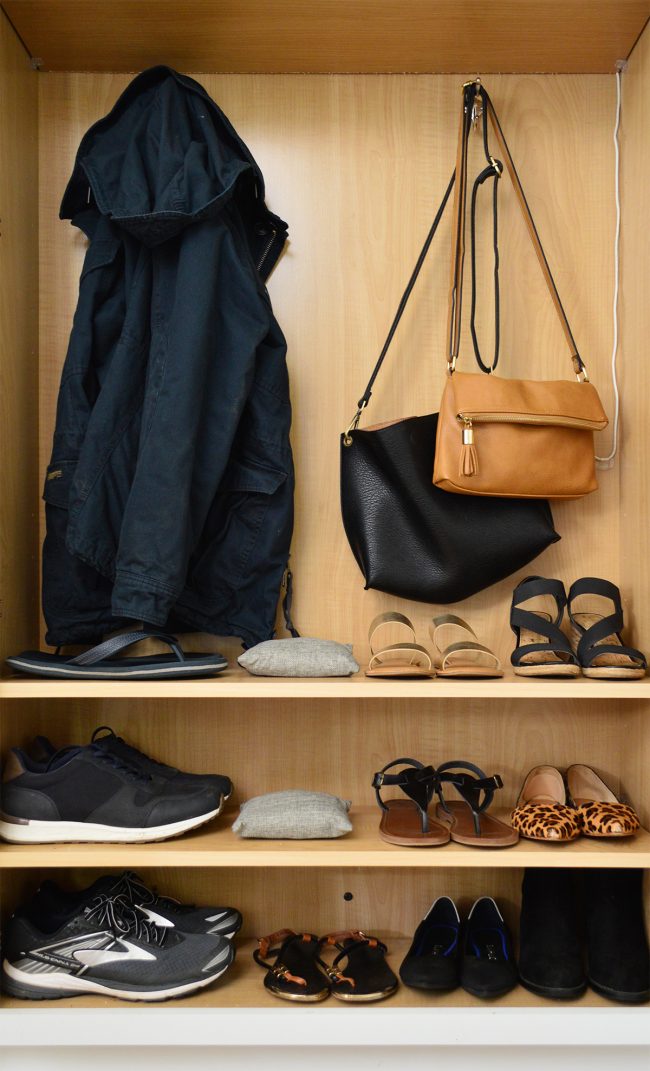
(Since I know you’ll ask – here are Sherry’s shoes, jeans, fleece, & a similar purse) To help you get oriented, here’s the area of our kitchen we’re talking about. That door to the garage is our main entry/exit point, and if you look at the floor plan options we considered during our renovation, you can understand why having this faux mudroom has been such a HUGE improvement for us. We get to keep shoes, coats, backpacks, purses, gloves, and hats conveniently by the door, but all of that clutter gets hidden away. It has been such an upgrade from our old system of walking halfway through the kitchen to dump shoes into one big dusty shoe basket that was out in the open, and then trekking even further around the corner to the coat closet to hang everything else.
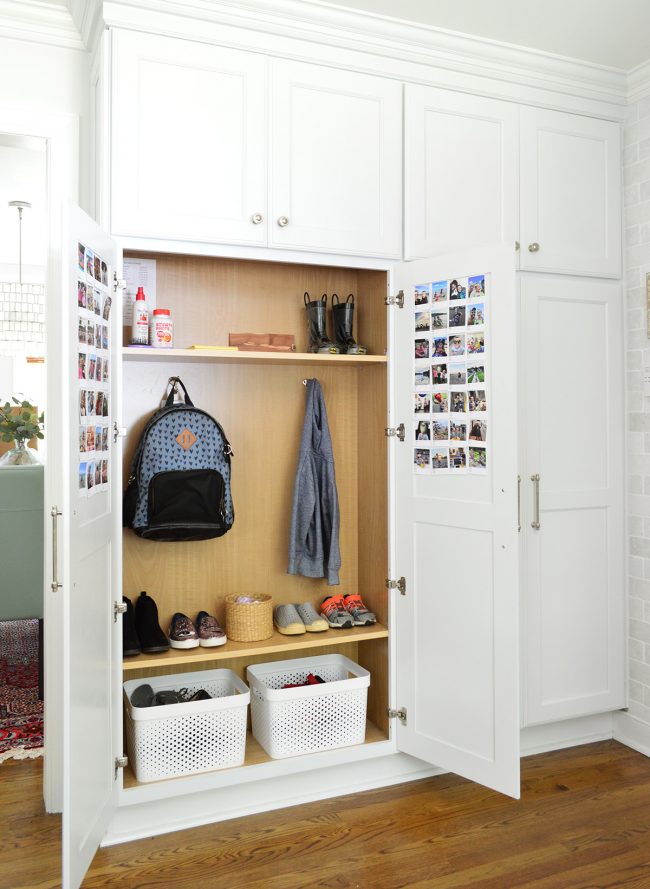
Our “mini mudroom,” as we call it, is made up of two large cabinets that go from floor to ceiling. And each of these two cabinets have two doors – meaning each of our four family members has their own side (or locker, if you please). You’ve probably seen our kids’ side the most, which has looked pretty much like this since the remodel was complete. We added hooks for their coats and backpacks, and a basket underneath to corral extra shoes. It gets a little messy sometimes, but overall it has been SUPER functional for us and for them. Tip: we keep a basket of socks in there along with their shoes, which makes it so much easier to get out the door than having to send them back upstairs for ’em.
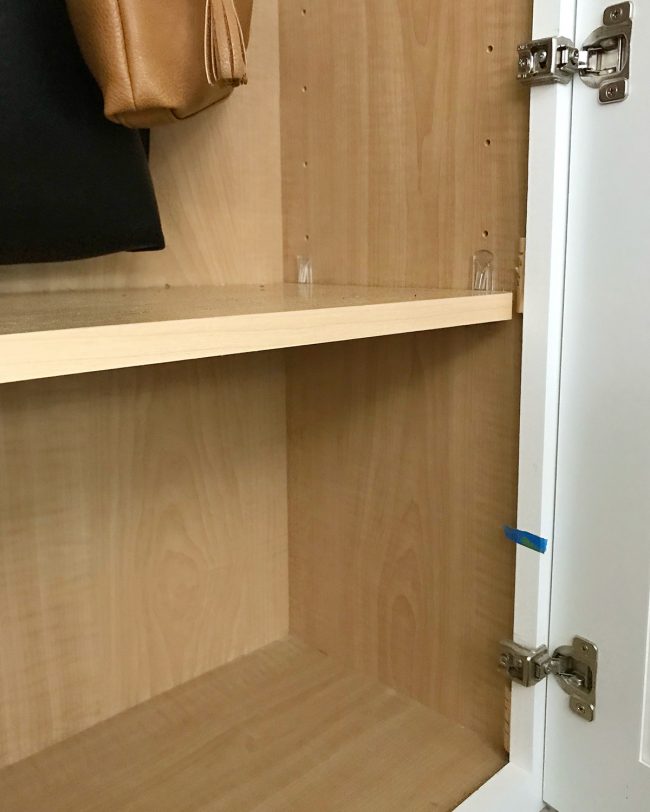
Our side has had the same setup over the last two years: hooks, shelves, and shoe baskets… but over time we realized it wasn’t working as well for us as we’d like. The primary issue is that our stuff is just bigger. Our coats are longer, so sometimes they’d get bunched and wrinkled on the bottom where they’d hit the shelf below (instead of freely hanging), and the baskets barely hold more than three of my shoes (and 3 shoes is NOT a helpful number). Sherry’s basket could hold more of her shoes since they’re smaller than mine, but it would get so crowded that it was impossible for her to grab a pair quickly without taking the whole basket out every time. Meanwhile, our kids’ little shoes could slide out with just a slightly tip of the basket. What works for them just wasn’t working for us.
I know you’re probably thinking: just adjust the freaking shelves then! Well, the problem – and actually the reason why we had set it up this way in the first place – is that the shelves are set at the highest and lowest points they can be, based on the pre-drilled holes in the cabinet. So back in 2016 when we wrapped up the renovation we really didn’t have the appetite or energy to go drilling extra holes and moving things around. “It’ll be fine,” we said. Eh, we were tired. But fast-forward to 2018 and it finally felt like an easy weekend task.
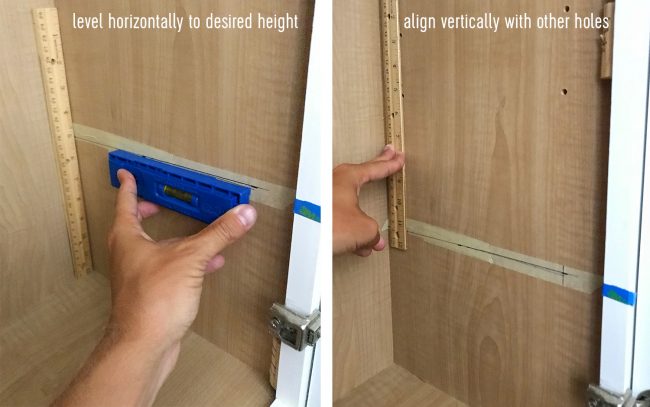
That blue tape mark above is where we decided we wanted to move the shelf, and therefore drill a new set of holes. They sell shelf pin templates and jigs for making holes like this, but I wasn’t about to spend $20 or $30 for a couple of holes, so I went old school and just marked everything on tape using a ruler, making sure it was level and vertically aligned with the holes above. The tape not only protected me from writing on the cabinet itself, but also helps to keep wood veneer from splintering when you drill into it.
Once everything was marked, I just stuck different sized drill bits into one of the existing holes until we found the one that would create a matching hole. Then I used blue tape to mark the depth of the existing hole on the drill bit, so I didn’t end up drilling through the entire side of the cabinet. Once my drill bit sunk to meet that piece of tape, I knew it was deep enough, and stopped drilling. Boom: instant holes that were the same size and depth as the pre-drilled ones that came with the cabinet.
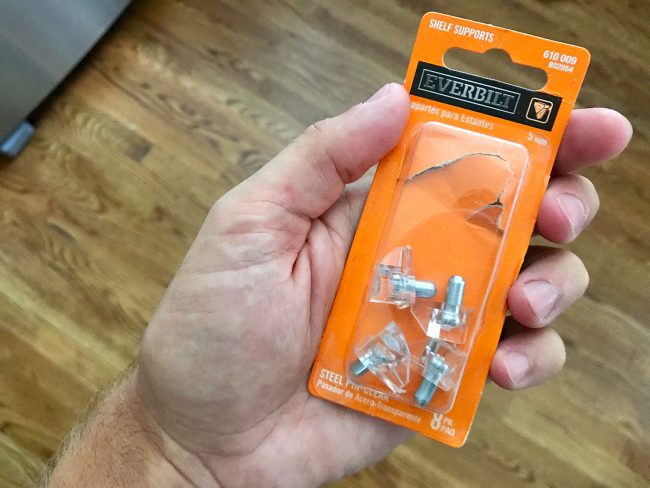
We didn’t have any more pegs in the cabinet to use to rest an extra shelf on, but you can find a box of them at the home improvement store. The store didn’t have of the click lock variety that came with our cabinets, but these fancy pegs with a sturdy plastic platform were under $3 and did the trick just fine.
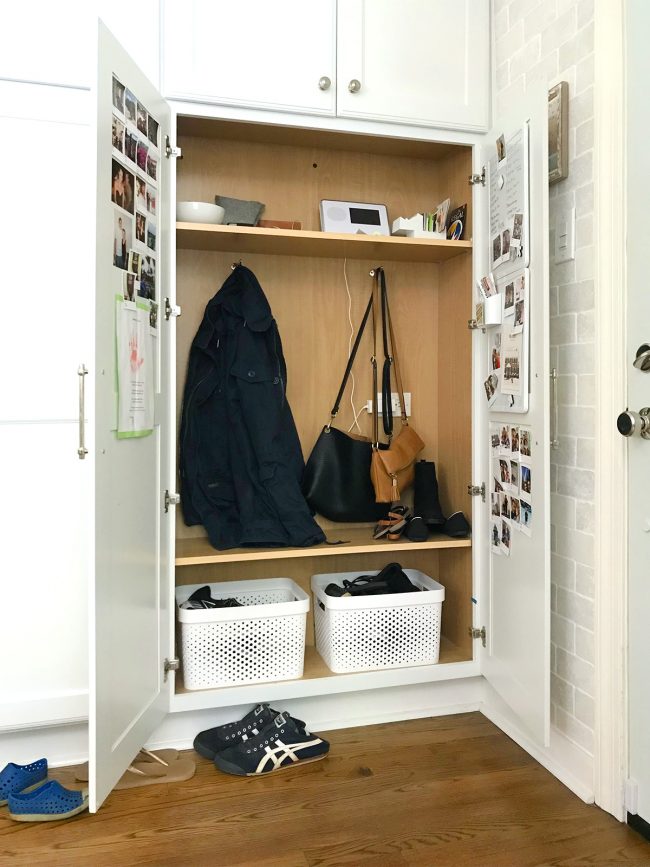
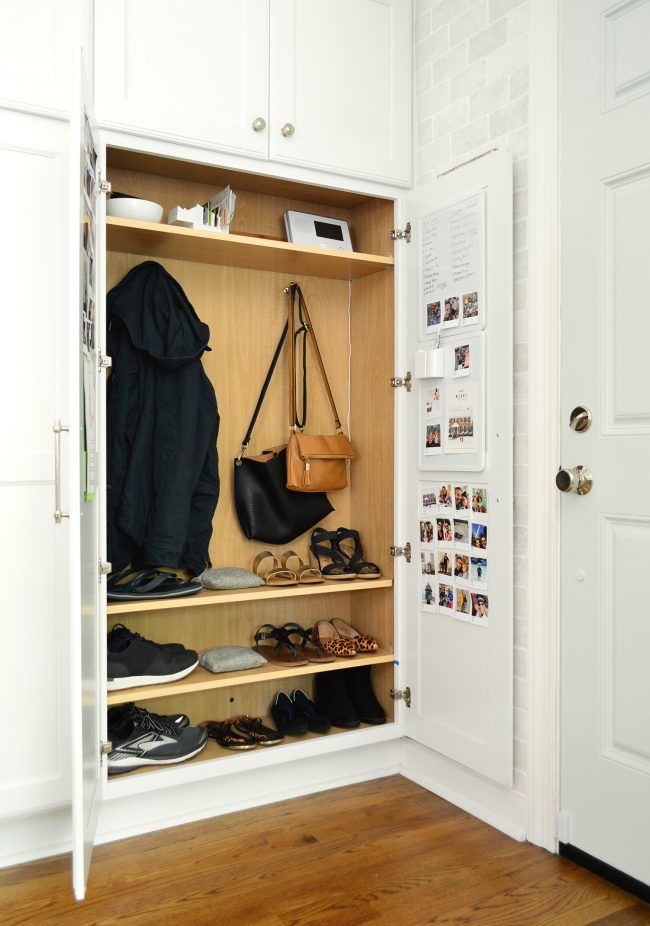
After drilling all of the new holes on the bottom (we just added two on each side) we also drilled a new set of holes up top so that we could raise the top shelf and, in turn, raise our hooks a little bit too. Suddenly our coats could hang without hitting the bottom shelf. And we had room for not one, but two shelves of shoes on the bottom thanks to moving the top shelf and the hook up. Then all we needed to do was dig out one of the extra shelves we’d been keeping in the attic (we also could have made one with plywood if we didn’t have one on hand) and – BLAMMO! Now our side of the mudroom looks like this:
Tip: those two gray bags above are these random charcoal bags that Sherry loves. They absorb odors so they’re great for a mudroom or a shoe basket, and you just lay them out in the sun for an hour a month to air them out and then toss them back into the cabinet to keep doing their job. It may not seem like a dramatic difference, but by adding the extra shelf on the bottom we were able to ditch the shoe baskets entirely, allowing us grown-ups to store MORE shoes and access them MUCH more easily. In fact, Sherry now can keep pretty much all of her go-to footwear down here (seven pairs!) so she’s not having to make those last minute runs up to the bedroom closet anymore. And the three pairs that I usually wear can easily fit too, even though they’re significantly larger than Sherry’s.
We couldn’t have found that extra space for shoes had we not moved the top shelf and the hooks up (we had a lot of dead space above the top shelf initially, but it had been on the highest pre-drilled holes before so we just sort of said “ok, if that’s the highest hole we’ll put the shelf there”). It’s a great spot for a few practical things that keep us organized, like a bowl for our keys and my wallet, a mail holder that Sherry got from Target to serve as a gift card organizer, and our alarm pad. Oh and that rectangle of wood that you see at the top is another one of Sherry’s deodorizing tricks – it’s one of these cedar panels, which definitely keeps these cubbies smelling good. There’s one on the kids’ side too.
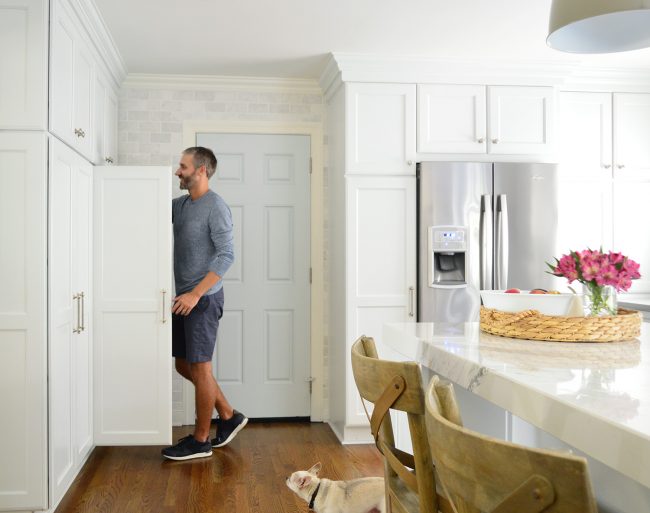
This small update was a reminder to us that sometimes you just have to live with something for a little while to find the best ways to make it work. And sometimes at the end of a BIG project, it’s ok to be tired and think “it’ll probably be fine, and if it’s not I’ll deal with it later.” And when you finally find the steam to address them down the road, they can be surprisingly satisfying. I mean, just check out how satisfied Burger looks below:
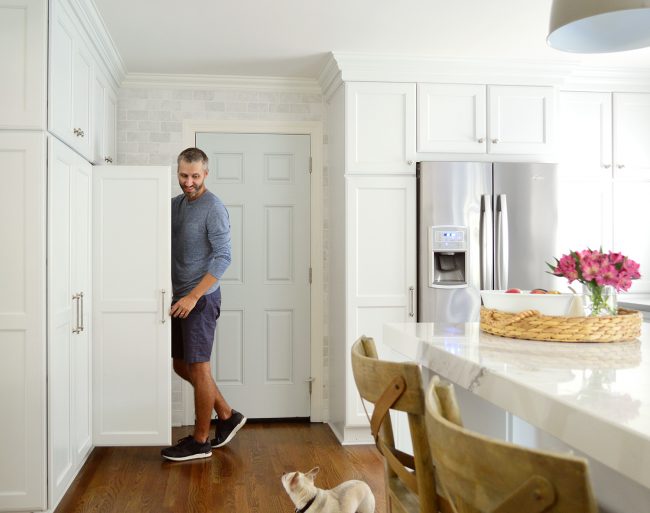
Speaking of Burger, he likes to hover nearby whenever we break out the camera and tripod. But this time he got nervous that we were actually leaving – not just posing like we were leaving – so he was extra vigilant.
Poor guy. Photos can be so stressful.
Oh, and since I know this question will come up. All of those photos taped inside the cabinet doors are from our custom page-a-day calendar that I rave about every year. You upload 365 photos and for $40 you get a personalized page-a-day calendar. I collect photos from my siblings each year and make one calendar that we get printed like six times (for all of us and my parents and our grandma) for Christmas each year). It’s like a rotating family album that sits on our kitchen counter and we all get to see the same photo every day, so it sparks texts about a certain memory or event.
Might sound silly, but we all feel more connected when we look at the same family photo everyday. And at our house we tape up our favorites on the cabinets throughout the year, then when the new calendar comes each January we clear the ones off from the year before (saving them in a memory box) and we start fresh. And again, if you want to learn more about kitchen remodel and how we decided on this layout (and this unconventional mudroom) you can see it all summarized in these three posts (which also include measurements of the entire room for anyone wondering how big our island is or how long the room is, etc):
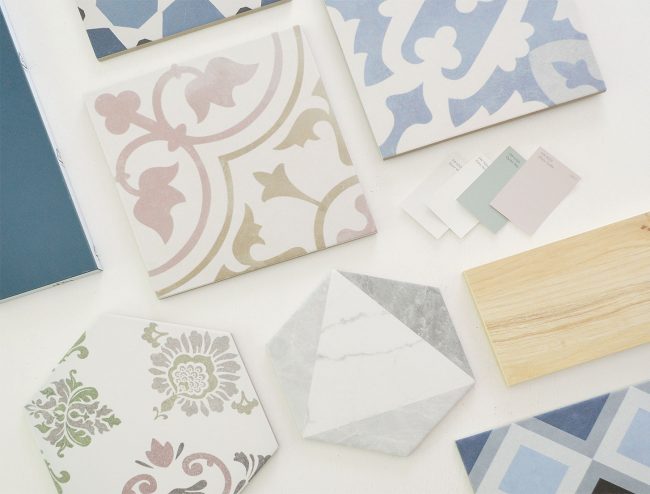
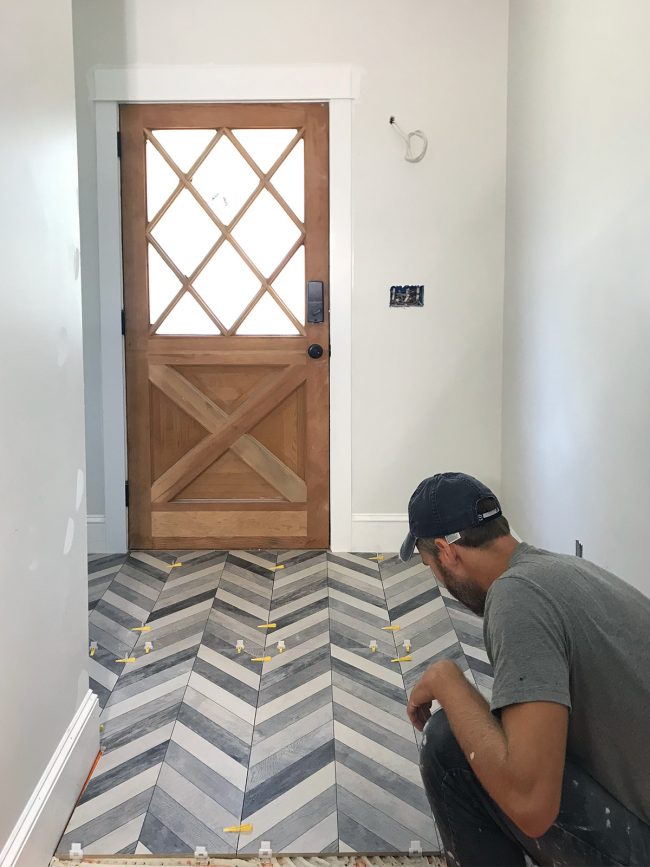
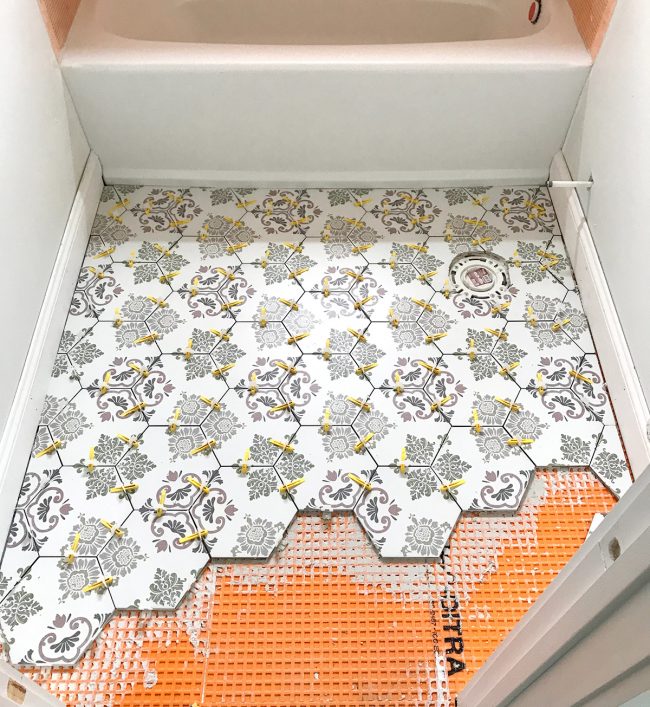
Also I know I already said this, but how was that over two years ago?! *This post contains affiliate links* The post Maximizing Our Mini Mudroom appeared first on Young House Love. Via https://www.younghouselove.com/maximizing-our-mini-mudroom/ Now that we tested out the process to achieve “Cozy Minimalism” in our house (and loved the result!), we’re taking it straight to the source and talking with Cozy Minimalist Home author Myquillyn Smith about how she realized she could merge these two seemingly opposite ideas to create a step-by-step process for people to follow in their own spaces. She shares how to stop buying the wrong accessories, why there’s a “right” order for decorating a room, and emphatically explains what none of us should ever be buying at Target. Plus, we detail how we’re trying to be smarter about our approach to tiling the duplex (one thing we did this time made it a whole lot easier!) and Sherry may have finally gotten on the autumn train. You can download this episode from Apple Podcasts, Google Podcasts, Stitcher, TuneIn Radio, and Spotify – or listen to it below! Then use this page to check out any links, notes, or photos we referenced. Note: If you’re reading in a feed reader, you may have to click through to the post to see the player. What’s New
Myquillyn Smith – Cozy Minimalist Home
We’re Digging
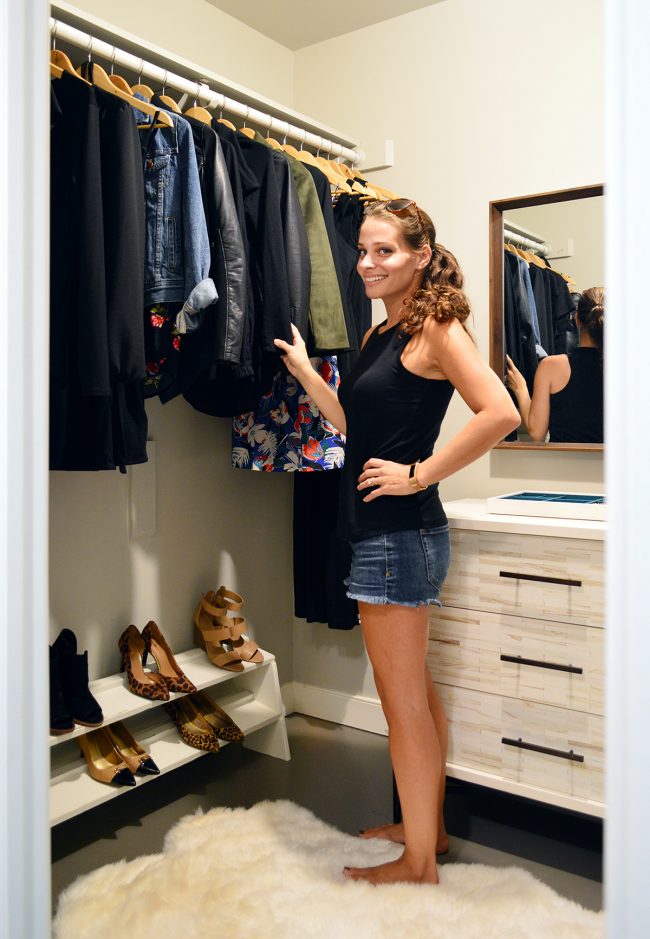
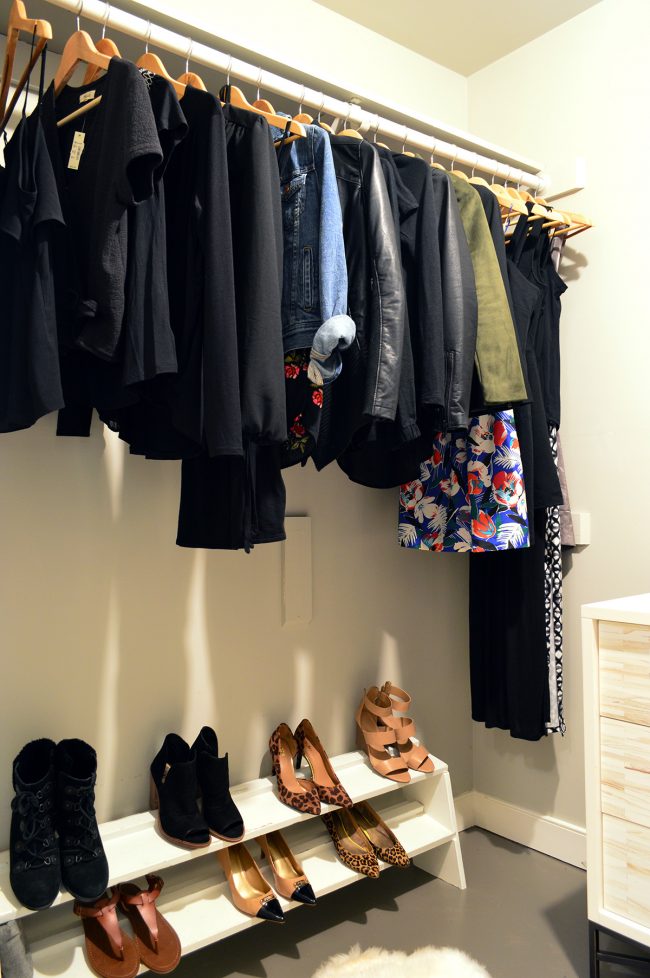
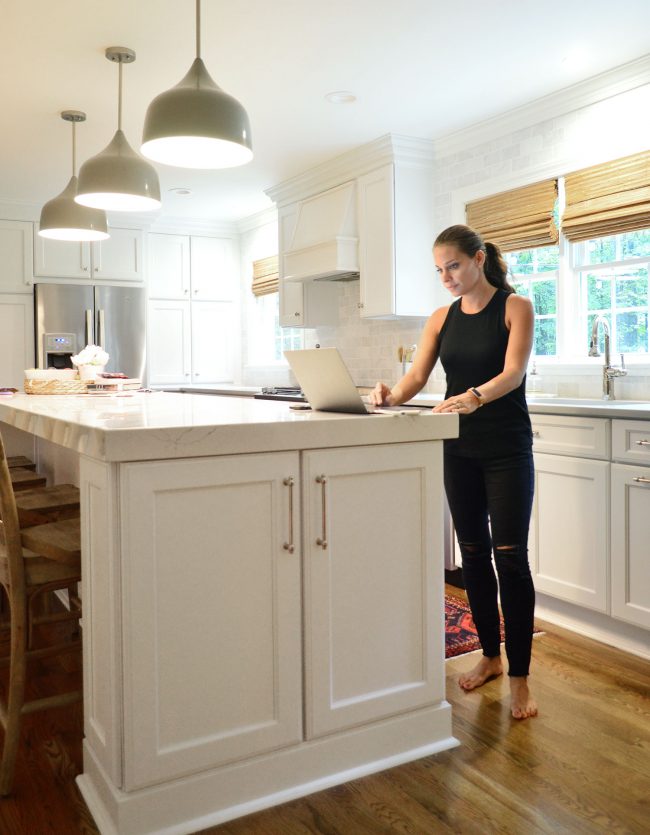
If you’re looking for something we’ve dug in a past episode, but don’t remember which show notes to click into, here’s a master list of everything we’ve been digging from all of our past episodes. You can also see all the books we’ve recommended on our Book Club page. And lastly, a big thank you to Revel Woods for sponsoring this episode. Visit RevelWoods.com/YHL to find the right hardwood floor for your home, and don’t forget to enter the code YHL10 at checkout to get $10 off your first sample box! Thanks for listening, guys! *This post contains affiliate links* The post #116: How To Get More Style At Home With Less Stuff appeared first on Young House Love. Via https://www.younghouselove.com/podcast-116/ Whenever I’m asked about my clothes, I joke that I wear basically the same thing every day. But it turns out that even after years of saying that (and sharing that I had just one bra for many years on the blog), a whole bunch of people freaked out when they saw the hanging bar in my closet on Instagram recently. I got FLOODED with DMs about my sparse mostly black wardrobe. One person even said that seeing my closet was, and I quote: “the wildest thing they’ve seen on the internet in 2018.” That’s quite the statement considering 2018 also gave us Gritty. To clarify don’t actually wear the same items of clothing every day on repeat – I just have a fairly small number of clothes that I love and wear all the time – all of which are pretty similar in color/style/silhouette – which I lovingly call “my uniform.” Think Steve Jobs or Michael Kors… except with fewer turtlenecks and less of that billionaire vibe.
I’m not doing laundry any more frequently than anyone else (we do it once a week around here, which I think is pretty average), so it’s just about having enough outfits that you love to get you from laundry day to laundry day (whether they need to be warm, or dressy, or whatever works for your life) without having a ton of extra stuff that’s in the way of the things that you actually wear. So if you’re tired of drawers and closets that are overflowing, or you love the idea of a more minimal wardrobe full of things you love – and less money spent on clothing excess – then this post is for you. There are definitely people with even fewer clothes, and folks who have other methods for paring down, but I’m just gonna lay out what works for me. And if you’re a wardrobe maximalist who loves having tons of clothes and a bunch of different looks and you ADORE your extensive wardrobe, then this post is not for you (do whatever works for you, boo! I’m ALL FOR THAT!). Ok, so my plan is just to take you through my closet and all of my drawers, talk you through my process/formula for keeping my wardrobe minimal, and show you how I can create a bunch of outfits (from casual to dressy and from warm weather to cold weather) from a pretty pared down number of tops and bottoms that I lovingly refer to as: “my uniform.”
And it bears mentioning that even if you have a completely different dress code for your profession, or if you hate the way I dress and the colors/styles/silhouettes that I wear, this is a formula. So you can plug in your favorite silhouettes and colors and everything else that YOU love to make this work for you! Closet Video TourLet’s kick this puppy off with a video tour. I know you have questions (I vividly remember all those DMs I got on Instagram), but pictures are worth 1,000 words, and a video is worth 1,000 pictures. So I’m walking you through my closet and opening all of my drawers (and John’s – haha!) to show you exactly what I have and how I store it along with sharing a little bit more about why/how it works for me. Note: if you can’t see the video below and are reading this post in a feed reader, you might have to click through to the original post to see it. We also uploaded it here on YouTube. Ok, so now that you’ve seen where everything is, and heard me talk a little bit about my uniform, let’s dive a little deeper. I’m just gonna answer things Q&A style for you below. How Does A “Uniform” Work?I’m not talking about a school uniform where your closet is filled with dozens of identical skirts and polos here, but it is almost like finding your own personal “dress code” – meaning the cuts, colors, and styles that you love the most and feel great in. Because if you find something that works, it makes sense that it’s going to be the thing that you’ll reach for and wear a whole lot more than everything else. So why not take a second to figure out why it works and why you love it so much so you can love every last item in your closet that much?! Sounds good, right? That’s the core idea behind my “uniform” – just figuring out what you love and stopping the vicious cycle of buying other things to stay “on trend” or for the sake of “variety” or to “look different” and then realizing months later that you never wear them because they don’t make you feel as good or you don’t like the cut or the color nearly as much as your tried and true favorites. And the amazing thing is that once you truly understand why you like what you like, you can stand in a store or the dressing room and eliminate clothing that doesn’t fit within that criteria without much effort or thought! You can literally stop the cycle of buying yet another thing that you won’t really love AND you can keep your closet and drawers from filling up with unnecessary extras. Plus you get to keep a little more cash in your wallet.
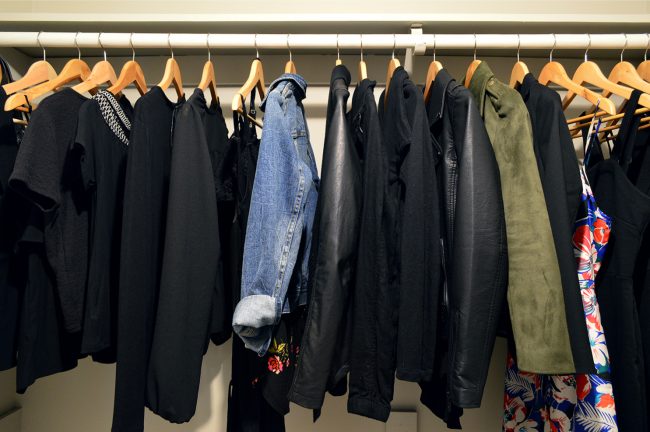
I don’t think there’s just one magic wardrobe number that works for everyone (someone who goes to the gym every day or lives on a farm or does a team sport may have a need for more laundry/clothing than someone who doesn’t) but I’ll show you my “uniforms” in a second, just to serve as an example. Oh and I say “uniforms” with an S because there can be different ones for different seasons and occasions, like casual weekend uniforms, workout uniforms, work uniforms, etc. And the key is just to figure out how many of those you actually need and not have double or triple that amount all squeezed into your drawers and falling all over the floor of your closet. And did I mention you can save that money? I did? Ok, good. Just making sure. So don’t tell yourself that just because you work in an office and have to dress up, or because you live in a colder climate that you can’t have a simpler closet. It’s not true!! I dressed myself with this method all the way back in NYC when I had an office job that necessitated me dressing up all the time. And this was in a colder climate where I walked city streets and stood on frigid subway platforms – so I definitely needed all the layering I could get. Why does it still work, even if you have to dress up or add a coat and a scarf and a hat? Because in the end, this is all math, GLORIOUS MATH! What Exact Items Are In My “Uniform”?If you’ve followed us for any amount of time, you probably already know my uniform. Black v-neck tops. Jeans. Black scoop neck tanks. Denim shorts. Blazers. Leather or suede jackets. More blazers. And a black dress or two to round things out. It has become kind of a joke, because you guys keep seeing me in a blazer at basically every speaking event or book signing. But here’s the thing: it’s not an accident. Because it’s the way I dress. It has become my uniform for those sorts of things – because I like the way they feel and look on me. And I actually reach for them in my closet and wear them (yesssssss) so I know they don’t sit around wasting space. And therefore I love these items. They work hard for me, make me feel good, and earn their space in my closet.
Six years of living in New York City instilled my love of black, and while I do branch out occasionally (I’ve been known to get wild and throw some navy or olive green in here and there) I’ve learned over the years that when I deviate and buy something in a brighter color, I rarely end up wearing it regularly because – well – I always have other options in my closet that I like better. And guess what? They’re black. It was something I had to realize over time, but ever since I embraced my love of black and stopped trying to make myself wear other colors that I ultimately didn’t wear because I didn’t like them as much (vicious cycle, much?!), two things have happened: 1) I feel GOOD in my clothes. Like all the time. There’s zero clothing drama for me when I get dressed. 2) I’ve stopped wasting money and time buying items I’ll probably just return or donate later. It’s freeing!
top: Old Navy but no longer sold / jeans / heels I’ve also learned over the years that most of my favorite tops are a little more fitted than the average loose fitting cut, because it helps my 5’2″ body look a little less amorphous – like I’m wearing a potato sack. This realization makes it easy to pass over anything with a drapey look in the store – no matter how glamorous it looks on the mannequin or some long torsoed girl in the fitting room. Same thing with shorts. I buy short shorts, because I’m petite and when I have tried buying longer shorts, they make me look frumpy, like I’m going golfing or something. And then I’d give those shorts the stink eye for wasting space in my drawer and eventually donate them. But the realization that shorter shorts work better for my body has been freeing. I no longer waste time or money buying longer shorts “just for variety” or to have “something different” because they don’t look as good on me – so duh, of course I won’t wear them as much and they’ll eventually end up in the donate pile! Same thing with a certain cut of jeans or something. It’s easy to fall for the marketing that says “this bellbottom highwater pant that ends at your shin is the new cool thing!” but I gotta tell ya… it might not be something you actually like or feel good in. So I’m not saying blanketly that you should avoid all trends, but before you go to the store, just look through your clothes and see what you don’t wear – then figure out why. If you pull out one pair of jeans with a different cut that you bought “just to be different” but you never wear them because you don’t like how they look as much as ever other pair you have, it’s a whole lot easier to dodge the urge to do that very same thing in the dressing room the next time around.
So let’s say you get to this point and you’re like “uh, but all of your clothes are black. That is so boring. I would die.” Yes, my clothes are mostly black. But this works with all the colors of the rainbow (and all styles and all body types). If you pull out your very favorite outfits from your closet – just the things you actually wear and love – and lay them on the bed, I’m betting they might have some things in common. Even if there are a bunch of different colored items on the bed. I would bet there are still some colors that come up more because you love how you look and feel in them. And you might also notice some trends with cut/silhouette, because chances are if a certain cut of jeans makes you feel your best, it may also be your favorite cut of dress pants. And you might have a few blazers or jackets with similar shapes that hit your body at just the right spot or something. Things are your favorite for a reason, right!?
I’m also a big fan of layering. It’s how I made it work in NYC while working in an agency where I had to get dressed up without even having a dresser in my apartment. That’s right, I had one small and narrow closet and that was it. So I taught myself to layer things. Five shirts that can be layered under five different jackets or blazers = 25 different combinations!!! I mean, how awesome is that math?! And if you add a few different pairs of shoes and some fun jewelry to switch out too, it’s a whole lot of looks without having a whole lot of things. Did I just have five of each thing? No, that would probably feel a little tight – but I probably had under 10 tops that I layered with maybe 7 blazers/jackets/cardigans and then had maybe 5 options for bottoms (jeans if I didn’t have to present that day, and black pants if I did). The funny thing is that my current “typical uniform” of a black top + denim bottom is that it replicates exactly what I did in NYC when I worked in an office – it’s just a little less dressy. So I can easily transition between summer and winter just by layering – which is exactly what I did back then. When it gets cold I just swap my denim shorts or skirt for skinny jeans, and I throw a jacket right over my black summer tank (maybe a black leather jacket or a crisp blazer or an olive green faux suede jacket). It can even go from casual to somewhat-dressy (like a date night) because I can toss on some cute heels and big earrings and I’m ready to go!
jeans / black tank / green faux suede jacket / leopard heels How To Pare Down Your ClosetNow I’m not in a position to tell you what YOUR uniform should look like, but one super easy tip for figuring yours out is to do what I touched on a little earlier in this section. Just pull all of your very favorite outfits out – the ones you love and wear all the time – and lay them on your bed. Then count them. You might literally have enough right there to take you from laundry day to laundry day. If so: congrats! That is your uniform! Right there on the bed! The rest is excess and it can be shoved into a big tupperware bin or two and stashed in the attic or garage. Just see if you even need those items at all. This is the training wheels method – if you need something you can take it back out – but if you don’t miss it and this helps to show you that it’s just dead weight in your closet or your drawers, it feels amazing to consign or donate that extra fluff and just have a wardrobe you LOVE and actually wear! Ok, but say you only have like five outfits on the bed and you need more than that to get you from laundry day to laundry day. The next step would be to try to identify the common threads, because you need more clothes that make you feel this way. Is it a certain color or color family that you notice when you stare at the winning clothes on the bed? Maybe it’s four favorite colors and tones instead of just one like me? Is it a certain cut? Maybe a fitted silhouette in general or a more voluminous skirt if you feel your best in something fun and swingy? Do a bunch of your favorite outfits follow the same “formula” – maybe a wrap dress with a cardigan and a cute colorful flat? Try to boil things down as much as you can so you have as much direction as you can moving forward. Try not to just say “I like boho stuff” or “anything at Anne Taylor!” because that won’t help you as much as a more detailed set of parameters will. Calculating Your Closet NeedsAgain, this isn’t about hitting a certain fixed number or quota in my closet, but I do find that thinking about this in numbers is helpful – especially just in illustrating why a lot of us have too many pieces in our closets and drawers. The basic idea is to have enough items to get you from one laundry day to the next, with a few – but not too many – extras (you know, in case you spill OJ down your shirt or you run a bit behind on washing a load). We do laundry about once per week in our household, so I have 10 “bottoms” in my wardrobe to cover those 7 days: 4 pairs of jeans, 4 pairs of shorts, 1 skirt, and 1 pair of yoga pants (I also have a few dresses for dressier occasions). And no, I’m not wearing shorts in the winter to get from laundry day to laundry day – I just don’t wash my denim after each wear because I’m a rule follower and it’s not recommended (don’t torture your jeans, guys!). So 4 pairs of jeans or 4 pairs of denim shorts easily last me 7 days if I wear a few of them twice before tossing them into the hamper. Nobody has ever told me that I smell, and children are VERY honest, so I feel good about this.
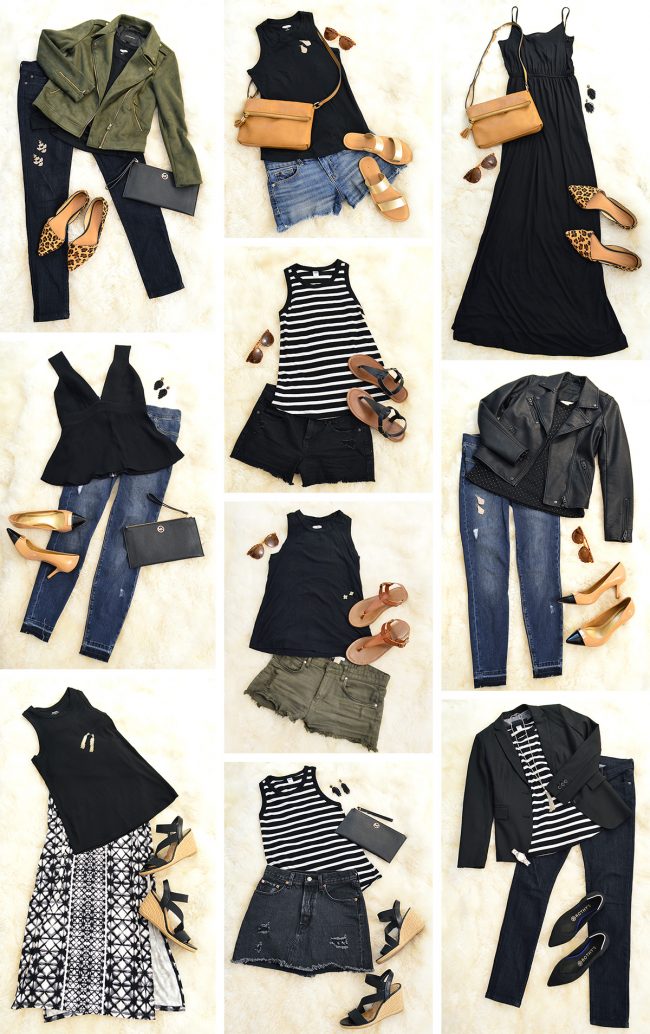
Ok, so now forget about me and think about all the different uniforms YOU might need for your lifestyle, whatever that may be – like for work or exercising – and actually add up in your head how many of those outfits you’ll need to get you through to your next laundry day. Keep that number in mind. Next, peek into your closet and drawers and just look at the actual number of things you have. If you count 25 t-shirts and tanks for summer, I’d guess that you probably wear your favorite 10-ish tops on repeat from laundry day to laundry day, and the other 15 items stay shoved wherever they always live, just taking up space because you have so many other items that you like more. If that is the case – just keep your 10 favorites and put the rest into the tupperware bin. You can do this. It’s not permanent. It’s just to see if you really do miss them or need them. The same logic applies to any part of your uniform. Why own 6 bathing suits if you only rotate between the 2 that you look best in?! John recently realized he had 8 running shirts in his drawer but was only wearing 3 each week, washing them, and repeating that. This realization not only helped him get rid of those space-stealing extras (he still kept a couple back-ups) but it reminded him that he doesn’t need to buy any more when he’s standing there in the store staring at them. Win-win. And for anyone who worries that just having a small number of favorite staples (aka: a uniform) might make you look like you’re wearing the exact same thing every day – it definitely doesn’t have to. Even with my very limited palette, I put together this little visual to show you how easy it is to layer things and change accessories to really switch things up. YAY PERMUTATIONS! I TOLD YOU THIS WAS MATH!
So those are some of the combinations I can make out of a few of my favorite items in my closet. Note that there are 10 different outfits in the image above – and they’re all made from just 4 different tops, 6 bottoms, and 2 dresses (the patterned skirt-looking-thing is a dress that feels too crazy for me, so I layer a tank over it to make it look like a skirt). I love this demonstration because at first thought you might say… “Ok so if I want to have 10 work outfits and 7 causal outfits to get me from laundry day to laundry day comfortably with some wiggle room, that means I need 17 bottoms and 17 tops.” But wait! That’s bad math! Think about how you rewear your denim and maybe even a blazer if you don’t feel like it got too dirty – and then think about how many combo moves you can make by layering things in different ways! Remember that the 10 outfits above that are made from just 12 pieces – not the 20+ you might initially think would be needed if you just assumed you’d need different bottoms and tops every single day. Am I rewearing those black tanks between washes? Nope! So it does bear mentioning that I love those so much, and I wear them so often, that I have three of them. They’re inexpensive and so versatile and they stay looking crisp and fresh that way. So occasionally purchasing multiples of something that you wear a ton can be an awesome way to keep it looking nice long-term and allow yourself to wear it in a few different ways throughout the week. A Few Other Reasons We Buy Stuff We Don’t WearA big part of my method is just being honest with myself about what I actually wear day in and day out, and then being willing to let go of the rest of the stuff that’s taking up space. I know a lot of us hold onto clothes that we think that we’ll wear for some future hypothetical occasion or circumstance (“aspirational wardrobe” is what I call it – it’s when you buy some item for some imaginary very glamorous event but you never actually wear it because this is real life and not the Simms, so you don’t actually go to those types of events). So sometimes that’s what gets us into this overcrowded closet situation. It also might be a good deal that tips the scales for you (“ooh these are so cheap, I can’t say no! I’ve gotta have them even though I have 15 shirts I like better BECAUSE THESE ARE TWO DOLLARS!”). Or it could be this idea that buying a certain thing will make you more stylish or pulled together (but then you never actually wear it because it turns out you wear/love super comfy clothes and that item that looks more pulled together is way less comfy than your soft and cozy favorites, so…). What About That One Super Colorful Thing In Your Closet?See this colorful dress? I know, it’s kind of hilarious next to everything else in my closet. But it fills a need, and I wear it often enough to warrant it staying. Why do I have it? Well, it’s kind of like my one fake uniform. I like how I look and feel in black, but every few months or so we need to give someone a bio picture or get dressed up for a photoshoot (like for our furniture line for example) and this dress comes with me. All black in a picture can look like a big dark hole amongst an otherwise fun and colorful shot, so I literally bought this dress from J. Crew Outlet a few years ago just for photos. Life is weird, huh?!
But we might all have strange wardrobe guidelines. Mine might be weirder than yours, but I’m sharing this because the instinct might be to tell yourself “hey I have this weird part of my life and I need some outfits for that, so I should probably grab like 10” – but in reality, I don’t need 10 colorful “fake uniforms” – one does the trick. So I have one. Shopping Tip: Protect Your Closet GPAHere’s another way to think about paring down your closet: you want to maintain a high closet GPA (grade point average). This is how I’ve been thinking about my closet for YEARS, and it really helps me avoid impulse purchases. Imagine giving every item of clothing that you already own a grade that’s based on how much you like it AND actually wear it. The things you wear all the time and love are As. Wahoo – working towards that perfect 4.0 average. But that random yellow sweater you picked up on a whim or because it was on sale, and have only worn once… well that stinker is closer to D or F territory. IT IS BRINGING DOWN YOUR ENTIRE CLOSET’S GPA. You want your closet to be filled with your very favorite and most wearable items – so when you’re out shopping, think to yourself “is this new shirt better than all the other shirts I already have, so it’ll bring up my average – or do I love everything I have more than this shirt? Because if the latter is the case, that bad boy is gonna bring down your GPA – and ain’t nobody got time for that.
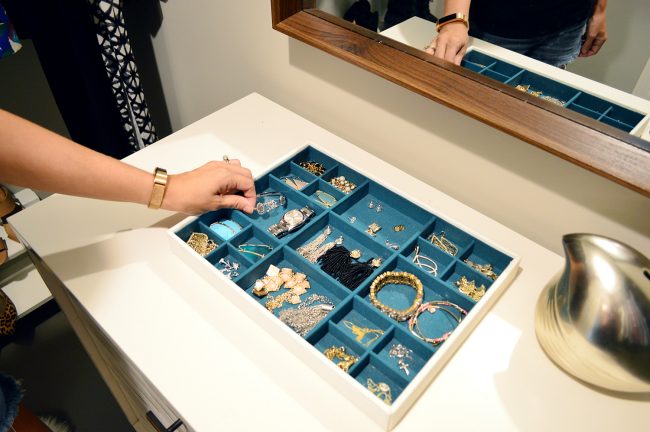
I think in general we tend to overcomplicate our clothing needs – and stores are constantly telling us we need something new, different, and trendy in order to look better or live a happier life or whatever story they’re trying to tell you when you see those people dashing across the street and hailing a cab in the commercials. Once I got really really happy with my clothes (they make me feel good! I love everything in my closet!) that’s like armor against all of those temptations to buy the newest and trendiest clothing and accessories. You Don’t Have To Be Minimal EverywhereI’m not a minimalist in every stretch of the word, though! So here’s a caveat to help you embrace whatever items you might actually not want to pare down at all. This minimal wardrobe of mine is about making my life easier and making me happy – it’s not about deprivation! AT ALL! So take my earrings for example. I probably have over 20 pairs of big fun earrings along with some classic studs and other jewelry like a few bracelets, a watch, a few necklaces.
That might be a lot to you!! You might not even have one pair of big dangly earrings. But for me, they’re part of my uniform – just like blazers and black tanks. So I embrace the fact that I have this many. I’m totally cool with it, and I don’t beat myself up. Incidentally, I think my love of them grew in NYC when I had no space for lots of clothes but I could always fit a few more earrings in my tiny apartment! Ha! Does Owning Less Cause More Wear?I got a lot of questions about how my clothes hold up if I’m wearing and washing each item more often. I see how someone could jump to that conclusion, but… drumroll please… I’m just washing things once a week like everyone else. Everything you wear, you launder it every 7 days or so, on average, right? And you probably wear your favorite 10 or so outfits and then you launder them. Well same for me! I just don’t have that extra stuff hanging between each item or shoved into the back of the drawer. Since I have fewer items, I’m encouraged to take better care of them. Things aren’t getting shoved or crammed onto a rod or into a drawer, and they’re not sitting crumpled somewhere because I don’t have space. I hesitate to say they’re “precious” (I do most of my shopping at places like Old Navy and Target) but when I have fewer backup items, I’m more inclined to take the time to get stains out, fix missing buttons, or follow the proper care instructions with the things I do own.
In fact, I am SUPER NICE to my stuff because my uniforms work hard for me. I like to wash everything in cold water (helps to lock in colors/black), I wash denim and black things inside out (helps with fading), and I always do a gentle wash and a tumble dry low (nothing too harsh for my babies, I mean clothes). I also always try to put laundry away right after it’s done, so I’m not losing track of piles of clothes and then rewashing them because I’m not sure if they’re clean or dirty – which is definitely something that my friends with more clothes say happens to them. I have blazers and jackets and tops and jeans that I’ve owned for three or even over five years… so it’s not like I’m rebuying this “minimal wardrobe” every season or even every year. Most of my staples work for at least a few years, although I do buy a few multiples of inexpensive items (like my black tanks) so they stay looking fresher for longer. How I Combine My Outfits
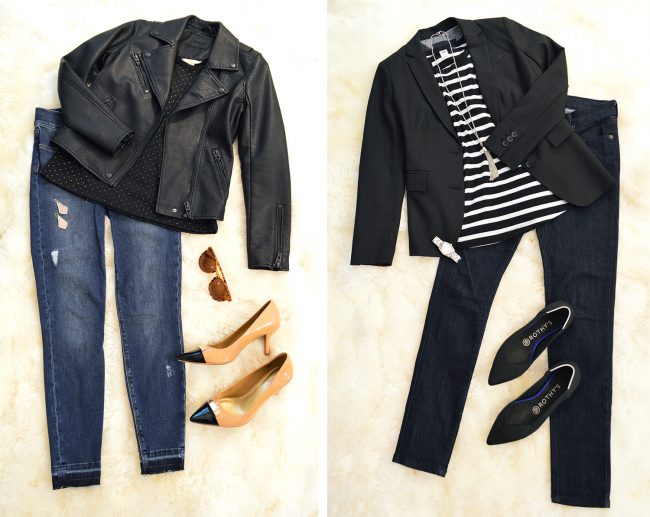
This is pretty self-explanatory, so I’m not gonna linger on it too much (and your closet favorites might look completely different than mine do), but seeing how I switch out shoes and jewelry and purses or some other thing below might just help the whole “permutations” thing click into place in your head, so here we go… These are examples of what I might wear on a date night or to a work meeting or something. You can see the “uniform” in total effect here. Both outfits are skinny pants + a fitted tank + a jacket (blazer on the right, leather jacket on the left). I like to play around with shoes and jewelry, so that helps to add a little something extra for me, and I’m good to go.
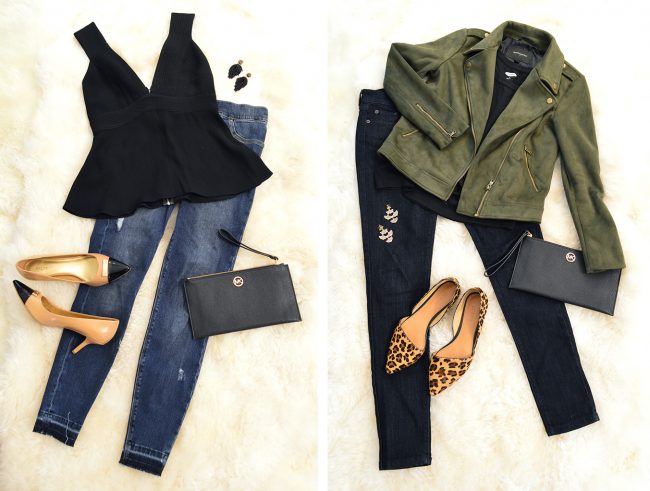
Left: jeans / heels / similar top / leather jacket Right: jeans / shoes / striped tank / blazer / necklace / watch This is another example of what I might wear if I want to be slightly dressier for a holiday gathering or some sort of dinner out or party or something. Once again it’s skinnies on the bottom, a fitted top, and some big earrings and fun shoes. I like a simple black clutch too (hi, have you met me? I like simple black accessories). One funny thing I didn’t even realize until I took these photos is that I also like nude and leopard in my shoes along with black.
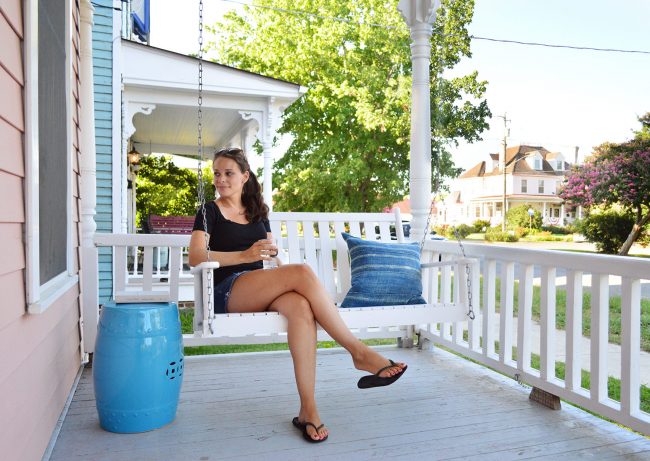
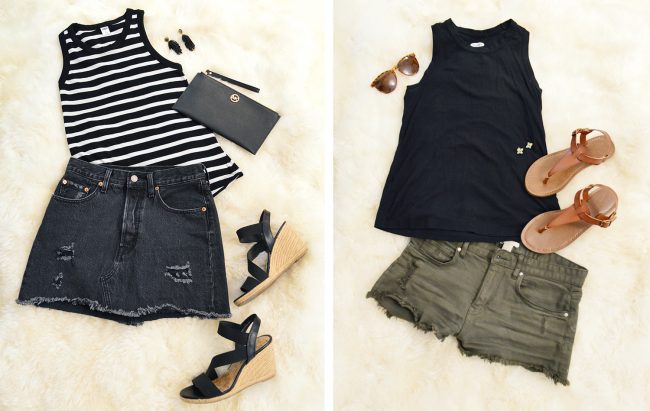
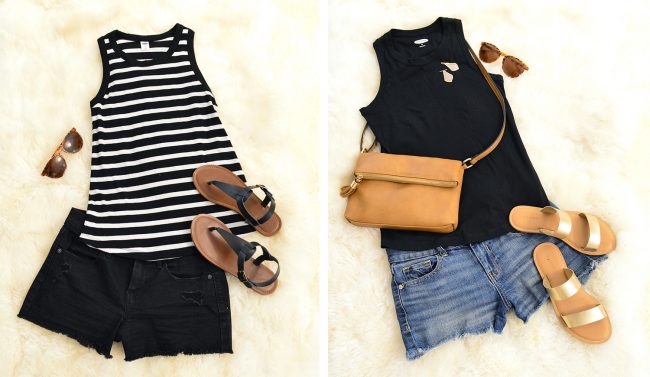
Left: jeans / heels / top / black clutch / earrings Right: jeans / leopard flats / top / green jacket / similar earrings / black clutch This is an example of what I might wear in the summer to a super casual something (on the right) and a slightly less casual something else (on the left). Oh and to everyone who asked what I walk in (because I’ve been doing these awesome long walks over lunch or after bedtime) and the answer is: whatever outfit I wear that day + sneakers or even flip flops in the summer. I can’t stress how chill these walks are (there’s no sweatband and sprinting, these are delightful strolls) so as long as I have deodorant on, I’m good.
Left: skirt / similar shoes / striped tank / clutch / earrings Right: shorts / sandals / tank / similar earrings /similar sunglasses Here are some more summer casual “uniforms” I wear all the time. It may shock you to learn that my everyday purse is this tan crossbody bag (WHAT, IT’S NOT BLACK?!?!), but the reason I love it is because I’m almost always wearing black, so I like that it adds something interesting with another color and goes with everything.
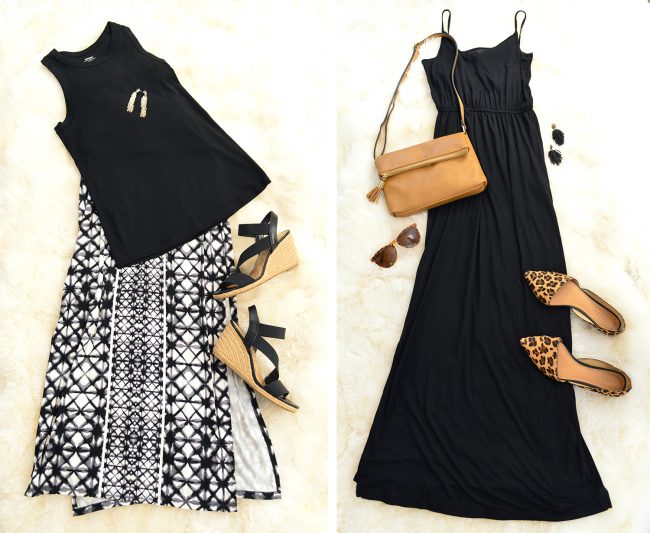
Left: shorts / sandals / striped tank /similar sunglasses Right: shorts / sandals / tank / earrings / similar purse /similar sunglasses If I want to dress up a little for some reason (or no reason – I once wore the long black dress on the right to an ice cream parlor with the kids) these might be what I wear. I mentioned before that the left outfit looks like it’s made up of a patterned skirt and a tank but it’s actually a dress that feels way too crazy to me when it’s worn that way but I LOVE it with a black tank layered over it. Once again I add cute shoes and some big earrings and either of these outfits have me out the door in minutes. Isn’t it funny that they have the same silhouette too? Creature of habit right here ;)
Left: dress / tank / similar shoes / similar earrings Right: dress / leopard flats / earrings / similar purse / similar sunglasses Got Any Tips For Minimizing Kids Clothing?There are lots of tricks for determining what you or your kids actually wear, versus what you think you wear. Like turning all of the hangers in one direction and then turning them around once an item is worn. The theory is that after a couple of weeks or months you can see exactly what didn’t get touched. You can also move everything to one side of your hanging rod and move it back once it has been worn. Any version of that works well for hanging clothes, but lots of us – especially kids – store big chunks of their wardrobe in drawers. BUT I HAVE A SOLUTION! You just have to do one simple thing each week for a few weeks in a row. Ready for it? Just look in their drawers and at their hanging bar on laundry day. That means the things they love most and have already worn are all in the hamper, so they’ve sort of naturally selected their favorites for you – but instead of putting them on the bed they’re all nicely coralled in the hamper.
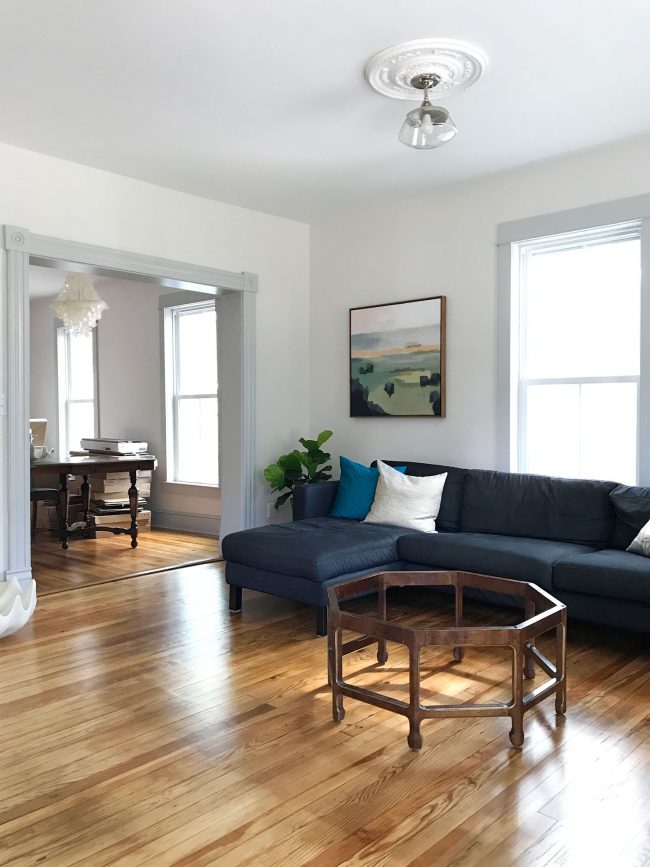
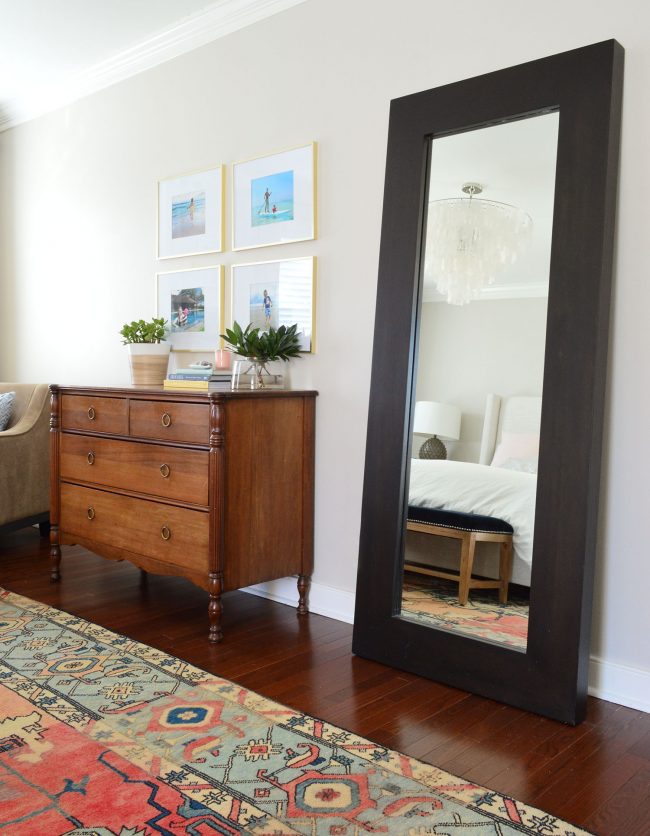
So with their favorites pulled out of the fray, go through their drawers and their hanging bar and take note of what’s left. If you do this for a few weeks in a row, you’ll start to notice a theme. Certain items never leave the drawer. A few things might always get shoved in the back of the closet or balled up on the floor. VOILA – there is your excess! Put that in a tupperware bin and see if you ever even need it again! And if you don’t, gleefully donate or consign it. And then remember what those “space wasters” were when you’re standing in the store about to buy another outfit for them – just to be sure you’re not repeating some pattern of thinking they’ll wear some item when in actuality they never do. Whew. Ok, that’s 5,688 words and I’m feeling ready to call this turkey of a post done. I hope this was helpful in some way if you’re looking for ways to simplify the clothing situation in your house. Psst – If you’re looking for more on this subject, here’s an old post I wrote about my clothing, here’s an awesome book called Simplicity Parenting that talks about decision fatigue and simplifying our homes in general (it totally changed my life and I’ve read it 3 times), and here’s a podcast we did with an amazing man named Matt who worked on the show Hoarders, and has some pretty enlightening and kind things to say about paring down. Also Katie Bower did a post about her one-rack wardrobe yesterday, which was a fun read too! *This post contains affiliate links* The post My Minimal Wardrobe – How Having A “Uniform” Simplifies My Closet & Saves Me Money appeared first on Young House Love. Via https://www.younghouselove.com/minimal-closet-wardrobe/ After a quick video of Sherry’s sparse closet sparked hundreds of questions on Instagram, we’re breaking down her process for creating a wardrobe that saves space, money, and energy. So if you want to tame your overflowing closet, cut your clothing budget, or take the stress out of getting yourself or your kids dressed each morning – this episode is for you. We’re also sharing an unconventional solution to filling those empty corners in your master bedroom. Plus John pushes back on a recent social media controversy. You can download this episode from Apple Podcasts, Google Podcasts, Stitcher, TuneIn Radio, and Spotify – or listen to it below! Then use this page to check out any links, notes, or photos we referenced. Note: If you’re reading in a feed reader, you may have to click through to the post to see the player. WHAT’S NEW
Listener Question
Event Announcement
We’re Digging
And if you’re looking for something we’ve dug in a past episode, but don’t remember which show notes to click into, here’s a master list of everything we’ve been digging from all of our past episodes. You can also see all the books we’ve recommended on our Book Club page. And lastly, a big thank you to Annie Selke for sponsoring this episode. You can score 15% off your order with the code YHL15. Plus, you can visit annieselke.com/YHL to get a look at their new fall collection.
Thanks for listening, guys! *This post contains affiliate links* The post #115: The Trouble With Master Bedrooms appeared first on Young House Love. Via https://www.younghouselove.com/podcast-115/ |